<!– This belongs to –>
<!– This belongs to –>
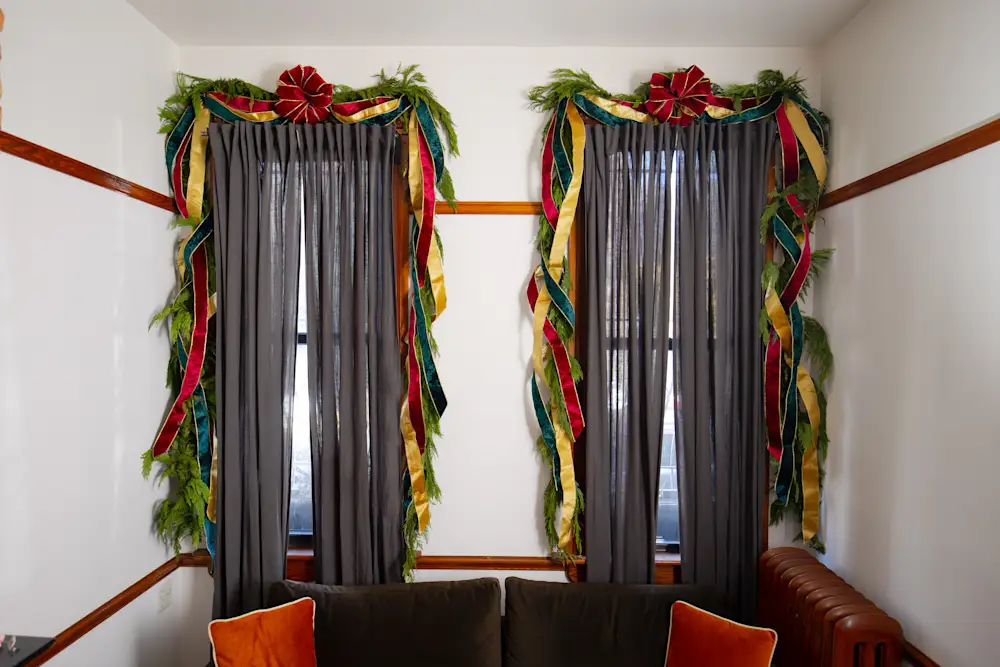
When it comes to holiday decorating, Apartment Therapy Lifestyle & Special Features Editor Sofia Rivera has maximum style but minimal space. To avoid overwhelming her small NYC apartment, she likes to keep her festive touches clutter-free and easy to remove later.
“My holiday style is ‘less is more’ — anything low-effort, high-impact that makes my space feel cozier,” Sofia says. She DIYed an easy, show-stopping garland that delivers on both counts. Draped around Sofia’s windows, the pretty project adds seasonal cheer while playing up her apartment’s high ceilings, which keeps things from feeling crowded.
And because she hung it with Command™ Brand Hooks, which have damage-free adhesive strips, the garland will be easy to remove without leaving marks on the wall. With a wide range of hooks, clips, and organizational items, Command™ Brand Products help seasonal decor shine. Here’s how Sofia used them to hang her garland.
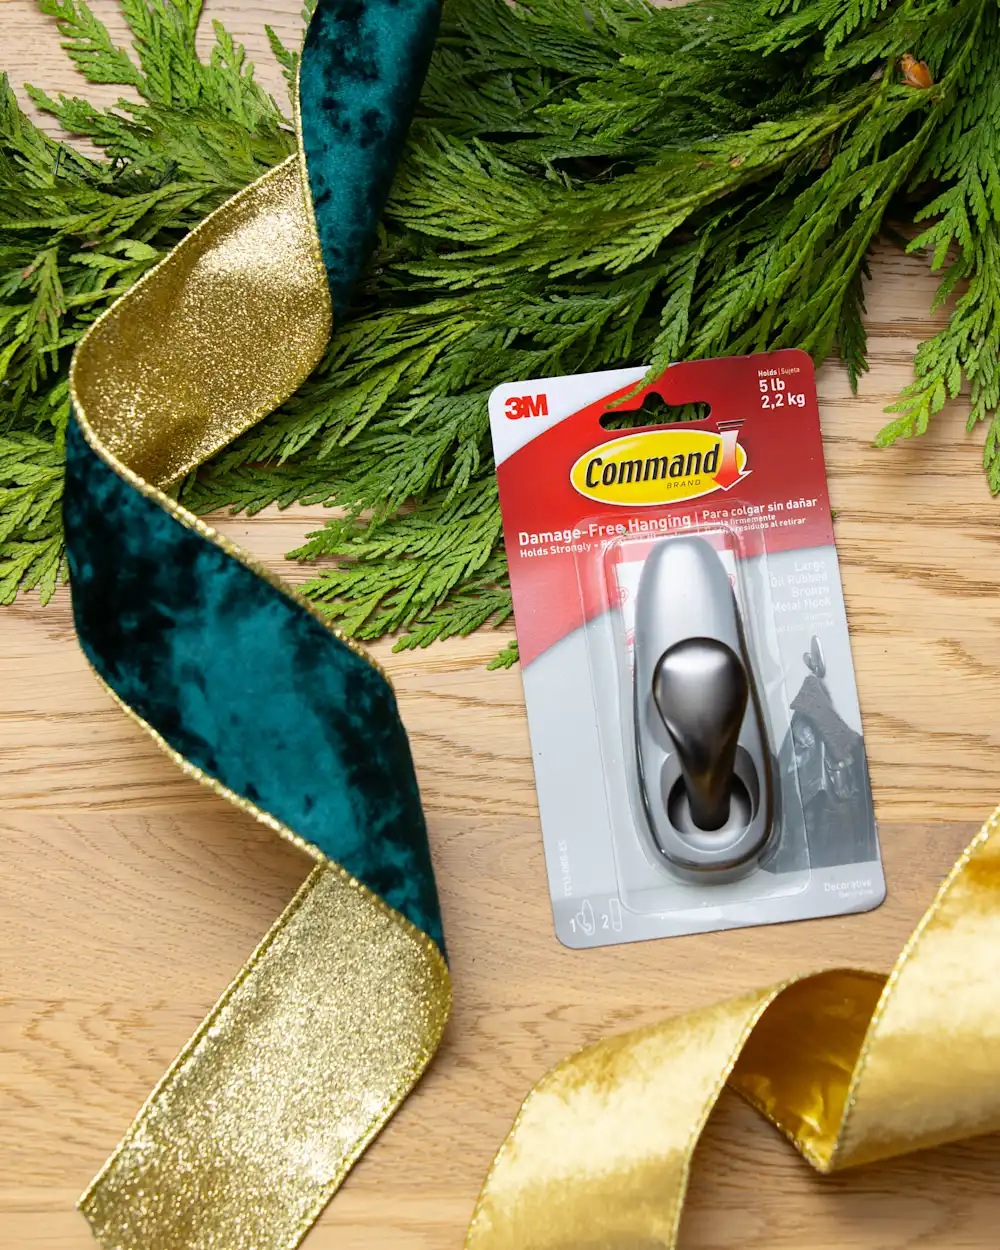
Materials
How to Make a Garland with Ribbons
- To determine the length of the garland, mark where your desired end of the garland will hit on both sides of your window. Measure from the marked point to the top of your window and double it to account for both sides.
- Then measure the width of your windows and add that to the number in step 1. For safety, add another 12 inches to the total length so that you have enough length to play with later.
- Next, mark the center at the top of your window after you’ve wiped the area with rubbing alcohol. This will be where the first Command™ Large Oil Rubbed Bronze Hook gets placed.
- Remove the red liner and attach the adhesive to the back of the hook.
- Remove the black liner and press the hook firmly for 10 seconds onto where you’ve marked the center at the top of your window. To reinforce, temporarily remove the hook from the wall. Slide the hook up and off the base, then press the base for 30 seconds. Slide the hook back on. Wait 1 hour for the adhesive to build.
- Repeat steps 4 and 5 for the next two Command™ Large Oil Rubbed Bronze Hooks at the top two corners of your window. Be sure the bottom of the hooks align with each other so that the garlands hang evenly.
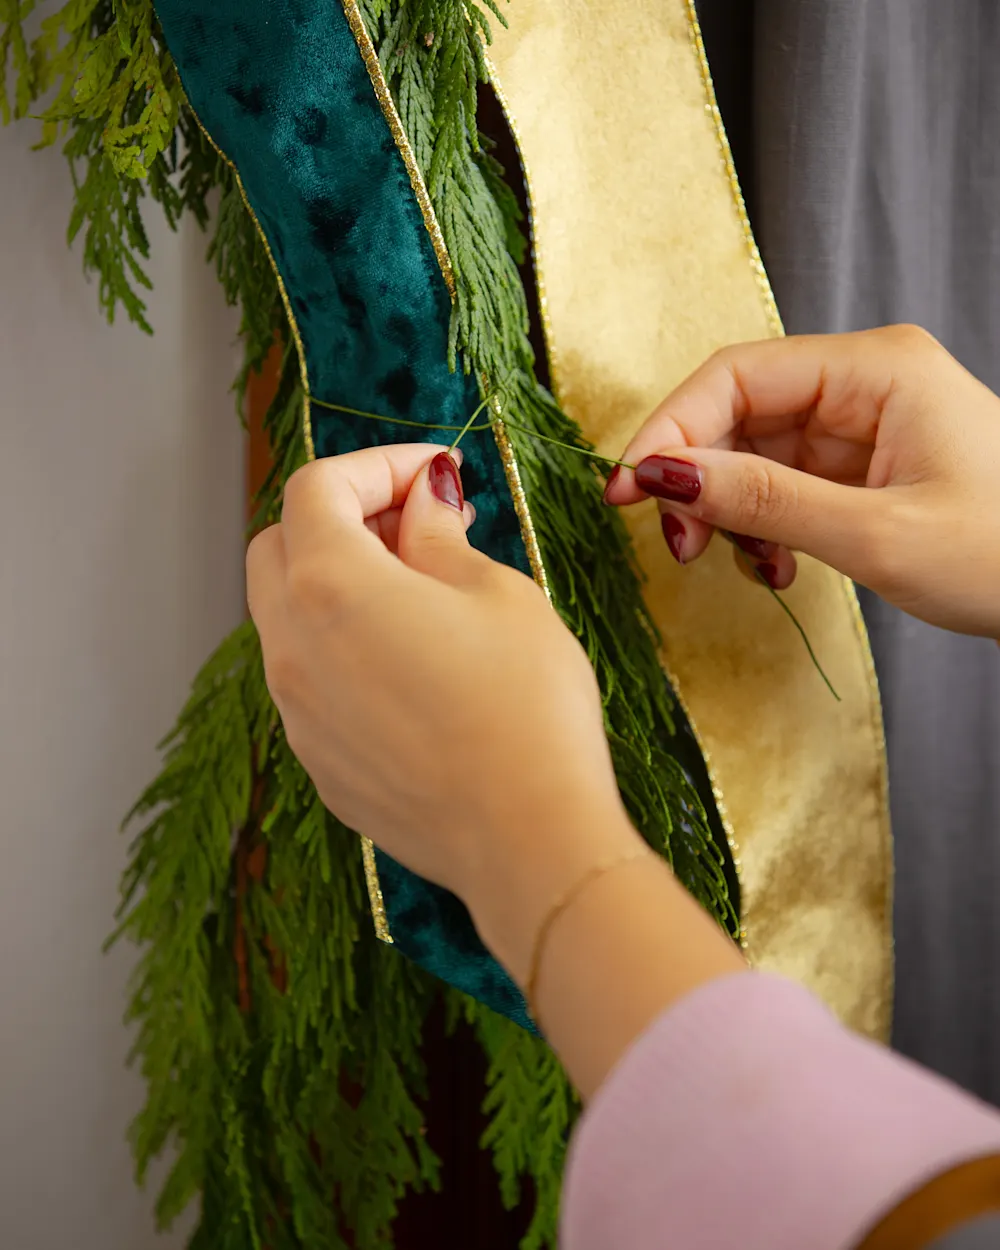
- Take your garland and carefully place it on the hooks. Take your wire and begin wrapping it around the garland to the hooks. Make sure each hook is secured to the garland.
- Now, take your large premade bow and use wire to attach it to the center hook and garland.
- Then, take your ribbons and measure how long you want them to be from the bow to the end of the garland. Do this for both sides.
- Once you’ve determined the lengths, cut your ribbons and start attaching them with wire, starting from the center bow all the way to the end of the garland. Do this for both sides.
- Repeat steps 9 and 10 until you’ve reached your desired ribbon fullness.
- Adjust and cut the ends as needed.
“Command™ Hooks let me decorate without stressing about getting my security deposit back or having to repaint when the season changes.”
Sofia Rivera

Sofia’s garland will add a stately sparkle to her space all season long. “The height, the beautiful bows, the wound ribbons — it reminds me of something I’ve seen in a fancy hotel lobby during the holidays,” she says. And when it’s time for something different, she can take it down in minutes with no marks on the wall.
Unlock your own holiday magic with the help of Command™ Brand Products!
This post originally appeared on Apartment Therapy. See it there: This Simple Holiday Garland DIY Adds Instant Drama to a Small Space.