
Revitalizing Cucumber and Melon Salad with Mint and Lime Vinaigrette
**Revitalizing Cucumber and Melon Salad with Mint and Lime Dressing**
As the heat increases and the sun shines brighter, there’s nothing like a cool, crisp, and thirst-quenching salad to help you stay refreshed. One such delightful creation is the Cucumber and Melon Salad with Mint and Lime Dressing. This colorful mix of succulent fruits and vegetables, combined with a lively dressing, serves as an excellent side dish or light snack for the warmer season. It’s not only pleasing to the eye but also loaded with nutrients and flavor.
—
### Why This Salad Shines
The wonder of this salad is found in its straightforwardness and the perfect fusion of varying textures and tastes:
– **Cucumber** offers a cool crunch and mild flavor, making it a perfect foundation.
– **Melons** like cantaloupe, honeydew, or watermelon introduce natural sweetness and juiciness.
– **Fresh mint** adds a cooling herbal essence that enhances the overall flavor.
– **Lime juice** provides a zesty brightness that contrasts beautifully with the melon’s sweetness.
– **Optional additions** such as feta cheese, red onion, or a dash of chili flakes can provide complexity and depth.
—
### Ingredients
Here’s what you’ll require to whip up this refreshing salad (serves 4):
#### For the Salad:
– 1 medium cucumber, thinly sliced or spiralized
– 2 cups cubed or balled melon (cantaloupe, honeydew, or watermelon—or a combination)
– 2 tablespoons fresh mint leaves, chopped or torn
– Optional: 1/4 cup crumbled feta cheese
– Optional: 1/4 small red onion, thinly sliced
#### For the Lime Dressing:
– 2 tablespoons fresh lime juice (about 1 lime)
– 1 tablespoon honey or agave syrup
– 1 tablespoon olive oil
– Pinch of salt
– Freshly ground black pepper, to taste
—
### Instructions
1. **Prepare the Ingredients**: Rinse and slice the cucumber. Use a melon baller or sharp knife to cube or scoop the melon. Chop the mint leaves and, if desired, slice the red onion and crumble the feta.
2. **Make the Dressing**: In a small bowl or jar, mix together the lime juice, honey, olive oil, salt, and pepper until thoroughly blended.
3. **Assemble the Salad**: In a large bowl, combine the cucumber, melon, and mint. Add red onion and feta if using.
4. **Dress and Toss**: Drizzle the lime dressing over the salad and gently toss to ensure all ingredients are coated.
5. **Chill and Serve**: For best results, refrigerate the salad for 15–30 minutes before serving. This allows the flavors to mingle and enhances the refreshing aspect.
—
### Nutritional Benefits
This salad is not only tasty—it’s also beneficial for your health:
– **Cucumber** is hydrating and low in calories, packed with vitamin K and antioxidants.
– **Melons** provide vitamins A and C, along with hydration due to their high water content.
– **Mint** aids in digestion and imparts a cooling sensation.
– **Lime juice** is rich in vitamin C and adds a tangy kick without extra calories.
—
### Tips and Variations
– **Add protein**: Include grilled shrimp or chicken for a more substantial meal.
– **Spice it up**: Stir in a pinch of chili flakes or a dash of hot sauce into the dressing for a spicy twist.
– **Make it vegan**: Substitute agave syrup for honey and omit the feta or use a plant-based alternative.
– **Experiment with herbs**: Swap in basil or cilantro instead of mint for a unique flavor profile.
—
### Final Thoughts
The Cucumber and Melon Salad with Mint and Lime Dressing is a homage to the finest produce of summer. It’s quick to prepare, infinitely adaptable, and sure to be a hit at picnics, barbecues, or as a light meal. With its bright colors, refreshing flavor, and health benefits, this salad is bound to become a staple in your warm-weather culinary repertoire.
So gather your freshest ingredients and try this salad—you’ll be surprised at how something so straightforward can taste so exceptional.
Read More
Tortellini Pasta Salad featuring Crisp Vegetables and Tangy Dressing
**Tortellini Pasta Salad with Fresh Vegetables and Zesty Dressing: A Delicious and Fulfilling Meal**
Tortellini pasta salad featuring fresh vegetables and zesty dressing is a colorful, crowd-pleasing creation that melds the hearty warmth of pasta with the crispness of fresh produce. Whether you’re whipping up a dish for a summer gathering, a potluck, or a simple weeknight meal, this salad delivers a wonderful harmony of flavor, texture, and nutrition. In this article, we’ll delve into the ingredients, preparation suggestions, and variations to assist you in crafting the ultimate tortellini pasta salad.
—
### What Is Tortellini?
Tortellini is a ring-shaped pasta typically filled with a blend of cheese, meat, or vegetables. Hailing from the Emilia-Romagna area of Italy, tortellini is a versatile pasta that retains its integrity in both hot and cold preparations. For pasta salads, cheese-stuffed tortellini is commonly favored due to its creamy, mild taste that complements a range of ingredients.
—
### Key Ingredients
Here’s a look at the fundamental elements of a tortellini pasta salad:
#### 1. **Tortellini**
– **Type**: Cheese-stuffed tortellini is the most frequently used variety.
– **Preparation**: Cook according to the instructions on the package, then rinse with cold water to halt the cooking process and keep the pasta firm.
#### 2. **Fresh Vegetables**
– **Common Choices**: Cherry tomatoes, cucumbers, bell peppers, red onions, and black olives.
– **Optional Additions**: Artichoke hearts, sun-dried tomatoes, shredded carrots, or baby spinach.
– **Tip**: Incorporate an array of colors and textures to enhance the salad’s visual appeal and nutritional value.
#### 3. **Zesty Dressing**
– **Base**: Olive oil and vinegar (red wine or balsamic are popular options).
– **Flavor Enhancers**: Dijon mustard, lemon juice, garlic, Italian herbs, salt, and pepper.
– **Shortcut**: Store-bought Italian dressing may be convenient, but homemade dressing yields a fresher flavor.
#### 4. **Cheese and Protein (Optional)**
– **Cheese**: Crumbled feta, mozzarella pearls, or shredded Parmesan.
– **Protein**: Grilled chicken, salami slices, or chickpeas as a vegetarian option.
—
### How to Make Tortellini Pasta Salad
**Step-by-Step Instructions:**
1. **Cook the Tortellini**: Boil the tortellini until al dente. Drain and rinse with cold water to cool.
2. **Prepare the Vegetables**: Chop vegetables into small pieces. Varying textures will add interest.
3. **Make the Dressing**: Whisk together olive oil, vinegar, lemon juice, mustard, garlic, and herbs.
4. **Combine Ingredients**: In a large bowl, mix the tortellini, vegetables, and dressing. Toss gently to evenly coat.
5. **Chill and Serve**: Refrigerate for at least 30 minutes to allow flavors to meld. Garnish with fresh herbs or cheese before serving.
—
### Tips for Success
– **Avoid Overcooking the Tortellini**: Overcooked tortellini can become mushy. Cook just until tender.
– **Utilize Fresh Herbs**: Basil, parsley, or oregano provide a burst of freshness.
– **Prepare Ahead**: This salad can be made a day in advance. Add delicate greens or cheese just before serving.
– **Personalize It**: Modify ingredients based on seasonal produce or your personal tastes.
—
### Nutritional Benefits
Tortellini pasta salad can be a wholesome meal when crafted with quality ingredients:
– **Vegetables** offer fiber, vitamins, and antioxidants.
– **Olive oil** provides heart-healthy fats.
– **Cheese and protein options** deliver calcium and fullness.
For a lighter version, opt for whole wheat tortellini and decrease the amount of cheese or oil in the dressing.
—
### Serving Suggestions
This pasta salad is highly versatile and can be enjoyed in numerous ways:
– **As a Main Course**: Incorporate grilled chicken or tofu for a complete meal.
– **As a Side Dish**: Pair with grilled meats, seafood, or sandwiches.
– **At Gatherings**: Serve in a large bowl with a serving spoon or in individual cups for easy serving.
—
### Final Thoughts
Tortellini pasta salad with fresh vegetables and zesty dressing is a delightful dish that harmonizes the best of both worlds: the comfort of pasta and the freshness of a garden salad. Simple to prepare and infinitely customizable, it’s a recipe that’s perfect for any event. Whether you’re an experienced chef or a novice in the kitchen, this salad will surely impress with its bold flavors and attractive presentation.
So grab your favorite tortellini,
Read More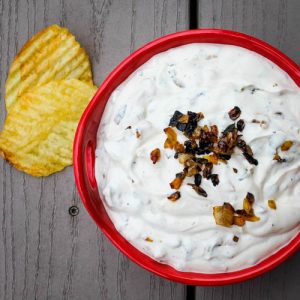
Traditional French Onion Dip Recipe
Introducing Alex & Sonja Overhiser: The Founders of A Couple Cooks
Alex and Sonja Overhiser are the innovative pair behind the beloved food blog A Couple Cooks, a culinary hub that has motivated millions of home chefs globally. As the creators of the praised cookbooks A Couple Cooks: Pretty Simple Cooking and Pretty Simple Cooking, they’ve forged a reputation for crafting accessible, nutritious, and delectable recipes that honor the happiness of cooking as a team.
The Start of a Culinary Adventure
In 2010, Alex and Sonja introduced A Couple Cooks to chronicle their home cooking journey. At that time, they were newly married with a mutual interest in food and a goal to eat healthier. What began as a personal blog swiftly transformed into a comprehensive culinary platform, as the couple uncovered a love for recipe creation, food photography, and narrative crafting.
Cookbooks That Motivate
Their inaugural cookbook, Pretty Simple Cooking, was met with widespread acclaim. It contains 100 vegetarian recipes aimed at making healthy eating both accessible and enjoyable. The book goes beyond mere recipes—it serves as a guide to building confidence in the kitchen and adopting a lifestyle focused on whole foods and mindful eating.
With their subsequent cookbook, A Couple Cooks, Alex and Sonja continued to convey their belief in cooking together as a means to connect, nourish, and celebrate life. Their writing style is warm and uplifting, making readers feel as though they are preparing meals alongside trusted companions.
A Varied Recipe Collection
Currently, A Couple Cooks showcases over 3,000 carefully tested recipes that cover an extensive array of dietary preferences and culinary genres. Whether you’re in search of Mediterranean diet essentials, vegan or vegetarian options, pescatarian creations, smoothies, or artisanal cocktails, the site provides something for everyone. Each recipe is prepared with attention, highlighting fresh ingredients, balanced flavors, and straightforward techniques that anyone can master.
Cooking as Partners
A standout feature of Alex and Sonja’s method is their focus on cooking together. They believe that preparing meals as a couple not only deepens relationships but also enhances the enjoyment of the cooking experience. Their collaborative spirit in the kitchen is reflected in their recipes, which are crafted to be enjoyable, cooperative, and fulfilling.
Beyond Culinary Delights
Apart from their blog and cookbooks, Alex and Sonja engage actively in the culinary community. They’ve been featured in prominent media such as The Washington Post, EatingWell, and Food & Wine. Additionally, they host the A Couple Cooks Podcast, where they interview chefs, authors, and culinary experts to delve into the profound significance of food and cooking in our lives.
Become Part of the Movement
Whether you’re an experienced home chef or just starting your culinary journey, Alex and Sonja Overhiser provide a friendly and motivating environment to discover the world of food. Their mission is straightforward: to encourage people to consume more real food, enjoy the cooking process, and connect with others around the dining table.
Explore A Couple Cooks to check out their recipes, tune into their podcast, and experience the joy of cooking together.
Read More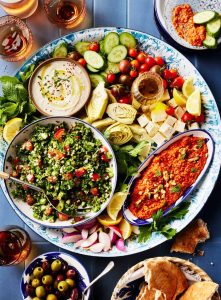
A Complete Manual for Chocolate Mousse: Components, Preparation, and Serving Ideas
# Chocolate Mousse: Simple Dessert Recipes for Kids
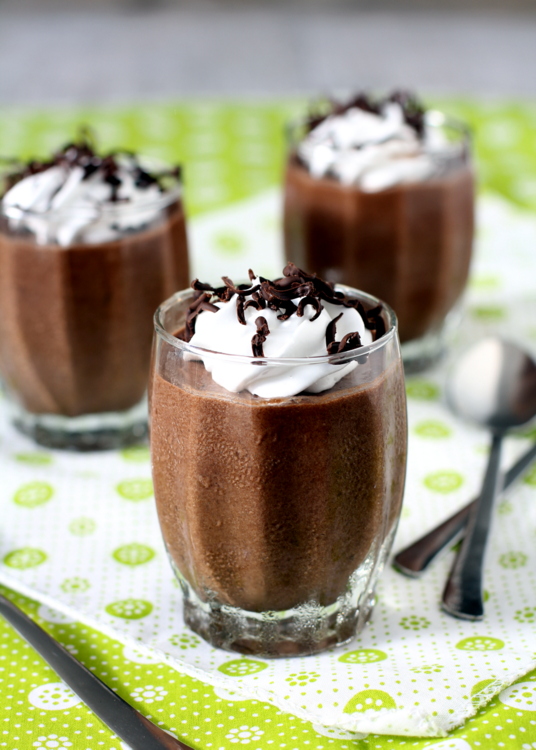
*Chocolate Mousse with whipped cream and grated chocolate*
Savoring rich desserts is a pleasurable experience that many of us value. Chocolate, in particular, occupies a special spot in the hearts of dessert enthusiasts. When crafted into a silky smooth chocolate mousse, it transforms into a divine treat that’s hard to resist. Although it may appear to be a complex dessert to create, chocolate mousse is unexpectedly straightforward to make, making it a superb option for both children and adults.
## Why Choose Chocolate Mousse?
Chocolate mousse is a timeless dessert that is both airy and indulgent. Its light texture and deep chocolate taste make it a favorite at any gathering. Whether you’re commemorating a special event or just want to treat yourself and your family, this dessert is guaranteed to impress. During a recent Dusherra break, I decided to prepare a batch of chocolate mousse for a gathering with my child’s friends, and it was an immediate success!
*Easy dessert for kids ~ Mousse*
## The Ease of Making Chocolate Mousse
One of the most appealing aspects of chocolate mousse is how easy it is to prepare. With just a handful of ingredients and some basic kitchen tools, you can whip up a dessert that looks and tastes exquisite. Here’s a brief overview of the procedure:
1. **Gather Ingredients**: You’ll need high-quality dark chocolate, eggs, sugar, and heavy cream. Optional ingredients include vanilla extract for extra flavor.
2. **Melt the Chocolate**: Begin by melting the chocolate in a heatproof bowl over simmering water or in the microwave. Make sure not to overheat it.
3. **Whip the Cream**: In another bowl, whip the heavy cream until soft peaks form. This will provide your mousse with its light and airy texture.
4. **Combine Ingredients**: Once the chocolate has cooled a bit, gently fold it into the whipped cream. This step is essential to keep the mousse’s fluffy texture.
5. **Chill**: Spoon the mixture into serving dishes and refrigerate for at least an hour to let it set.
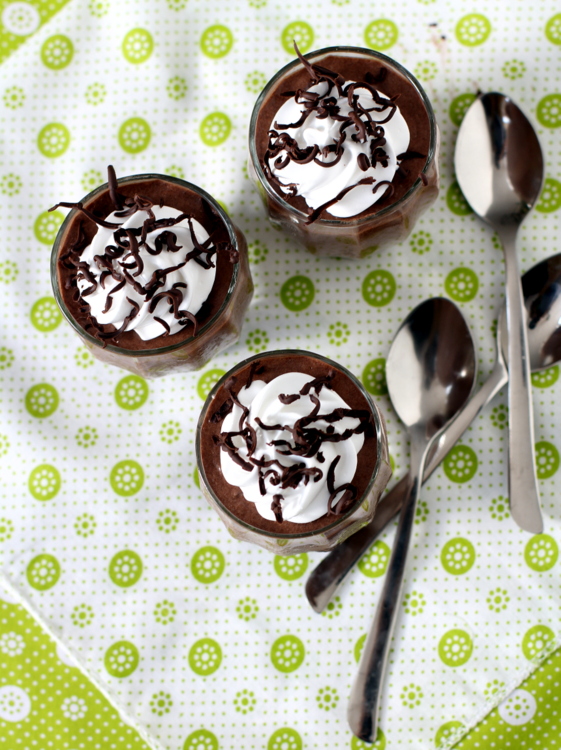
6. **Serve**: Finish with whipped cream and grated chocolate for a classy touch.
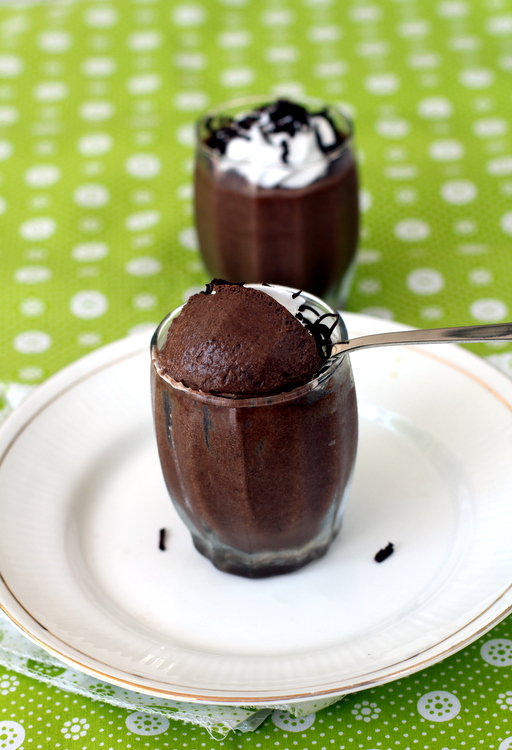
*Chocolate Mousse*
## A Dessert for All
Chocolate mousse is not just a wonderful treat for adults but also a fantastic dessert for kids. Its creamy texture and rich flavor make it a favorite among children, who will enjoy assisting you in the kitchen. This recipe encourages kids to pick up basic cooking skills, such as measuring ingredients and folding mixtures, all while having a good time.
### Tips for Success
– **Choose Quality Chocolate**: The taste of your mousse heavily relies on the quality of the chocolate you choose. Select high-quality dark chocolate for optimal results.
– **Be Gentle**: When incorporating the whipped cream into the chocolate mixture, be gentle to prevent deflating the mousse.
– **Experiment with Flavors**: Don’t hesitate to add a dash of vanilla extract or a sprinkle of sea salt to elevate the chocolate flavor.
## Conclusion
Chocolate mousse is a delightful dessert that adds joy to any occasion. Its easy preparation makes it an ideal choice for kids to participate in the kitchen, and its rich, creamy texture is bound to satisfy any sweet craving. So why not make this delicious recipe part of your dessert collection? With just a few straightforward steps, you can create a stunning chocolate mousse that everyone will adore. Happy cooking!
Delight in this chocolatey creation and relish the smiles it brings to your loved ones!
Read More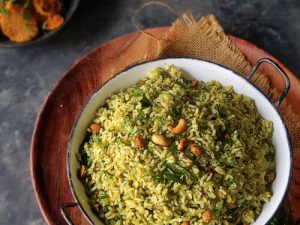
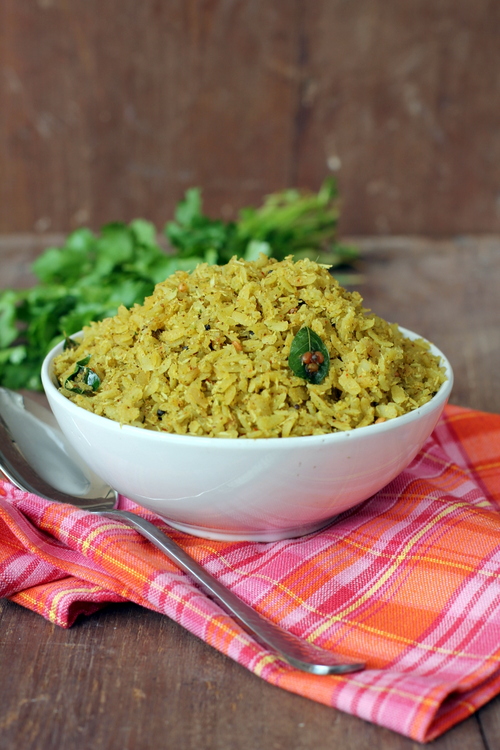
Coriander Poha: An Authentic Indian Recipe Featuring Kothimeera
# Kids Tiffin Recipes: Kothimeera Atukulu (Fresh Coriander Poha)
## Introduction to Poha
Poha, often referred to as beaten rice or flattened rice, is a fundamental ingredient found in numerous Indian households. This adaptable food derives from dehusked rice that has been flattened into airy, dry flakes, which come in various thicknesses. Commonly known as poha, aval, avalakki, or atukulu, this ingredient is appreciated for its flexibility in both savory and sweet dishes.
For busy parents seeking quick and wholesome tiffin recipes for their children, poha serves as an excellent option. It can be reinvented into a range of delightful meals, such as the beloved atukula upma and kanda pohe. Moreover, poha finds its place in festive preparations like atukula payasam (a sweet kheer), atukula laddu (sweet balls), and teepi atukulu (sweet poha).
## What is Kothimeera Atukulu?
Kothimeera Atukulu, or Fresh Coriander Poha, is an easy yet tasty dish that showcases the vibrant flavors of coriander leaves and coconut. Not only is this dish quick to make, but it also bursts with flavor, rendering it an enjoyable choice for breakfast, snacks, or even a light meal.
The blend of poha with fresh coconut and coriander produces a refreshing flavor that is both gratifying and nourishing. It’s an ideal recipe to prepare when uninvited guests drop by or when you wish to offer something special during festivals.
## Why Choose Kothimeera Atukulu?
1. **Quick and Easy**: Kothimeera Atukulu can be made in less than 30 minutes, making it a perfect option for hectic mornings or after-school munchies.
2. **Nutritious**: Brimming with the benefits of coriander and coconut, this dish is abundant in vitamins and minerals, classifying it as a healthy choice for children.
3. **Versatile**: This recipe lends itself to easy customization. You can incorporate vegetables like peas or carrots for added nutrition or modify the spices to cater to your child’s taste.
4. **Light Yet Filling**: Kothimeera Atukulu is gentle on the stomach, making it ideal for kids who need energy without feeling overly full.
## Ingredients for Kothimeera Atukulu
– 1 cup poha (flattened rice)
– 1/4 cup fresh grated coconut
– 1/2 cup fresh coriander leaves, finely chopped
– 1-2 green chilies, finely chopped (adjust to taste)
– 1/2 teaspoon mustard seeds
– 1/2 teaspoon cumin seeds
– 1 tablespoon oil
– Salt to taste
– Lemon juice (optional, for added zesty flavor)
## Instructions
1. **Preparation of Poha**: Rinse the poha in water and drain it. Allow it to sit for about 10 minutes to become tender.
2. **Tempering**: Heat oil in a pan over medium heat. Add mustard seeds and cumin seeds. When they start to pop, add the chopped green chilies and sauté for one minute.
3. **Mixing Ingredients**: Incorporate the softened poha into the pan. Carefully combine it with the tempered spices. Add salt to taste and mix thoroughly.
4. **Adding Coconut and Coriander**: Introduce the grated coconut and chopped coriander leaves to the poha mixture. Stir everything until well blended.
5. **Finishing Touches**: Allow to cook for an extra 2-3 minutes, letting the flavors meld together. If desired, drizzle some lemon juice over the dish for an exhilarating twist.
6. **Serve**: Serve warm, garnished with extra coriander leaves or coconut if desired.
## Conclusion
Kothimeera Atukulu is a charming and nutritious tiffin recipe that is certain to satisfy both kids and adults. Its simplicity and taste make it a superb addition to any meal plan. Whether you are in search of a quick breakfast, a healthy snack, or a light lunch, this Fresh Coriander Poha is a recipe that deserves a spot in your culinary collection. Relish the explosion of flavors and the pleasure of presenting a dish that is both healthy and delicious!
Read More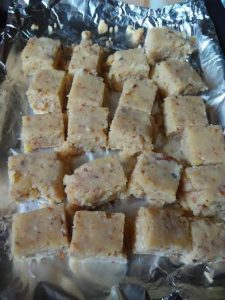
Nutritious Yellow Moong Dal Ladoo: A Wholesome Indian Confection
# Moong Dal Ladoo: A Sweet Treat for Diwali
With the festival of Diwali nearing, the atmosphere is charged with excitement. Homes are beautifully decorated, and the delightful scent of festive goodies fills the air. Among the numerous sweets that adorn the festivities, **Moong Dal Ladoo** emerges as a nutritious and tasty choice. This traditional Indian delicacy is not just simple to make but is also rich in protein, making it a fantastic addition to your Diwali festivities.
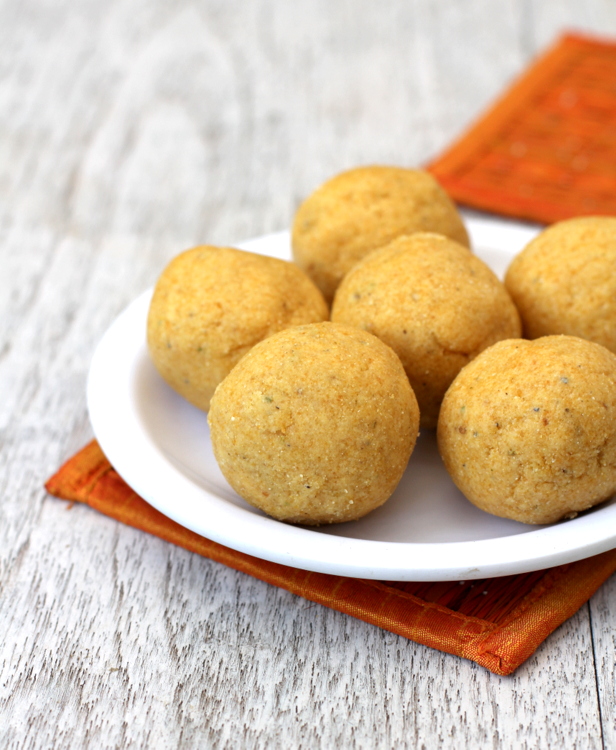
*Moong Dal Ladoo ~ Diwali Sweet*
## What is Moong Dal Ladoo?
Moong Dal Ladoo is a quintessential Indian dessert primarily crafted from **moong dal**, a lentil variety abundant in protein and vital nutrients. Referred to by various names throughout India, such as **pesara sunnaundalu** in Andhra Pradesh and **pasi paruppu laddu** in Tamil Nadu, this sweet is celebrated for its straightforward preparation and delightful flavor. The recipe involves a few basic ingredients and can be completed in simple steps: roast, powder, blend, and mold.
## Ingredients
To prepare Moong Dal Ladoo, you will require the following ingredients:
– **1 cup moong dal** (yellow split moong dal or whole green gram)
– **1 cup jaggery** (grated or powdered)
– **1/4 cup ghee** (clarified butter)
– **1/2 teaspoon cardamom powder** (optional)
– **Chopped nuts** (cashews, almonds, or pistachios for decoration)
## Preparation Steps
### Step 1: Roast the Moong Dal
Begin by dry roasting the moong dal in a pan over medium heat. Stir continuously to ensure uniform roasting. The dal should develop a light golden hue and release a nutty fragrance. This procedure enhances its flavor and facilitates grinding.
### Step 2: Powder the Roasted Dal
After roasting, allow the dal to cool slightly. Then, place it in a blender or food processor and grind it into a fine powder. Ensure it is lump-free, as a smooth consistency is essential for forming the ladoos.
### Step 3: Combine with Jaggery and Ghee
In a mixing bowl, blend the powdered moong dal with grated jaggery and melted ghee. If using cardamom powder, incorporate it at this time for an aromatic flavor. Thoroughly mix until the ingredients are well combined and can hold shape when pressed.
### Step 4: Form the Ladoos
Take small amounts of the mixture and roll them into round balls or ladoos using your palms. Optionally, you can coat them in chopped nuts for added texture and flavor. Place the ladoos on a plate and allow them to cool and firm up.
## Nutritional Benefits
Moong Dal Ladoo is not merely a treat for the palate; it also provides various health advantages:
– **High in Protein**: Moong dal serves as an excellent source of plant-based protein, making these ladoos a nutritious choice for vegetarians and vegans.
– **Rich in Fiber**: The lentils are high in dietary fiber, supporting digestive health and helping you feel satiated longer.
– **Low Glycemic Index**: Jaggery, used as a sweetener, has a lower glycemic index compared to refined sugar, making it a healthier option for those keeping an eye on their blood sugar levels.
## Conclusion
As you get ready for Diwali, think about including Moong Dal Ladoo in your list of festive delights. Its ease of preparation, health benefits, and pleasing taste make it a beloved treat for families commemorating this joyous festival. Whether sharing with family or enjoying them on your own, these ladoos are sure to add sweetness to your Diwali celebrations.
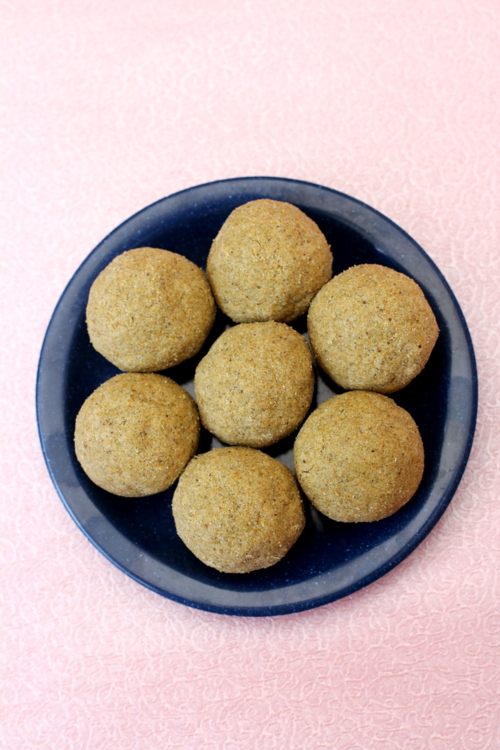
*Green Moong Dal Laddu*
So, roll up your sleeves, gather your ingredients, and prepare to create this scrumptious Indian sweet that captures the essence of Diwali!
Read More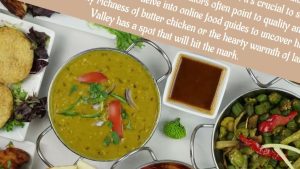
Grasping Chiroti: An Authentic Indian Confectionery Delight
# Chiroti (Chirote) ~ Diwali Indian Sweet Treats
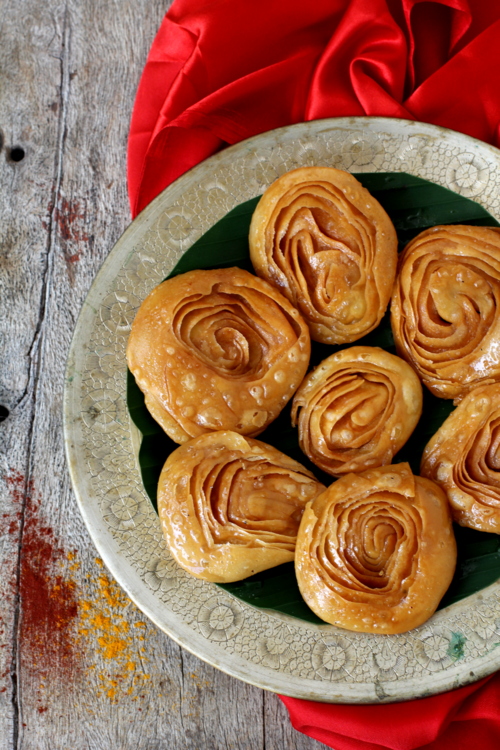
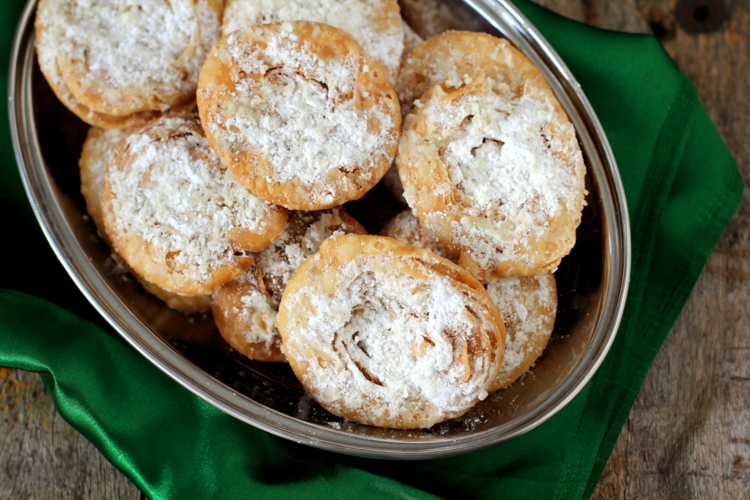
Chiroti, or Chirote as it’s commonly referred to in Maharashtra, is a cherished traditional dessert from Karnataka that enhances the festive atmosphere during special events and religious celebrations. This flaky delicacy, known for its thin layers and exquisite taste, is particularly favored during Diwali, the festival of lights, when families unite to honor the occasion with an array of sweets.
## The Charm of Chiroti
Primarily crafted from plain flour, Chiroti is transformed into a crunchy, fried treat that showcases circular layers of thin dough. It is generally topped off with a lavish sprinkle of cardamom-infused powdered sugar or dipped into a sweetened sugar syrup accented with cardamom.
Apart from the traditional variant, there exists a delightful alternative termed Pathir Pheni. This variation employs “chiroti rava,” a mix of plain flour and fine semolina (sooji). The fried delight is then adorned with powdered sugar and paired with badami haalu, a sweet almond milk enriched with saffron and cardamom. This indulgent combination creates a delectable experience that often stands out in Kannadiga wedding feasts.
## A Culinary Heritage
Chiroti goes beyond being just a dessert; it is interwoven into the cultural identity of Karnataka and Maharashtra. Commonly prepared during festivals, weddings, and other significant events, it represents happiness and festive cheer. The process of making Chiroti involves teamwork, as family members come together to craft this delectable confection.
## Steps to Create Chiroti
Creating Chiroti may appear challenging initially, but with some practice, it becomes quite feasible. Here’s a straightforward step-by-step guide to help you whip up this delightful dessert at home:
### Ingredients:
– 2 cups plain flour
– 2 tablespoons rice flour (for layering)
– Water (as required)
– Oil (for deep frying)
– Powdered sugar (for sprinkling)
– Cardamom powder (to taste)
### Instructions:
1. **Dough Preparation**: In a mixing bowl, combine the plain flour and a pinch of salt. Gradually incorporate water to form a smooth, soft dough. Cover it with a damp cloth and allow it to rest for around 30 minutes.
2. **Layering Paste Creation**: In a small bowl, blend rice flour with a little water to yield a smooth paste.
3. **Dough Rolling**: Divide the rested dough into small balls. Roll each ball into a thin circle, approximately 8-10 inches in diameter.
4. **Layering the Dough**: Spread a thin application of the rice flour paste across the rolled-out dough. Place another rolled-out dough circle on top and continue this layering process for 3-4 layers.
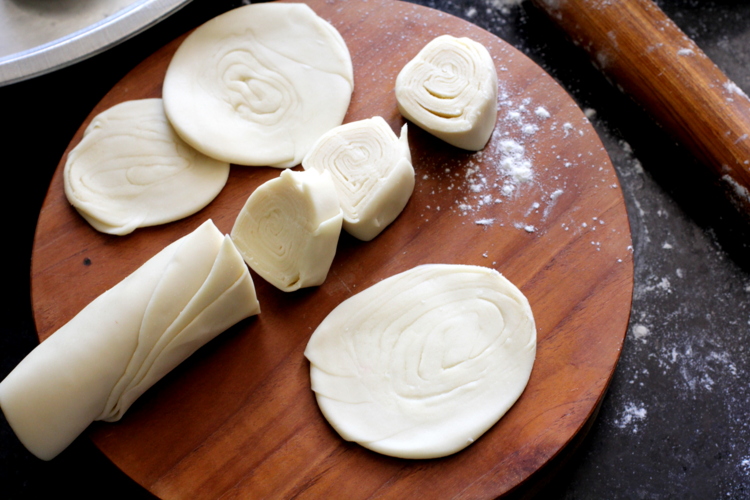
5. **Form into a Log**: After layering, tightly roll the circles into a cylindrical log.
6. **Slice and Re-Roll**: Cut the log into pieces about ½ inch thick. Take each piece and roll it out again into a thin circle.
7. **Fry the Chiroti**: Heat oil in a deep frying pan. When hot, carefully slide in the rolled-out Chiroti and fry until golden brown and crispy. Remove and drain on paper towels.
8. **Sugar Coating**: While still warm, dust the fried Chiroti with powdered sugar mixed with cardamom powder or dip them into cardamom-flavored sugar syrup.
## A Sweet Treat for Your Diwali Festivities
Chiroti is a wonderful dessert that is bound to delight your family and friends during Diwali. Its crispiness and sweet, fragrant flavors make it an ideal addition to your festive celebrations. As you gather with loved ones, consider making this traditional sweet to spread joy and sweetness during the festivities.
Whether you’re an experienced cook or just starting out, Chiroti is a fulfilling recipe that captures the essence of Indian sweets. So, roll up your sleeves, gather your supplies, and prepare to make this scrumptious delicacy that will undoubtedly be a favorite at your Diwali festivities!
Read More
“Diverse Cornflakes Blends: An Overview of Taste Pairings”
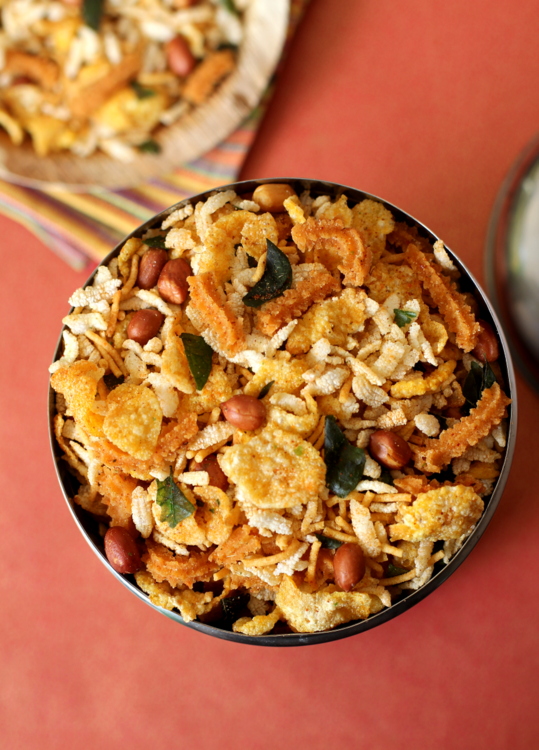
# Cornflakes Mixture: A South Indian Bakery Style Treat
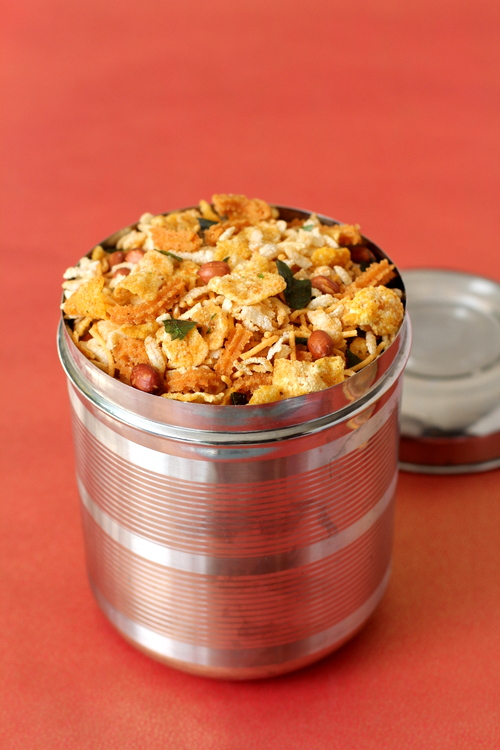
**Cornflakes Mixture** is a favorite savory treat that captures the rich culinary heritage of South India. Present in almost every bakery throughout the subcontinent, this enjoyable blend consists of various crunchy snacks that excite the palate.
## What is Mixture?
Mixture is a staple Indian snack comprising an assortment of savory components, primarily made with chickpea flour. The base ingredients usually consist of:
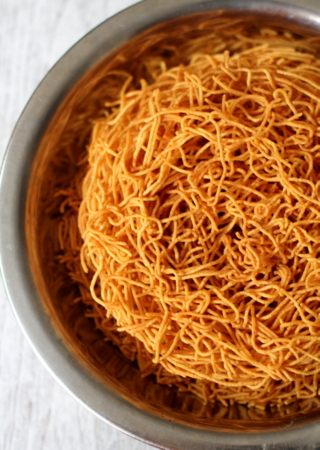
– **Murukku**: A twisty, crunchy snack crafted from rice and lentil flour.
– **Omapudi (Karapoosa/Sev)**: Slim, crispy strands made from chickpea flour and seasoned with spices.
– **Boondi**: Tiny, round, deep-fried chickpea flour balls that contribute a delightful crunch.
These snacks are generally spiced with red chili powder and combined with other crunchy ingredients like roasted peanuts, cashew nuts, fried beaten rice, and, of course, cornflakes. The charm of the mixture lies in its adaptability, as each family may have its special recipe, offering a broad spectrum of flavors from sweet to spicy to tangy.
## The Importance of Mixture in Indian Culture
During celebrations such as Diwali, families prepare significant amounts of mixture ahead of time, storing them in stainless steel containers known as dabbas. These snacks are not only relished at home but also shared with friends and relatives, often alongside traditional sweets. The tradition of preparing and sharing mixture brings people together during festive occasions and is highly valued.
### Ingredients for Cornflakes Mixture
For an enjoyable Cornflakes Mixture, the usually required ingredients include:
– **Cornflakes**: The highlight of the dish, offering a crunchy bite.
– **Fried Snacks**: Such as murukku and sev, which can be homemade or bought from a bakery.
– **Beaten Rice (Poha)**: Adds an extra layer of crunchiness.
– **Roasted Peanuts and Cashew Nuts**: For added richness and taste.
– **Spices**: Red chili powder, salt, and a touch of turmeric for color and flavor.
– **Curry Leaves**: For a fragrant addition.
### Preparation Method
1. **Fry the Snacks**: If making murukku and sev at home, start with their preparation. Follow the recipes for each item.
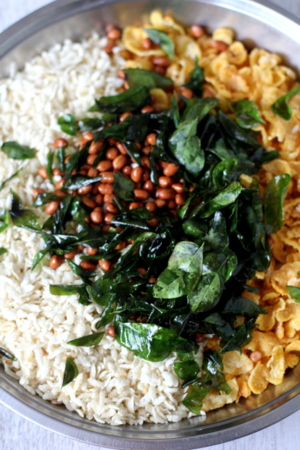
2. **Combine Ingredients**: In a large bowl, mix together the cornflakes, fried snacks, beaten rice, and nuts.
3. **Season**: Sprinkle the spices over the mixture and toss well to ensure even distribution.
4. **Store**: Allow the mixture to cool completely before placing it in an airtight container.
### Serving Suggestions
Cornflakes Mixture is more than just a snack; it can also be turned into a delicious chaat. Here’s how:
1. **Chaat Style**: Incorporate chopped onions, tomatoes, and fresh coriander into the mixture.
2. **Chutneys**: Drizzle with green chutney and sweet chutney for an explosion of flavor.
3. **Curd**: Crown with sweetened beaten curd for a creamy texture.
4. **Lemon Juice**: Conclude with a sprinkle of lemon juice for a refreshing kick.
This simple and quick preparation makes it an ideal snack for surprise visitors or a delightful companion to a cup of masala chai.
## Conclusion
Cornflakes Mixture is not merely a snack; it represents a celebration of flavors and textures that mirror the vibrant culture of South India. Whether savored during festive times or as a casual treat, this mixture is bound to delight anyone who tastes it. With its straightforward preparation and countless variations, it’s an essential experience for anyone wishing to delve into the world of Indian snacks. So gather your ingredients and indulge in the crunchy, spicy delight of Cornflakes Mixture!
Read More
“Pala Munjalu: A Brief Insight into Its Importance and Applications”
### Pala Munjalu: An Authentic Indian Delight for Diwali
As the Diwali festival draws near, households throughout India become infused with the scent of delightful sweets and savory treats. Among the countless traditional offerings that adorn the festive spread, Pala Munjalu stands out, particularly for those hailing from Andhra Pradesh. This charming sweet, commonly crafted during Diwali and other significant celebrations, reflects the rich culinary legacy of the area.
#### A Glimpse into Heritage
Pala Munjalu, which may also be referred to as Pala Munjalu or simply Munjalu, is a sweet delicacy that is deep-fried and bears a close resemblance to another cherished dish, Boorelu (or Poornalu). While both sweets contain a similar filling, their outer coverings present notable differences in texture and taste. Boorelu is enveloped in a batter made from black gram dal and rice, whereas Pala Munjalu showcases a distinctive outer layer crafted from rice flour cooked in milk, providing it with a tender and melt-in-your-mouth sensation.
The making of Pala Munjalu often turns into a family event, as various generations gather to enjoy the process of cooking. Many of us treasure memories of observing our grandmothers, or “ammamma,” adeptly creating these classic sweets, filling our homes with warmth and fond nostalgia.
#### The Sweet Filling
At the core of Pala Munjalu lies its filling, known as poornam. This sweet concoction is generally prepared using Bengal gram (chana dal), which is boiled, ground, and subsequently sweetened with jaggery or sugar. The filling is enhanced with cardamom powder, contributing a fragrant note that elevates the overall flavor of the sweet. The fusion of the nutty taste of the Bengal gram and the sweetness of jaggery forms an irresistible contrast.
#### The Cooking Process
Preparing Pala Munjalu requires several steps, yet the procedure is simple and fulfilling. Here’s a concise guide on how to create this delightful sweet:
1. **Prepare the Filling**: Soak Bengal gram in water for several hours, then cook until tender. Drain and blend into a smooth paste, incorporating jaggery and cardamom powder until well-mixed. Set aside to cool.
2. **Make the Outer Layer**: In a pan, warm milk and slowly add rice flour, stirring constantly to prevent lumps. Cook until the mixture thickens and achieves a dough-like consistency. Let it cool slightly.
3. **Assemble the Sweets**: Take a small amount of rice flour dough, flatten it in your palm, and place a spoonful of the poornam filling in the middle. Carefully fold the dough over the filling and seal well to create a ball.
4. **Fry the Munjalu**: Heat oil in a deep frying pan. Once hot, gently slide the prepared Pala Munjalu into the oil and fry until golden brown. Remove and let drain on paper towels.
5. **Serve and Enjoy**: Pala Munjalu can be served warm or at room temperature, making it an ideal addition to your Diwali feast.
#### The Spirit of Diwali
Pala Munjalu is not merely a sweet; it encapsulates the essence of Diwali—a time for family, festivity, and the sharing of happiness and love through food. As you prepare to mark this festival of lights, contemplate including Pala Munjalu in your offerings. Its rich tastes and soft texture will undoubtedly enchant your family and friends, forging new memories that will be treasured for years ahead.
In conclusion, Pala Munjalu is a classic sweet that not only caters to the sweet cravings but also connects us to our heritage and the culinary practices passed down through generations. This Diwali, allow the warmth of homemade sweets to envelop your home and heart, as you rejoice with loved ones, sharing in the happiness of this festive season.
Read More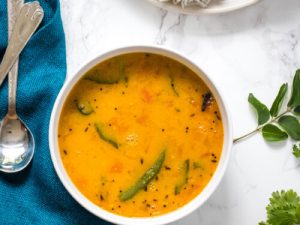
A Complete Manual on Gujarati Dal: Classic Recipe and Cooking Techniques
# Gujarati Dal Recipe: A Culinary Treasure from India
In the realm of Indian gastronomy, dal stands as a fundamental component that bridges regional divides. Nevertheless, every region has its own distinctive spin on this cherished dish. One particularly enchanting variant is the Gujarati dal, which captures the spirit of Gujarati cooking through its unique sweet and tangy notes. If you seek to enhance your cooking skills, this Gujarati dal recipe is an essential addition to your repertoire.
## The Heart of Gujarati Cuisine
Gujarati fare is celebrated for its lively flavors, often marked by a balanced mix of sweet, salty, and spicy elements. A hallmark of many Gujarati recipes is the incorporation of jaggery or sugar, which introduces a gentle sweetness that counters the spices. This exceptional flavor combination is what distinguishes Gujarati dal from other regional dal preparations.
### Ingredients
To create an authentic Gujarati dal, gather the following components:
– **1 cup toor dal (split pigeon peas)**
– **1 tablespoon ghee or oil**
– **1 teaspoon mustard seeds**
– **1 teaspoon cumin seeds**
– **1-2 green chilies, slit**
– **1-2 dried red chilies**
– **A pinch of asafoetida (hing)**
– **1 medium-sized tomato, chopped**
– **1 tablespoon tamarind pulp (or juice of 1 lemon)**
– **1-2 tablespoons jaggery (or sugar, according to taste)**
– **Salt, to taste**
– **Fresh coriander leaves, chopped (for garnish)**
– **Water (as required)**
### Instructions
1. **Cook the Dal**: Rinse the toor dal thoroughly under running water. In a pressure cooker, combine the dal with 3 cups of water and a pinch of turmeric. Cook for approximately 3-4 whistles or until the dal is tender and mushy. If lacking a pressure cooker, boiling the dal in a pot will suffice, though it may take more time.
2. **Prepare the Tempering**: In a separate pan, warm the ghee or oil over medium heat. Add mustard seeds and allow them to crackle. Next, add cumin seeds, green chilies, dried red chilies, and asafoetida. Sauté for a few moments until aromatic.
3. **Add Tomatoes**: Incorporate the chopped tomatoes into the tempering and sauté until they soften, which should take around 3-4 minutes.
4. **Combine Ingredients**: After the tomatoes are cooked, introduce the cooked dal into the pan. Stir thoroughly to blend. If the dal is excessively thick, adjust the consistency by adding water.
5. **Season the Dal**: Stir in the tamarind pulp, jaggery, and salt to the dal. Mix well and allow it to simmer for approximately 5-10 minutes. Taste and modify the seasoning as required. The flavor profile of the dal should reflect a balanced sense of sweetness and tanginess.
6. **Garnish and Serve**: Once finished, garnish the dal with freshly chopped coriander leaves. Serve warm alongside phulkas (Indian flatbreads) or steamed rice, complemented by a side of bhindi fry (okra) and a bowl of curd for a well-rounded meal.
## Why You’ll Adore Gujarati Dal
Gujarati dal is more than just a dish; it’s a delightful experience. The khati meeti (tangy and sweet) flavor profile offers a refreshing deviation from the more prevalent savory dal varieties. The harmony of jaggery and tamarind creates a pleasing contrast that excites the palate. Whether paired with phulkas or rice, this dal is destined to become a beloved dish in your home.
### Conclusion
Diving into regional Indian cuisines can reveal a wealth of culinary treasures, and Gujarati dal is undoubtedly among them. Its distinct flavors and straightforward preparation make it an ideal dish for both everyday dining and festive gatherings. So, roll up your sleeves and give this recipe a whirl; you may just discover a new family favorite! Relish the delightful array of flavors that Gujarati dal brings to your dining experience.
Read More