
7-Day Nutritious Meal Schedule for August 3-9
**7-Day Nutritious Meal Guide for August 3-9**
Maintaining a healthy diet doesn’t need to be difficult. With a bit of preparation, you can indulge in nutritious meals all week long. Here’s a 7-day meal guide to assist you in staying focused from August 3-9. This guide emphasizes balanced nutrition, featuring a mix of proteins, whole grains, fruits, and vegetables.
**Day 1: August 3**
– **Breakfast:** Greek yogurt paired with assorted berries and a dash of granola.
– **Lunch:** Grilled chicken salad with mixed greens, cherry tomatoes, cucumber, and balsamic dressing.
– **Dinner:** Broiled salmon served with quinoa and steamed broccoli.
– **Snack:** Sliced apple with almond butter.
**Day 2: August 4**
– **Breakfast:** Overnight oats mixed with chia seeds, banana, and a touch of honey.
– **Lunch:** Turkey and avocado wrap using whole grain tortilla and a side of carrot sticks.
– **Dinner:** Stir-fried tofu with bell peppers, broccoli, and brown rice.
– **Snack:** A handful of assorted nuts.
**Day 3: August 5**
– **Breakfast:** Spinach smoothie with banana, protein powder, and almond milk.
– **Lunch:** Lentil soup alongside whole grain bread.
– **Dinner:** Grilled shrimp tacos accompanied by cabbage slaw and avocado.
– **Snack:** Celery sticks with hummus.
**Day 4: August 6**
– **Breakfast:** Whole grain toast topped with avocado and a poached egg.
– **Lunch:** Quinoa salad featuring chickpeas, cherry tomatoes, cucumber, and lemon vinaigrette.
– **Dinner:** Baked chicken breast paired with sweet potato and green beans.
– **Snack:** Greek yogurt with a handful of almonds.
**Day 5: August 7**
– **Breakfast:** Scrambled eggs mixed with spinach and tomatoes.
– **Lunch:** Tuna salad with mixed greens and whole grain crackers.
– **Dinner:** Beef stir-fry with an assortment of vegetables and brown rice.
– **Snack:** Sliced pear with cottage cheese.
**Day 6: August 8**
– **Breakfast:** Chia pudding made with almond milk, topped with fresh berries.
– **Lunch:** Grilled vegetable wrap with hummus in a whole grain tortilla.
– **Dinner:** Lemon herb chicken alongside roasted Brussels sprouts and quinoa.
– **Snack:** Baby carrots served with tzatziki sauce.
**Day 7: August 9**
– **Breakfast:** Oatmeal mixed with sliced almonds, raisins, and a sprinkle of cinnamon.
– **Lunch:** Caprese salad featuring fresh mozzarella, tomatoes, basil, and balsamic drizzle.
– **Dinner:** Baked cod served with wild rice and sautéed spinach.
– **Snack:** Orange segments with a few walnuts.
**Success Tips:**
– **Preparation:** Use some time over the weekend to prep ingredients, such as chopping vegetables or cooking grains, to save time during the week.
– **Hydration:** Ensure to drink sufficient water throughout the day for hydration.
– **Portion Control:** Pay attention to serving sizes for a well-balanced diet.
– **Variety:** Feel free to exchange similar ingredients to accommodate your flavor preferences or dietary requirements.
This meal plan aims to offer a range of nutrients and tastes, making healthy eating both enjoyable and sustainable.

Fast and Simple No-Heat Meal Suggestions for Hectic Days
# Chickpea Salad: A Vibrant and Tasty Treat
Chickpea Salad is a lively, crunchy creation that is filled with fresh tastes. This salad is not only simple to make but also keeps well in the refrigerator, making it a fantastic option for lunches or gatherings.
## Holly’s Recipe Highlights: Chickpea Salad
– **Flavor:** Refreshing and vibrant with crisp veggies, chickpeas, and a zesty cumin-lemon dressing.
– **Why Make It:** Quick to chop, mix, and chill, and it improves in flavor after resting.
– **Tools:** A vegetable chopper can expedite prep and ensure consistent chopping of bell peppers and cucumbers.
– **Serving Suggestions:** Enjoy as a side, fill into pita, or top with grilled chicken breasts or oven-roasted shrimp for a fantastic meal.
**Total Time:** 1 hr 25 mins
**Servings:** 6
**Cooking Method:** Chilled
## Ingredient Notes
– **Chickpeas:** Canned chickpeas make this recipe fast and easy. Rinse thoroughly and pat dry for optimal flavor. If using homemade chickpeas, make sure they are tender and not overcooked.
– **Tomatoes:** Cherry tomatoes are ideal for a fresh, sweet taste, although canned diced tomatoes can be an alternative.
– **Cucumbers:** English or Persian cucumbers maintain their crunch and require minimal preparation. If using backyard cucumbers, peel and remove seeds to prevent a soggy salad.
– **Green Pepper:** Green bell pepper contributes a nice crunch. Red, yellow, or orange bell peppers may be used for a sweeter flavor.
– **Red Onion:** Imparts a sharp taste; finely chop to avoid overwhelming the salad. Soaking briefly in cold water can soften the flavor.
– **Avocado:** Optional, but adds a creamy texture. Best added just before serving or lightly combined with lemon juice to prevent browning.
The dressing is straightforward, highlighting the oil’s flavor. Opt for a mild extra-virgin olive oil for a subtle taste or a strong one for a peppery note. Avocado oil is a neutral substitute.
## How to Prepare Chickpea Salad
1. In a medium bowl, mix together tomatoes, cucumber, chickpeas, bell pepper, parsley, and red onion.
2. Incorporate olive oil, vinegar, cumin, salt, and pepper. Toss thoroughly to combine.
3. If using, chop the avocado into cubes and place in a small bowl. Drizzle juice from half a lemon over the avocado and gently mix. If avocado is not included, squeeze 1 to 2 tablespoons of lemon juice over the salad and toss.
4. Chill for at least one hour prior to serving.
### Preparation Tips
– **Cut Vegetables Evenly:** This ensures each bite has a balance of flavors and textures.
– **Prep Ahead of Time:** Add avocado just before serving for optimal texture.
– **Taste After Chilling:** Cold salads might need additional salt or a hint of lemon.
## Storing Leftovers
– **Refrigerate:** Store leftover chickpea salad in an airtight container in the fridge for up to 5 days. Keep avocado separate and add it just before serving to preserve its texture.
– **Serving:** Stir before serving as the dressing can settle. Revive leftovers with a splash of red wine vinegar, olive oil, or lemon juice.
– **Freezing:** Not advisable.
## What to Pair with Chickpea Salad
Chickpea Salad complements a wide array of dishes, making it a flexible addition to any meal. Relish it as a side dish, in a pita, or as a topping for grilled proteins.
Did you enjoy this Chickpea Salad Recipe? Leave a comment and rating below!
A Comprehensive Guide for Making Buldak Ramen at Home
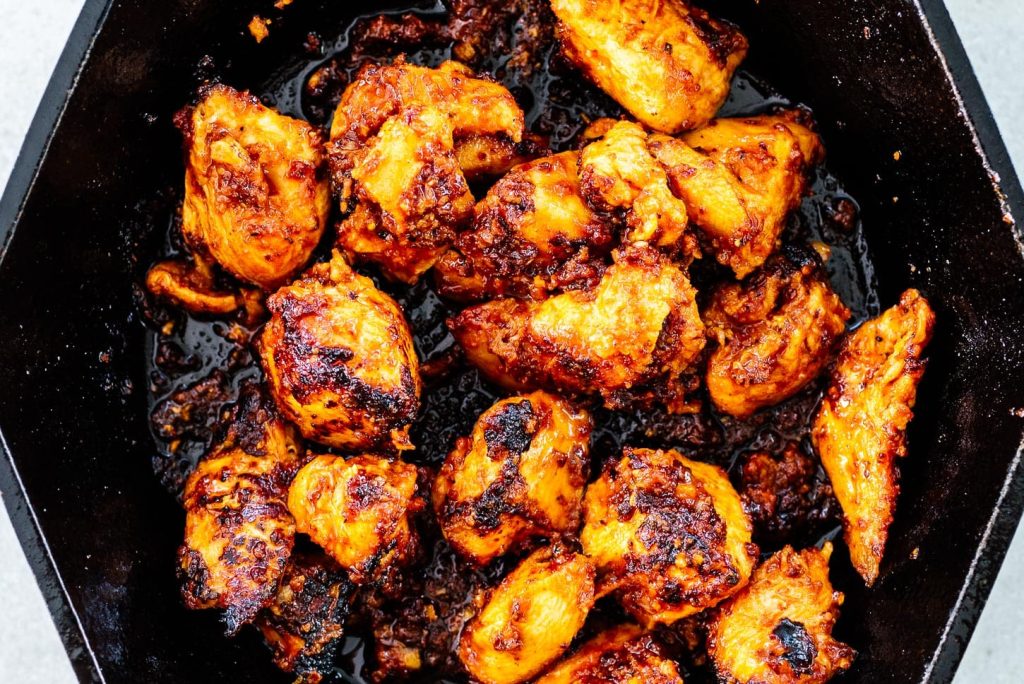
# Are You a Fan of Spicy Cuisine? Make Homemade Buldak Ramen!
If spicy food excites you, buldak is probably among your top choices. This homemade buldak ramen is a fantastic way to relish the intense flavors of this beloved Korean dish right from your own kitchen.
## Reasons to Love This Recipe
– **Healthier and Less Processed**: Cooking it at home allows you to choose the ingredients.
– **Budget-Friendly**: If you have the majority of the ingredients at home, this recipe is more affordable than purchasing instant noodles.
– **Adjustable Spice Level**: You can modify the heat according to your taste.
– **Enhanced Flavor**: Homemade buldak ramen typically has a richer taste compared to its instant versions.
### Quick Overview
| Flavor Profile | Spicy |
|—————-|——-|
| Diet | [Vegetarian Recipes](https://iamafoodblog.com/category/recipes/diets/vegetarian-recipes/) |
| Storage | Keep refrigerated for up to 24 hours |
| Reheating | Use a microwave or a pot with a little chicken broth or water |
| Difficulty | Easy |
| Pair It With | [Marinated Eggs](https://iamafoodblog.com/marinated-eggs/) |
—
## What Exactly is Buldak?
Buldak, translating to “fire chicken,” is a spicy Korean dish featuring small chunks of chicken slathered in a hot sauce. The sauce usually consists of gochugaru (Korean chili flakes), gochujang (Korean chili paste), soy sauce, garlic, ginger, and sugar. This dish surged in popularity in the early 2000s, aided by buldak eateries and the emergence of Samyang’s buldak instant noodles.
## What is Buldak Ramen?
Buldak ramen, famous for its extreme spiciness, gained prominence through Samyang’s hot chicken flavor ramen, also referred to as buldak bokkeum myeon. Different from conventional instant ramen, which is broth-based, buldak ramen is a saucy noodle meal. After boiling the noodles, they are drained and mixed with the fiery buldak sauce, culminating in a dish that is both tasty and scorching.
## Steps to Prepare Buldak Ramen
1. **Prepare the Sauce**: In a mixing bowl, blend 1 tbsp gochujang, 1 tbsp gochugaru, 1 tbsp soy sauce, 2 tsp sugar, 1 tsp chicken bouillon powder, 1 clove minced garlic, and 1/4 tsp black pepper.
2. **Boil the Noodles**: Cook the noodles as per the package directions.
3. **Combine Noodles with Sauce**: After the noodles are done, place them directly into the bowl with the sauce. Toss until the noodles are thoroughly coated and shiny, adding a splash of noodle water if needed.
4. **Dig In**: Serve hot and savor your homemade buldak ramen!
—
## How Spicy is Buldak?
Buldak is recognized for its remarkable heat, which can differ based on individual spice tolerance. The homemade version gives you the power to manage the spice level while still enjoying the deep flavors.
## Is Buldak Ramen the Hottest Ramen?
The original buldak bokkeum myeon has a Scoville score of 4,404 units, but Samyang also has spicier varieties, including a mini version at 12,000 Scoville units and a 3x spicy version that surpasses 13,000 Scoville units.
## What Ingredients Make Buldak Sauce?
– **Gochugaru**: Korean chili flakes that contribute smokiness and heat.
– **Gochujang**: A thick, piquant paste that gives the main heat.
– **Soy Sauce**: Provides umami taste.
– **Sugar**: Offsets the spiciness with sweetness.
– **Garlic**: Fresh garlic amplifies the overall taste and adds heat.
## Gochujang vs. Gochugaru
– **Gochujang**: A fermented chili paste that is sweet, savory, and spicy.
– **Gochugaru**: Dried chili flakes that are fruity and smoky, offering a milder heat.
## What Type of Noodles for Buldak Ramen?
Though any noodles can work, instant ramen noodles are perfect for the Samyang-style buldak ramen. Brands like Nongshim Shin Ramyun feature thick, chewy noodles that suit the dish well. If instant noodles aren’t available, spaghetti or udon can serve as substitutes.
—
With this guide, you’re all set to whip up your very own spicy buldak ramen at home. Relish the heat and zest of this cherished Korean dish!


Crushed Olives Accompanied by Burrata Cheese
### Fried Bread with Creamy Burrata and Crushed Castelvetrano Olives
Fried bread garnished with torn creamy burrata and crushed Castelvetrano olives, blended with lemon, olive oil, and herbs, is an exceptional dish that functions perfectly as an appetizer, snack, or light lunch. This charming amalgamation is not just simple to make but also explodes with flavor, establishing it as a summer favorite.
#### Why You Should Try This Dish
The blend of textures and tastes in this dish is what renders it distinctly remarkable. The crunchy, golden fried bread offers a delightful crispness, while the creamy burrata contributes a rich, buttery touch. The crushed Castelvetrano olives, celebrated for their sweet and gentle flavor, are brightened up with lemon juice and fresh herbs, achieving a harmonious equilibrium.
This dish has turned into a weekly favorite for many, as it is adaptable enough to be relished at any time. Whether you’re entertaining guests or simply savoring a relaxed lunch, this recipe is bound to impress.
#### Ingredients
**For the Olives:**
– Castelvetrano olives
– Olive oil
– Lemon juice
– Lemon zest
– Fresh oregano leaves
– Black pepper
**For Serving:**
– Ciabatta or your preferred bread
– Burrata cheese
#### Instructions
1. **Crush the Olives:** Position the olives on a cutting board and smash them with the flat base of a glass until they are chunky and uneven.
2. **Combine Ingredients:** In a bowl, mix the crushed olives with olive oil, lemon juice, lemon zest, oregano leaves, and black pepper. Optionally, add salt to adjust to taste.
3. **Marinate (Optional):** For a deeper flavor, chill the olive mixture for 12-24 hours. This allows the flavors to meld excellently. If the oil solidifies, allow it to sit at room temperature or stir in some fresh olive oil to loosen it.
4. **Prepare the Bread:** Slice the bread into pieces and drizzle with olive oil. Air fry at 375°F for about 4 minutes or until golden brown. Alternatively, you can broil, pan-toast, or grill the bread.
5. **Prepare the Burrata:** Slice the burrata in half and gently pull it apart to reveal the creamy interior.
6. **Serve:** Position the burrata on the fried bread, spoon the olive mixture over the top, and top with fresh oregano leaves and cracked black pepper.
#### Serving Suggestions
This dish can be enjoyed as a standalone appetizer or combined with a light salad for a refreshing lunch. The mix of creamy, salty, and tangy flavors makes it a fantastic addition to any summer gathering.
#### Conclusion
Fried bread with creamy burrata and crushed Castelvetrano olives is an uncomplicated yet sophisticated dish that embodies the essence of summer dining. Its vibrant flavors and textures make it a favorite among gastronomes. Whether you’re relishing it at home or sharing it with loved ones, this recipe is certain to become a valued part of your cooking collection.

7-Day Nutritious Meal Schedule for August 3-9
**7-Day Nutritious Meal Guide for August 3-9**
Maintaining a healthy diet doesn’t need to be difficult. With a bit of preparation, you can indulge in nutritious meals all week long. Here’s a 7-day meal guide to assist you in staying focused from August 3-9. This guide emphasizes balanced nutrition, featuring a mix of proteins, whole grains, fruits, and vegetables.
**Day 1: August 3**
– **Breakfast:** Greek yogurt paired with assorted berries and a dash of granola.
– **Lunch:** Grilled chicken salad with mixed greens, cherry tomatoes, cucumber, and balsamic dressing.
– **Dinner:** Broiled salmon served with quinoa and steamed broccoli.
– **Snack:** Sliced apple with almond butter.
**Day 2: August 4**
– **Breakfast:** Overnight oats mixed with chia seeds, banana, and a touch of honey.
– **Lunch:** Turkey and avocado wrap using whole grain tortilla and a side of carrot sticks.
– **Dinner:** Stir-fried tofu with bell peppers, broccoli, and brown rice.
– **Snack:** A handful of assorted nuts.
**Day 3: August 5**
– **Breakfast:** Spinach smoothie with banana, protein powder, and almond milk.
– **Lunch:** Lentil soup alongside whole grain bread.
– **Dinner:** Grilled shrimp tacos accompanied by cabbage slaw and avocado.
– **Snack:** Celery sticks with hummus.
**Day 4: August 6**
– **Breakfast:** Whole grain toast topped with avocado and a poached egg.
– **Lunch:** Quinoa salad featuring chickpeas, cherry tomatoes, cucumber, and lemon vinaigrette.
– **Dinner:** Baked chicken breast paired with sweet potato and green beans.
– **Snack:** Greek yogurt with a handful of almonds.
**Day 5: August 7**
– **Breakfast:** Scrambled eggs mixed with spinach and tomatoes.
– **Lunch:** Tuna salad with mixed greens and whole grain crackers.
– **Dinner:** Beef stir-fry with an assortment of vegetables and brown rice.
– **Snack:** Sliced pear with cottage cheese.
**Day 6: August 8**
– **Breakfast:** Chia pudding made with almond milk, topped with fresh berries.
– **Lunch:** Grilled vegetable wrap with hummus in a whole grain tortilla.
– **Dinner:** Lemon herb chicken alongside roasted Brussels sprouts and quinoa.
– **Snack:** Baby carrots served with tzatziki sauce.
**Day 7: August 9**
– **Breakfast:** Oatmeal mixed with sliced almonds, raisins, and a sprinkle of cinnamon.
– **Lunch:** Caprese salad featuring fresh mozzarella, tomatoes, basil, and balsamic drizzle.
– **Dinner:** Baked cod served with wild rice and sautéed spinach.
– **Snack:** Orange segments with a few walnuts.
**Success Tips:**
– **Preparation:** Use some time over the weekend to prep ingredients, such as chopping vegetables or cooking grains, to save time during the week.
– **Hydration:** Ensure to drink sufficient water throughout the day for hydration.
– **Portion Control:** Pay attention to serving sizes for a well-balanced diet.
– **Variety:** Feel free to exchange similar ingredients to accommodate your flavor preferences or dietary requirements.
This meal plan aims to offer a range of nutrients and tastes, making healthy eating both enjoyable and sustainable.
Read More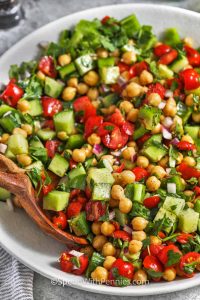
Fast and Simple No-Heat Meal Suggestions for Hectic Days
# Chickpea Salad: A Vibrant and Tasty Treat
Chickpea Salad is a lively, crunchy creation that is filled with fresh tastes. This salad is not only simple to make but also keeps well in the refrigerator, making it a fantastic option for lunches or gatherings.
## Holly’s Recipe Highlights: Chickpea Salad
– **Flavor:** Refreshing and vibrant with crisp veggies, chickpeas, and a zesty cumin-lemon dressing.
– **Why Make It:** Quick to chop, mix, and chill, and it improves in flavor after resting.
– **Tools:** A vegetable chopper can expedite prep and ensure consistent chopping of bell peppers and cucumbers.
– **Serving Suggestions:** Enjoy as a side, fill into pita, or top with grilled chicken breasts or oven-roasted shrimp for a fantastic meal.
**Total Time:** 1 hr 25 mins
**Servings:** 6
**Cooking Method:** Chilled
## Ingredient Notes
– **Chickpeas:** Canned chickpeas make this recipe fast and easy. Rinse thoroughly and pat dry for optimal flavor. If using homemade chickpeas, make sure they are tender and not overcooked.
– **Tomatoes:** Cherry tomatoes are ideal for a fresh, sweet taste, although canned diced tomatoes can be an alternative.
– **Cucumbers:** English or Persian cucumbers maintain their crunch and require minimal preparation. If using backyard cucumbers, peel and remove seeds to prevent a soggy salad.
– **Green Pepper:** Green bell pepper contributes a nice crunch. Red, yellow, or orange bell peppers may be used for a sweeter flavor.
– **Red Onion:** Imparts a sharp taste; finely chop to avoid overwhelming the salad. Soaking briefly in cold water can soften the flavor.
– **Avocado:** Optional, but adds a creamy texture. Best added just before serving or lightly combined with lemon juice to prevent browning.
The dressing is straightforward, highlighting the oil’s flavor. Opt for a mild extra-virgin olive oil for a subtle taste or a strong one for a peppery note. Avocado oil is a neutral substitute.
## How to Prepare Chickpea Salad
1. In a medium bowl, mix together tomatoes, cucumber, chickpeas, bell pepper, parsley, and red onion.
2. Incorporate olive oil, vinegar, cumin, salt, and pepper. Toss thoroughly to combine.
3. If using, chop the avocado into cubes and place in a small bowl. Drizzle juice from half a lemon over the avocado and gently mix. If avocado is not included, squeeze 1 to 2 tablespoons of lemon juice over the salad and toss.
4. Chill for at least one hour prior to serving.
### Preparation Tips
– **Cut Vegetables Evenly:** This ensures each bite has a balance of flavors and textures.
– **Prep Ahead of Time:** Add avocado just before serving for optimal texture.
– **Taste After Chilling:** Cold salads might need additional salt or a hint of lemon.
## Storing Leftovers
– **Refrigerate:** Store leftover chickpea salad in an airtight container in the fridge for up to 5 days. Keep avocado separate and add it just before serving to preserve its texture.
– **Serving:** Stir before serving as the dressing can settle. Revive leftovers with a splash of red wine vinegar, olive oil, or lemon juice.
– **Freezing:** Not advisable.
## What to Pair with Chickpea Salad
Chickpea Salad complements a wide array of dishes, making it a flexible addition to any meal. Relish it as a side dish, in a pita, or as a topping for grilled proteins.
Did you enjoy this Chickpea Salad Recipe? Leave a comment and rating below!
Read More
A Comprehensive Guide for Making Buldak Ramen at Home
# Are You a Fan of Spicy Cuisine? Make Homemade Buldak Ramen!
If spicy food excites you, buldak is probably among your top choices. This homemade buldak ramen is a fantastic way to relish the intense flavors of this beloved Korean dish right from your own kitchen.
## Reasons to Love This Recipe
– **Healthier and Less Processed**: Cooking it at home allows you to choose the ingredients.
– **Budget-Friendly**: If you have the majority of the ingredients at home, this recipe is more affordable than purchasing instant noodles.
– **Adjustable Spice Level**: You can modify the heat according to your taste.
– **Enhanced Flavor**: Homemade buldak ramen typically has a richer taste compared to its instant versions.
### Quick Overview
| Flavor Profile | Spicy |
|—————-|——-|
| Diet | [Vegetarian Recipes](https://iamafoodblog.com/category/recipes/diets/vegetarian-recipes/) |
| Storage | Keep refrigerated for up to 24 hours |
| Reheating | Use a microwave or a pot with a little chicken broth or water |
| Difficulty | Easy |
| Pair It With | [Marinated Eggs](https://iamafoodblog.com/marinated-eggs/) |
—
## What Exactly is Buldak?
Buldak, translating to “fire chicken,” is a spicy Korean dish featuring small chunks of chicken slathered in a hot sauce. The sauce usually consists of gochugaru (Korean chili flakes), gochujang (Korean chili paste), soy sauce, garlic, ginger, and sugar. This dish surged in popularity in the early 2000s, aided by buldak eateries and the emergence of Samyang’s buldak instant noodles.
## What is Buldak Ramen?
Buldak ramen, famous for its extreme spiciness, gained prominence through Samyang’s hot chicken flavor ramen, also referred to as buldak bokkeum myeon. Different from conventional instant ramen, which is broth-based, buldak ramen is a saucy noodle meal. After boiling the noodles, they are drained and mixed with the fiery buldak sauce, culminating in a dish that is both tasty and scorching.
## Steps to Prepare Buldak Ramen
1. **Prepare the Sauce**: In a mixing bowl, blend 1 tbsp gochujang, 1 tbsp gochugaru, 1 tbsp soy sauce, 2 tsp sugar, 1 tsp chicken bouillon powder, 1 clove minced garlic, and 1/4 tsp black pepper.
2. **Boil the Noodles**: Cook the noodles as per the package directions.
3. **Combine Noodles with Sauce**: After the noodles are done, place them directly into the bowl with the sauce. Toss until the noodles are thoroughly coated and shiny, adding a splash of noodle water if needed.
4. **Dig In**: Serve hot and savor your homemade buldak ramen!
—
## How Spicy is Buldak?
Buldak is recognized for its remarkable heat, which can differ based on individual spice tolerance. The homemade version gives you the power to manage the spice level while still enjoying the deep flavors.
## Is Buldak Ramen the Hottest Ramen?
The original buldak bokkeum myeon has a Scoville score of 4,404 units, but Samyang also has spicier varieties, including a mini version at 12,000 Scoville units and a 3x spicy version that surpasses 13,000 Scoville units.
## What Ingredients Make Buldak Sauce?
– **Gochugaru**: Korean chili flakes that contribute smokiness and heat.
– **Gochujang**: A thick, piquant paste that gives the main heat.
– **Soy Sauce**: Provides umami taste.
– **Sugar**: Offsets the spiciness with sweetness.
– **Garlic**: Fresh garlic amplifies the overall taste and adds heat.
## Gochujang vs. Gochugaru
– **Gochujang**: A fermented chili paste that is sweet, savory, and spicy.
– **Gochugaru**: Dried chili flakes that are fruity and smoky, offering a milder heat.
## What Type of Noodles for Buldak Ramen?
Though any noodles can work, instant ramen noodles are perfect for the Samyang-style buldak ramen. Brands like Nongshim Shin Ramyun feature thick, chewy noodles that suit the dish well. If instant noodles aren’t available, spaghetti or udon can serve as substitutes.
—
With this guide, you’re all set to whip up your very own spicy buldak ramen at home. Relish the heat and zest of this cherished Korean dish!
Read More

Crushed Olives Accompanied by Burrata Cheese
### Fried Bread with Creamy Burrata and Crushed Castelvetrano Olives
Fried bread garnished with torn creamy burrata and crushed Castelvetrano olives, blended with lemon, olive oil, and herbs, is an exceptional dish that functions perfectly as an appetizer, snack, or light lunch. This charming amalgamation is not just simple to make but also explodes with flavor, establishing it as a summer favorite.
#### Why You Should Try This Dish
The blend of textures and tastes in this dish is what renders it distinctly remarkable. The crunchy, golden fried bread offers a delightful crispness, while the creamy burrata contributes a rich, buttery touch. The crushed Castelvetrano olives, celebrated for their sweet and gentle flavor, are brightened up with lemon juice and fresh herbs, achieving a harmonious equilibrium.
This dish has turned into a weekly favorite for many, as it is adaptable enough to be relished at any time. Whether you’re entertaining guests or simply savoring a relaxed lunch, this recipe is bound to impress.
#### Ingredients
**For the Olives:**
– Castelvetrano olives
– Olive oil
– Lemon juice
– Lemon zest
– Fresh oregano leaves
– Black pepper
**For Serving:**
– Ciabatta or your preferred bread
– Burrata cheese
#### Instructions
1. **Crush the Olives:** Position the olives on a cutting board and smash them with the flat base of a glass until they are chunky and uneven.
2. **Combine Ingredients:** In a bowl, mix the crushed olives with olive oil, lemon juice, lemon zest, oregano leaves, and black pepper. Optionally, add salt to adjust to taste.
3. **Marinate (Optional):** For a deeper flavor, chill the olive mixture for 12-24 hours. This allows the flavors to meld excellently. If the oil solidifies, allow it to sit at room temperature or stir in some fresh olive oil to loosen it.
4. **Prepare the Bread:** Slice the bread into pieces and drizzle with olive oil. Air fry at 375°F for about 4 minutes or until golden brown. Alternatively, you can broil, pan-toast, or grill the bread.
5. **Prepare the Burrata:** Slice the burrata in half and gently pull it apart to reveal the creamy interior.
6. **Serve:** Position the burrata on the fried bread, spoon the olive mixture over the top, and top with fresh oregano leaves and cracked black pepper.
#### Serving Suggestions
This dish can be enjoyed as a standalone appetizer or combined with a light salad for a refreshing lunch. The mix of creamy, salty, and tangy flavors makes it a fantastic addition to any summer gathering.
#### Conclusion
Fried bread with creamy burrata and crushed Castelvetrano olives is an uncomplicated yet sophisticated dish that embodies the essence of summer dining. Its vibrant flavors and textures make it a favorite among gastronomes. Whether you’re relishing it at home or sharing it with loved ones, this recipe is certain to become a valued part of your cooking collection.
Read More
Crispy Parmesan Chicken Accompanied by Creamy Lemon Pasta
# Crispy Parmesan Chicken with Creamy Lemon Pasta
Crispy, golden parmesan chicken served on top of rich, creamy lemon pasta creates a wonderful blend of textures and flavors that is both comforting and satisfying. This dish is ideal for family gatherings, impressing visitors, or simply treating yourself to a tasty meal at home.
## The Dream Combination!
Whenever dinner feels repetitive, crispy chicken is my preferred solution. The whole family loves it, and this specific crispy chicken recipe has become a favorite. The key to its mouthwatering taste lies in the pairing of parmesan cheese with an unexpected ingredient: mayonnaise. This distinctive coating seals in flavor and moisture, delivering juicy, umami-packed chicken that is perfectly crispy.
### What Makes This Recipe Unique
The combination of the golden, crispy chicken with creamy, lemon-flavored pasta creates a delightful blend of tastes. Fresh basil and lemon zest enhance the dish, making it not only tasty but also visually striking. When paired with green beans or a fresh salad, this meal is sure to please everyone. Even the fussiest eaters will want to come back for more!
## Ingredients
### For the Crispy Parmesan Chicken:
– Chicken breasts
– Mayonnaise
– Grated parmesan cheese
– Panko breadcrumbs
– Italian seasoning
– Paprika
– Garlic powder
– Salt
– Avocado oil spray
### For the Creamy Lemon Pasta:
– Pasta of choice
– Butter
– Garlic
– Flour
– Cream
– Water
– Better than Bouillon (or chicken broth)
– Lemon zest
– Lemon juice
### For Garnish:
– Fresh basil
– Lemon wedges
## Instructions
1. **Prepare the Chicken:** Preheat the oven to 425°F (220°C) and line a baking sheet with parchment paper. Slice each chicken breast into thin, flat pieces for even cooking. Pat the chicken dry to eliminate excess moisture.
2. **Prepare Topping:** In a bowl, combine the parmesan, panko, Italian seasoning, paprika, garlic powder, and salt.
3. **Coat the Chicken:** Apply a thin layer of mayonnaise to each piece of chicken. Spoon the panko mixture over the chicken, pressing firmly to stick. Flip the chicken and do the same on the other side, then spray the top with avocado oil.
4. **Bake the Chicken:** Bake for 13-15 minutes until golden. Turn on the broiler for 1-2 minutes to crisp the opposite side, ensuring the chicken reaches an internal temperature of 165°F (74°C).
5. **Prepare the Lemon Sauce:** In a saucepan, melt butter over medium-low heat. Add garlic and sauté for 2-3 minutes. Incorporate flour and cook for another 2-3 minutes until bubbly.
6. **Complete Sauce:** Stir in cream, water, and Better than Bouillon. Simmer for about 10 minutes until thickened. Remove from the heat and mix in lemon zest and juice.
7. **Cook the Pasta:** Prepare pasta following package instructions, saving some pasta water. Mix the pasta with the sauce, adding reserved water as needed to achieve the desired consistency.
8. **Serve:** Cut the crispy chicken into strips and place over the creamy pasta. Garnish with fresh basil and extra parmesan crumbles if desired.
## Conclusion
This crispy parmesan chicken with creamy lemon pasta is more than just a meal; it’s an experience that brings happiness to the dining table. With its rich flavors and fulfilling textures, it’s a dish that will leave everyone wanting more. Share this culinary delight with your loved ones and see it become a regular favorite in your home!
Read More
Nutritious Morning-Friendly Delicate Peach Crisp Recipe
**Healthy Breakfast-Friendly Light Peach Crisp Recipe**
A tasty and nourishing breakfast can set the mood for the rest of your day. If you’re searching for a breakfast choice that’s both nutritious and fulfilling, think about trying a light peach crisp. This recipe merges the natural sweetness of peaches with wholesome ingredients to craft a dish that’s ideal for kicking off your morning on the right note.
**Ingredients:**
*For the Filling:*
– 4 cups of fresh peaches, peeled and sliced
– 1 tablespoon of lemon juice
– 1 tablespoon of honey or maple syrup
– 1 teaspoon of vanilla extract
– 1 teaspoon of cinnamon
– 1 tablespoon of cornstarch or arrowroot powder
*For the Topping:*
– 1 cup of rolled oats
– 1/4 cup of almond flour
– 1/4 cup of chopped nuts (such as almonds or walnuts)
– 2 tablespoons of coconut oil or unsalted butter, melted
– 2 tablespoons of honey or maple syrup
– 1/2 teaspoon of cinnamon
– A pinch of salt
**Instructions:**
1. **Preheat the Oven:** Preheat your oven to 350°F (175°C).
2. **Prepare the Filling:** In a large mixing bowl, mix the sliced peaches with lemon juice, honey or maple syrup, vanilla extract, cinnamon, and cornstarch. Toss all ingredients together until the peaches are thoroughly coated. Transfer the mixture to a baking dish.
3. **Make the Topping:** In another bowl, combine the rolled oats, almond flour, chopped nuts, melted coconut oil or butter, honey or maple syrup, cinnamon, and salt. Mix until the mixture becomes crumbly and homogenous.
4. **Assemble the Crisp:** Evenly distribute the oat topping over the peach filling in the baking dish.
5. **Bake:** Place the dish in the preheated oven and bake for approximately 30-35 minutes, or until the topping turns golden brown and the peaches start bubbling.
6. **Cool and Serve:** Let the peach crisp cool slightly before serving. This dish can be enjoyed warm or at room temperature.
**Serving Suggestions:**
– Serve with a dollop of Greek yogurt or a splash of almond milk for added creaminess.
– Top with a few fresh berries or a handful of granola for additional texture and flavor.
**Nutritional Benefits:**
This light peach crisp is not only delicious but also rich in nutrients. Peaches offer vitamins A and C, while oats and nuts provide fiber and healthy fats. By utilizing natural sweeteners like honey or maple syrup, this recipe minimizes added sugars, making it a healthier option for breakfast.
Savor this healthy breakfast-friendly light peach crisp as a delightful beginning to your day or as a nutritious snack at any time.
Read More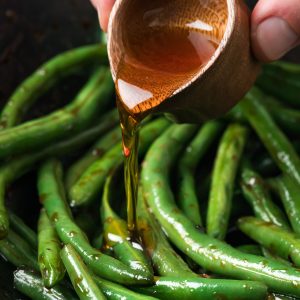
Nutritional Advantages and Culinary Applications of Chinese Green Beans
**Discovering Worldwide Tastes: The Wanderlust Kitchen**
Welcome to The Wanderlust Kitchen, a lively environment where culinary adventures intertwine with travel experiences. Here, we honor the diverse fabric of international cuisine, presenting recipes that celebrate traditional food heritage while incorporating contemporary cooking methods and ingredients.
### A Culinary Adventure
At The Wanderlust Kitchen, our goal is to motivate culinary explorers to venture beyond their usual parameters. Each recipe serves as a ticket to a new culture, enabling you to savor the world through your palate. Whether you’re crafting a timeless dish from Italy, a fiery curry from India, or a refreshing ceviche from Peru, you’ll discover genuine flavors that narrate a tale.
### Tradition Meets Creativity
The recipes highlighted in The Wanderlust Kitchen are thoughtfully selected to represent both tradition and creativity. Age-old recipes are often handed down through generations, holding the spirit of their origins. Nevertheless, contemporary techniques and ingredients can elevate these meals, making them engaging and approachable for today’s home chefs.
### Invitation to Experiment
Linda encourages you to take risks in the kitchen. Experimenting with a new recipe can be a joyful experience, unlocking new tastes and cooking styles. Each dish presents an opportunity to journey to locations you’ve yet to explore, broadening your culinary knowledge and deepening your appreciation of global traditions.
### Enjoy Your Meal! Enjoy Your Travels!
As you embark on this culinary adventure, keep in mind that cooking encompasses more than just the food; it’s about the experiences and memories built along the way. So, gather your supplies, roll up your sleeves, and prepare to traverse the globe from the comfort of your kitchen. Enjoy your meal! Enjoy your travels!
Read More
Tasty Traditional Stuffed Peppers Recipe
### Stuffed Peppers: A Flavorful All-in-One Meal
Stuffed Peppers offer a tasty and simple meal choice that unites vibrant bell peppers with a mouthwatering mixture of beef, sausage, and marinara sauce. This dish is both aesthetically pleasing and remarkably convenient, making it an ideal option for hectic evenings. Able to be prepared in advance and frozen, stuffed peppers are a flexible component of any meal regimen.
#### Holly’s Recipe Highlights: Stuffed Peppers
– **Flavor**: Each morsel is a luscious fusion of seasoned meat, fluffy rice, sweet bell peppers, and zesty marinara sauce, resulting in a comforting and fulfilling meal.
– **Why Make It**: Cooking the rice directly in the tomato concoction allows it to soak up all the delightful flavors, guaranteeing a moist and tasty filling.
– **Serving Suggestions**: While these peppers stand alone as a complete meal, they complement a crunchy green salad and warm garlic bread beautifully, which is ideal for soaking up any leftover marinara sauce.
**Total Time**: 1 Hour 20 Minutes
**Servings**: 6
**Cooking Method**: Oven Baked
### Ingredient Notes
– **Bell Peppers**: Any variety can be utilized. Green peppers provide a sharper taste, whereas red, yellow, and orange peppers are on the sweeter side.
– **Meat**: A mix of lean ground beef and Italian sausage creates a robust filling. Select mild, sweet, or spicy sausage according to your taste, and make sure to drain excess fat after browning.
– **Long Grain White Rice**: Uncooked rice cooks in the tomato blend, absorbing the flavors. If cooked rice is used, omit the water and warm the filling just until combined.
– **Marinara Sauce**: Opt for a marinara sauce you favor, as it greatly influences the dish’s flavor. Sample the filling before adding additional salt, as sauces differ in salt content.
### Tips for Ideal Stuffed Peppers
– **For Softer Peppers**: Boil or air fry the peppers before filling them. For a tender-crisp outcome, you can skip this step.
– **Drain the Peppers**: Be sure they are well-drained after boiling to prevent a soggy dish.
– **Taste the Filling**: Always taste the filling prior to stuffing to modify seasoning as required.
– **Do Not Pack Tightly**: Lightly press the filling into the peppers, avoiding packing it too tightly.
– **Spoon the Sauce**: Before layering cheese, spoon sauce from the bottom of the dish over the peppers for extra moisture and flavor.
### Save Every Stuffed Pepper
– **Leftovers**: Keep in an airtight container in the fridge for up to 4 days.
– **Reheating**: Reheat in the microwave loosely covered or in the oven at 350°F with a bit of marinara or water, covered with foil.
– **To Freeze**: Assemble the peppers without baking, allow the filling to cool completely, cover tightly, and freeze. Thaw overnight in the fridge before baking, adding about 15 minutes if necessary.
### More Stuffed Pepper Favorites
Stuffed Peppers aren’t simply a dish; they offer a platform for creativity in the kitchen. Feel free to try various fillings, spices, and sauces to personalize this recipe.
Did you enjoy this Stuffed Peppers Recipe? Share a comment and rating below!
Read More
Sidecar: A Summary of Its Features and Applications
### The Sidecar Cocktail: An Enduring Classic
The Sidecar cocktail is a timeless beverage that has persevered through the ages, enchanting drink aficionados since its emergence in the early 20th century. With its fascinating background and delightful taste profile, the Sidecar continues to be a favored selection among both experienced mixologists and casual drinkers.
#### Origins of the Sidecar
The beginnings of the Sidecar are cloaked in intrigue, with multiple anecdotes contending for the distinction of its origin. One of the most entertaining stories features an American army captain during World War I who visited bars in Paris, arriving in a motorcycle sidecar. This captain, a familiar face at either the Hôtel Ritz Paris or Harry’s New York Bar, would request a blend of cognac, orange liqueur, and lemon juice. Bartenders eventually named the drink after his distinctive means of transportation.
Another hypothesis posits that bartenders would pour leftover cocktail shaker contents into a second glass, calling it the “sidecar.” Though the precise origin might be a matter of discussion, the Sidecar’s delightful flavor is cherished everywhere.
#### Flavor Profile
The Sidecar is frequently regarded as the French equivalent of the margarita. It exhibits a harmonious blend of tastes: the potency of cognac, the zest of lemon juice, and the sweetness of orange liqueur. This fusion results in a cocktail that is both invigorating and strong. Typically, the Sidecar is garnished with a sugared rim, enhancing its visual attractiveness, though some might consider it superfluous given the drink’s natural sweetness.
#### Recipe for a Classic Sidecar
To craft your own Sidecar, adhere to this straightforward recipe:
**Ingredients:**
– 1 ounce (30 ml) lemon juice, plus an additional wedge for a sugared rim
– Raw or turbinado sugar (for the rim, optional)
– 3 ounces (90 ml) cognac or brandy
– 1 1/2 ounces (45 ml) Cointreau or triple sec
**Instructions:**
1. If you opt to sugar the rim, swipe a wedge of lemon around the edge of your glass and roll it in raw sugar.
2. In a cocktail shaker or jar, mix the cognac, Cointreau, and lemon juice with ice. Shake until the blend is thoroughly chilled.
3. Strain the cocktail into your prepared glass and savor it.
#### Conclusion
The Sidecar cocktail exemplifies the lasting allure of classic beverages. Its rich background, along with a balanced and refreshing flavor profile, renders it a must-experience for anyone keen on traversing the cocktail realm. Whether you relish it in a charming bar or concoct it at home, the Sidecar is bound to leave a lasting impression. Cheers!
Read More