
Over the last decade I’ve made my share of peanut butter cups, carefully distributing the muffin liners, pouring chocolate and measuring peanut butter into individual cups, and freezing or chilling between each layer. They have always been worth the effort required to make them and are a treat I come back to multiple times a year. But when I came across these Reddit-famous lunch lady peanut butter bars, I realized there was a much easier (and better) way to get my PB chocolate fix. These no-bake bars deliver on every level.
Get the recipe: Lunch Lady Peanut Butter Bars
How To Make the Lunch Lady Peanut Butter Bars
First, line a 9- x 13-inch pan with parchment paper with a bit of overhang. This is crucial for getting your bars out of your baking dish intact later.
Next, melt half a cup of butter (I tossed mine in the microwave) and add it to a large bowl. Once that’s ready, mix in half a cup of brown sugar, two and a half cups of powdered sugar, two cups of creamy peanut butter (I used natural), and one and a half teaspoons of vanilla. I used a hand mixer for this, but you can do it with a sturdy arm and a wooden spoon. It’ll come together like a thick peanut butter cookie dough, and you’re going to want to taste it at this stage. (No judgment!)
Press this mixture into your lined pan, making sure it’s even and smooth on top. In the same microwave-safe bowl you used to melt the butter, add one cup of semi-sweet chocolate chips and another quarter cup of butter. Melt the remaining butter and chocolate chips in 30-second increments in the microwave, stirring in between, until it’s smooth and glossy. Pour that luscious chocolate over the peanut butter layer, spread it evenly, and pop the whole thing in the fridge to chill for at least an hour. Once it cooled a bit, I added some Maldon salt. That’s it! The hardest part is waiting for them to set.
My Honest Review
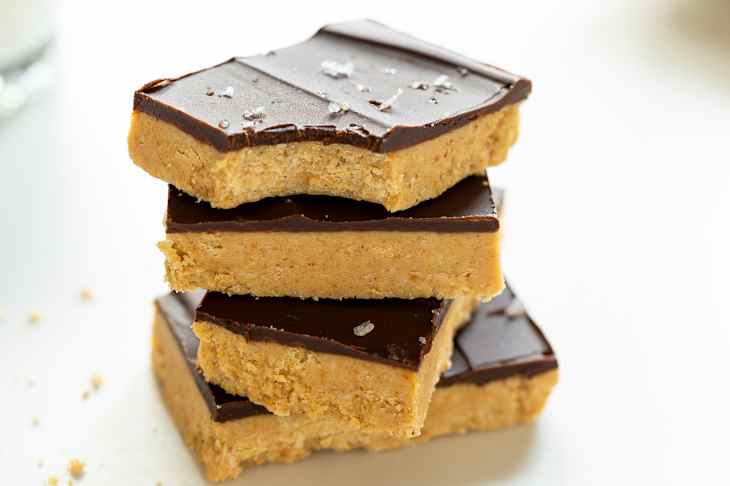
The Reddit hype is real. These bars are the perfect balance between sweet and salty, with a lush, rich, craveable texture. When you bite into them, you get a creamy chocolate top with just enough firmness in the peanut butter base to give you that “snap” when you break into it. Every bite feels like the best parts of a Reese’s cup but in a satisfyingly thick bar form. After my daughter took her first bite, she even said, “These taste just like Reese’s!”
The best part for me is that this recipe is so much easier than making individual peanut butter cups. I couldn’t believe I hadn’t discovered it (or thought of it myself) years ago. I threw them together in about 10 minutes, using pantry staples, and didn’t break a sweat — unless you count trying to avoid licking the spoon!
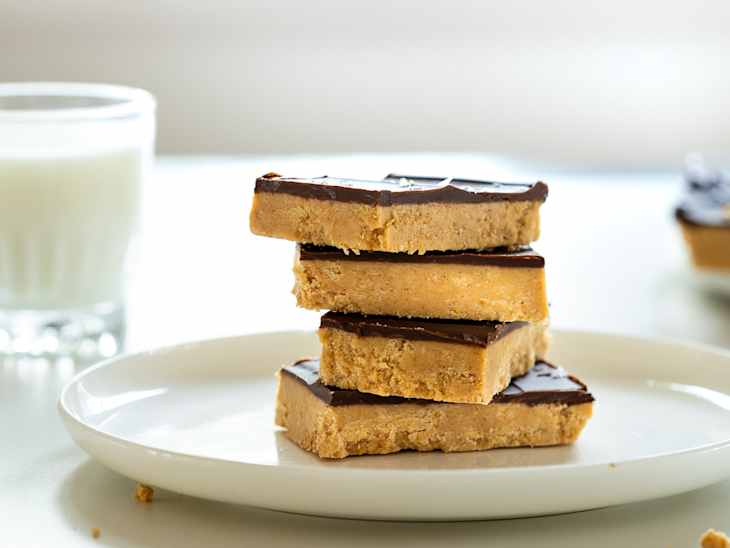
Making them in a 9- by 13-inch pan also produces 20 to 40 bars, depending on how big you cut them. And they’re so rich that a little goes a long way. So you really do get more bang for your buck when it comes to effort. Extras also freeze well and thaw quickly, but taste great straight from the freezer, too!
Tips for Making the Lunch Lady Peanut Butter Bars
- Use a scale. If you don’t already have one, this is your sign to buy one. It’s much more accurate when it comes to baking, but the biggest selling feature for most home bakers is that it will save you countless hours of cleaning up! Make this recipe once with the measuring cups, but weigh your quantities on a scale as you’re adding them to the bowl (don’t forget to tare in between). Take notes, and you’ll never have to clean peanut butter out of a measuring cup again! And your bars will be much quicker to make.
- Use salted butter. That bit of salt is key to bringing out the flavors of everything and balancing the hefty hand of sugar in the mix.
- Smooth it out. When pressing the peanut butter mixture into the pan, use a piece of parchment paper and a glass, or a firm offset spatula to smooth the surface. It’ll make your chocolate layer sit evenly and look professional, too.
- Sprinkle it with flaky salt. That extra simple touch takes them from an A to an A+ dessert. And they look prettier this way! Alternatively, sprinkle with chopped salted peanuts for some texture and contrast.
- Cut clean bars. Once your bars have chilled and the chocolate is firm, take them out of the fridge and let them sit at room temperature for a few minutes before slicing. This softens the chocolate just enough to avoid cracking when you cut through. Bonus: run your knife under warm water and dry it before slicing for extra clean lines.