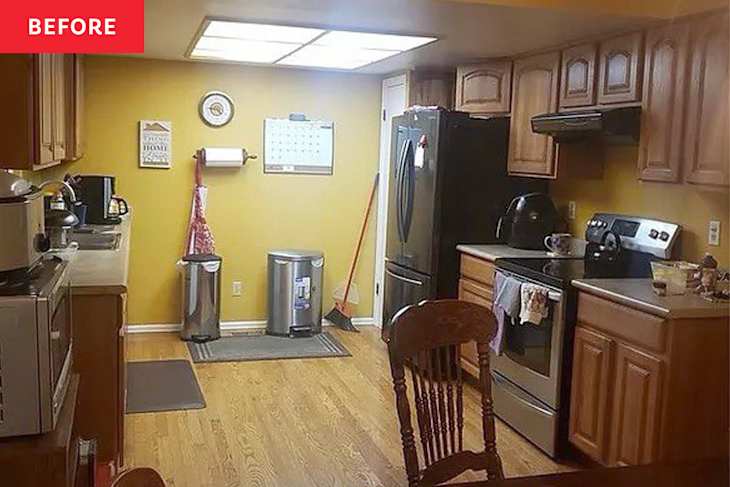
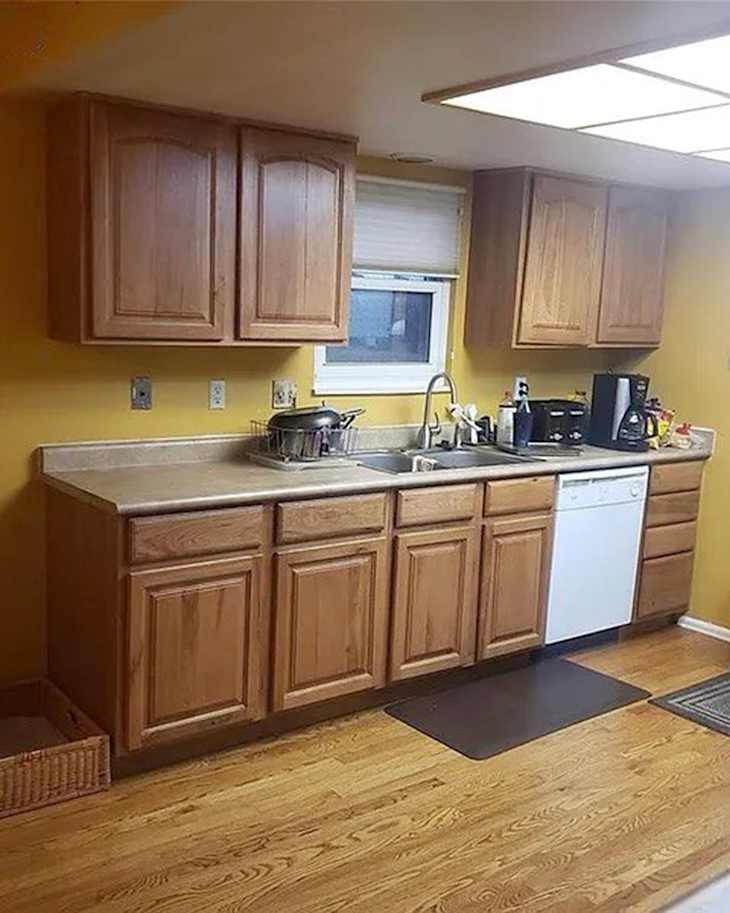
Households with large families or multigenerational homes can be busy and bustling — especially in the kitchen. Homeowner Susan Rincon (@ladyliphe) shares her house with her husband, three kids ages 8 to 14, and her 70-year-old mother.
“We’re a family that cooks, and since the kitchen is truly the heart of our home, I wanted to love the space where I spend most of my time and where we all gather,” Susan says. “The original layout just didn’t work. There was too much wasted space, not enough counter space, and a tiny pantry that could never hold what a family of six needs.” The kitchen got a smart renovation.
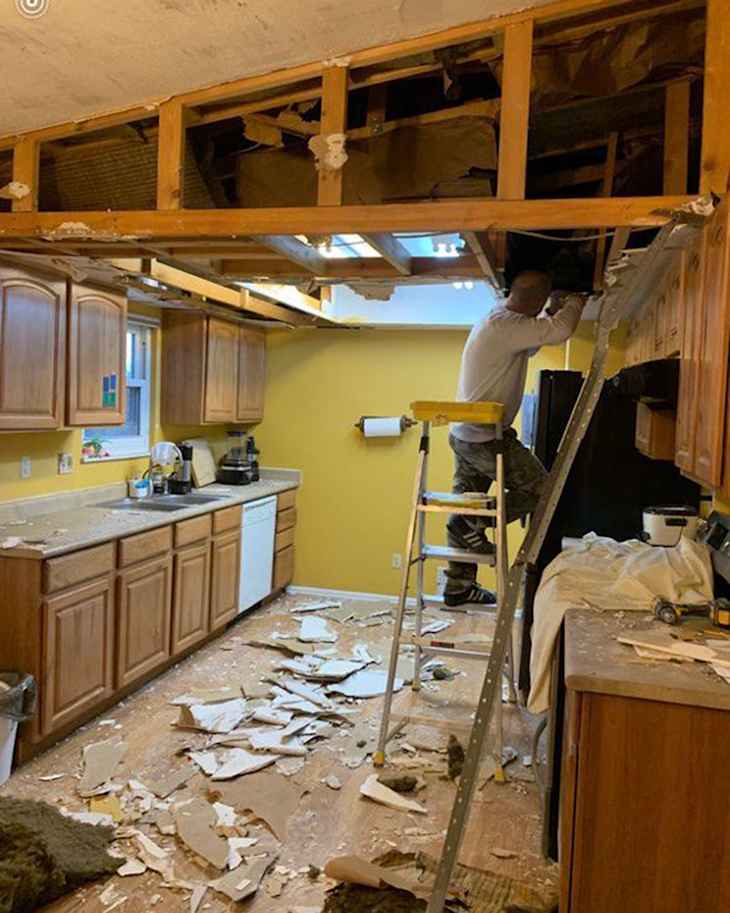
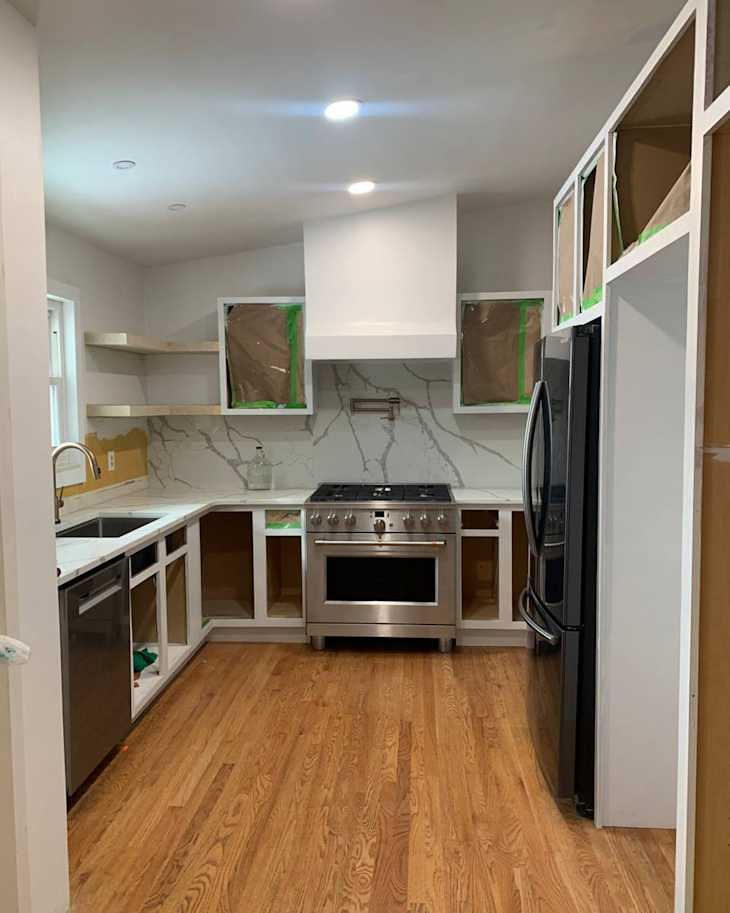
A demo made the layout work harder — and the space feel larger.
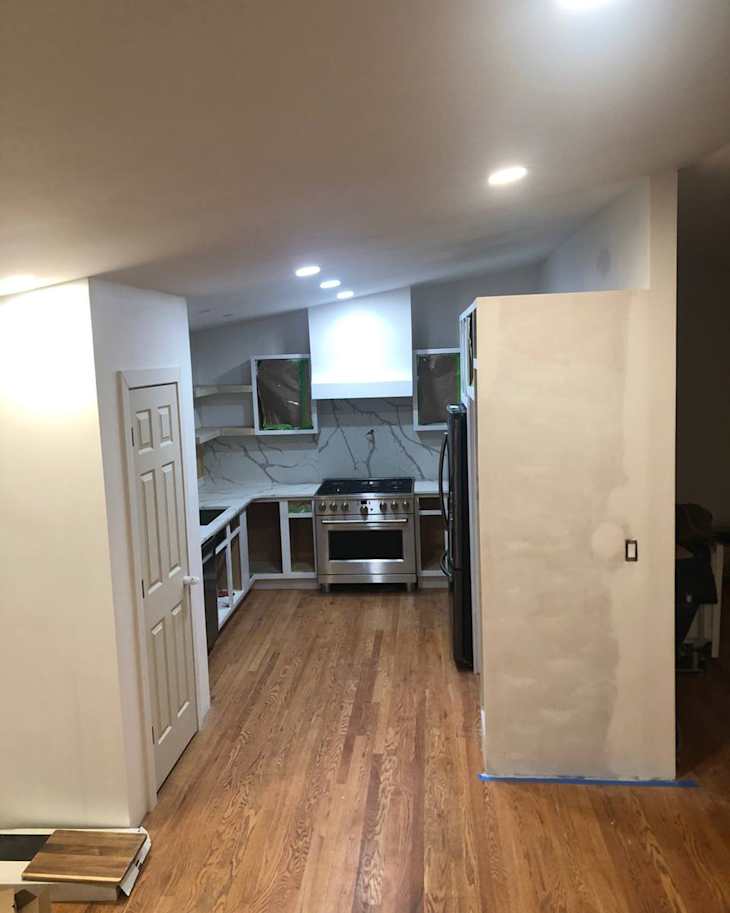
“I learned so much doing this project!” Susan says. Much of it was done by Susan and her husband, Andrew — like the demo, cabinet installation and building, shelving, painting, and lighting — and the backsplash and countertops were professionally installed.
The homeowners relocated the range to the back wall and added more countertops and counters there, plus a statement hood. They also added a washer and dryer to the kitchen.
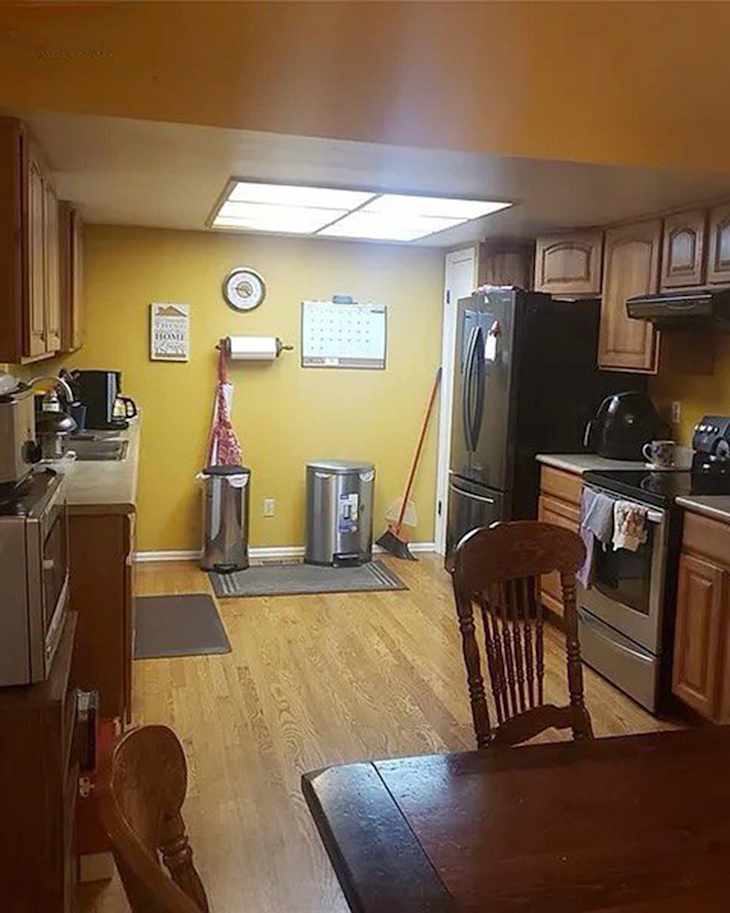
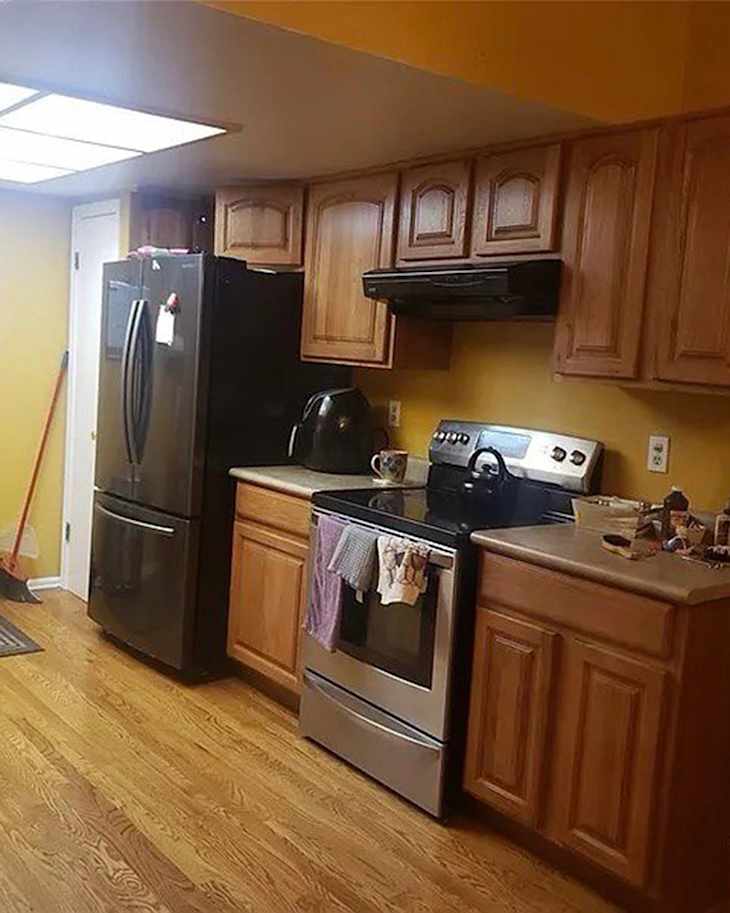
“Before, the kitchen was a dated galley style with a tiny pantry and mustard yellow walls,” Susan says. “A large soffit dominated the space.” (Not to mention, the single fluorescent ceiling light made it hard to see while cooking.) The renovation involved removing the soffit thus making the space feel bigger and brighter, adding can lighting, building a new pantry, and refinishing the floors.
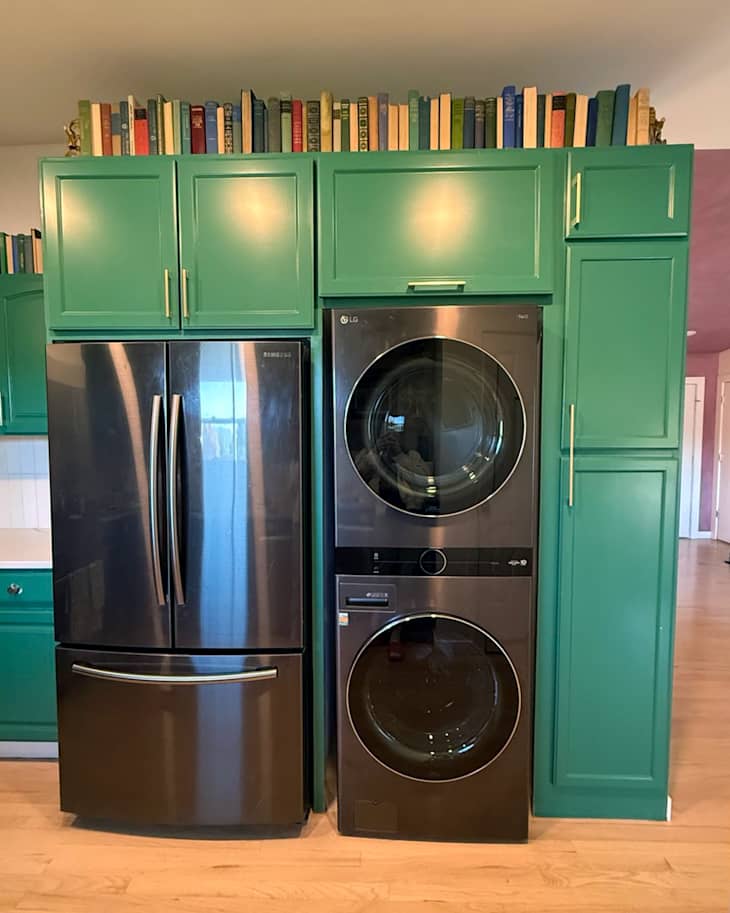
Some of the cabinets are custom-made; some are secondhand matches.
Susan says she learned time-saving tricks in the reno — like prepping and sourcing her materials before beginning — and she also learned budgeting tricks “like reusing cabinets, hunting for matching pieces on Facebook Marketplace, and selling what I didn’t use,” she says.
She searched for months for an exact match for her old cathedral-style cabinetry on Facebook Marketplace for $500, and she also built the cabinetry around the washer and dryer herself “since no stock cabinet was wide enough.” Susan also installed the open shelving herself.
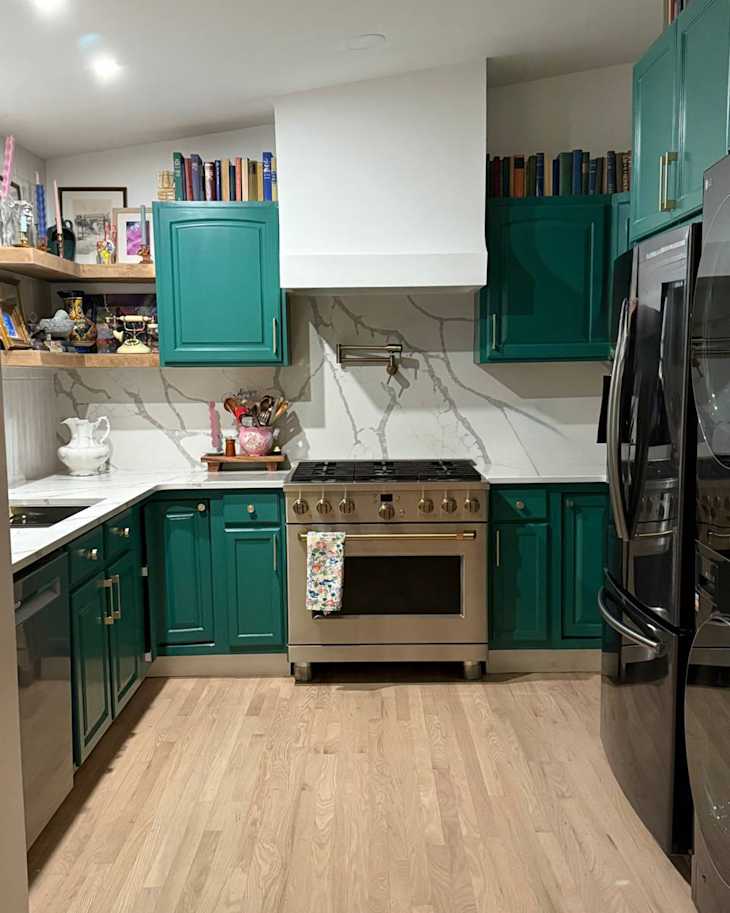
The old cabinetry got a bright green paint makeover for about $300.
Painting the cabinets was the part of the kitchen renovation that Susan was dreading the most, but it had a big payoff. “I wanted a perfectly smooth finish,” she explains.
To prep, she gave the cabinets a thorough sanding and filled uneven spots Bondo filler to ensure an even surface. “In the end, the cabinets turned out beautifully,” she says. “The thick, forgiving paint made the process much easier than I expected.” She used a deep green (Magnolia Home’s Aspen Leaf) paint.
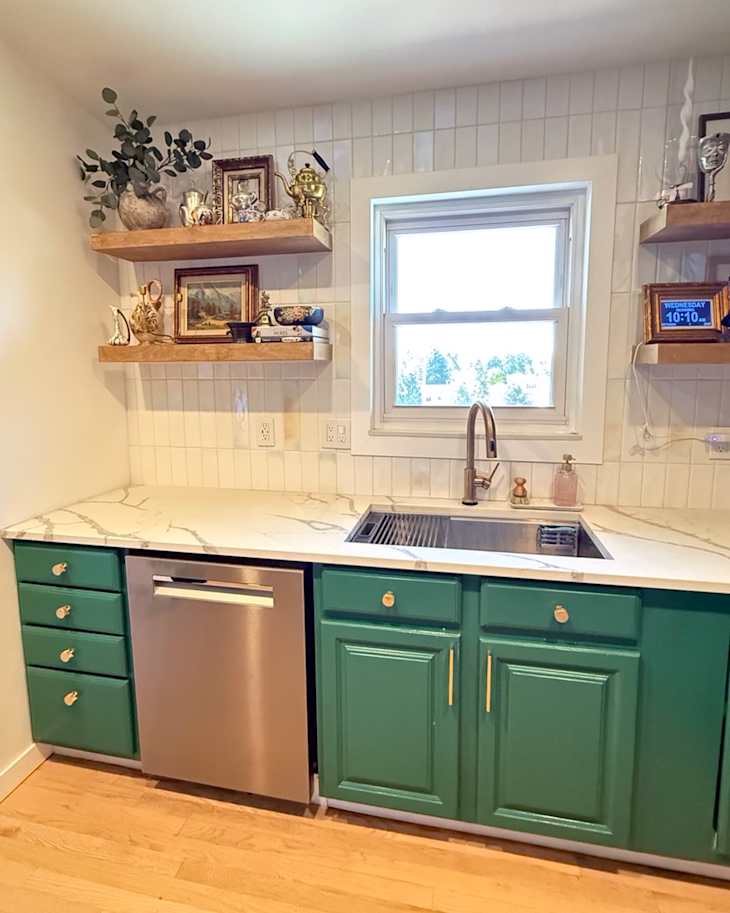
The kitchen is 100% more functional.
Not only does Susan love the way the “after” looks, but she loves the way it functions, too. “The functionality is incredible because I finally have ample counter space and can cook multiple meals at the same time on my new stove,” she says. “The hood extractor keeps the whole house from smelling like food. But what I’m most proud of is that I did nearly everything myself.”
Her advice to DIYers is to take pride in the learning process and the final result. “Don’t be afraid to make mistakes; every challenge is a learning opportunity,” she says. “Most importantly, enjoy the process, there’s nothing more rewarding than seeing a space transform through your own effort.”