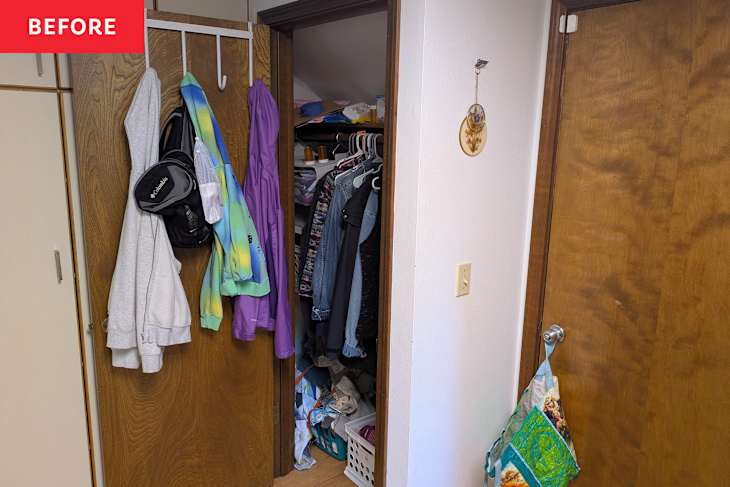
Most of the time, I come into the house through the garage, right into the kitchen. That means backpacks, coats, and random odds-and-ends get dropped on the floor and forgotten, no matter how often I gently remind the kids. When my trusty towel bar finally snapped under the weight of a now-middle-schooler’s gear, I knew it was time to rethink the whole system.
I asked pro organizer Jean Prominski of Sparkle Home Organizing to help me reimagine our chaotic kitchen closet — a cramped space under the stairs filled with coats, offseason gear, and other miscellaneous things. Here’s how we turned it into a functional drop zone that actually works for our family.
Step 1: Empty It All Out
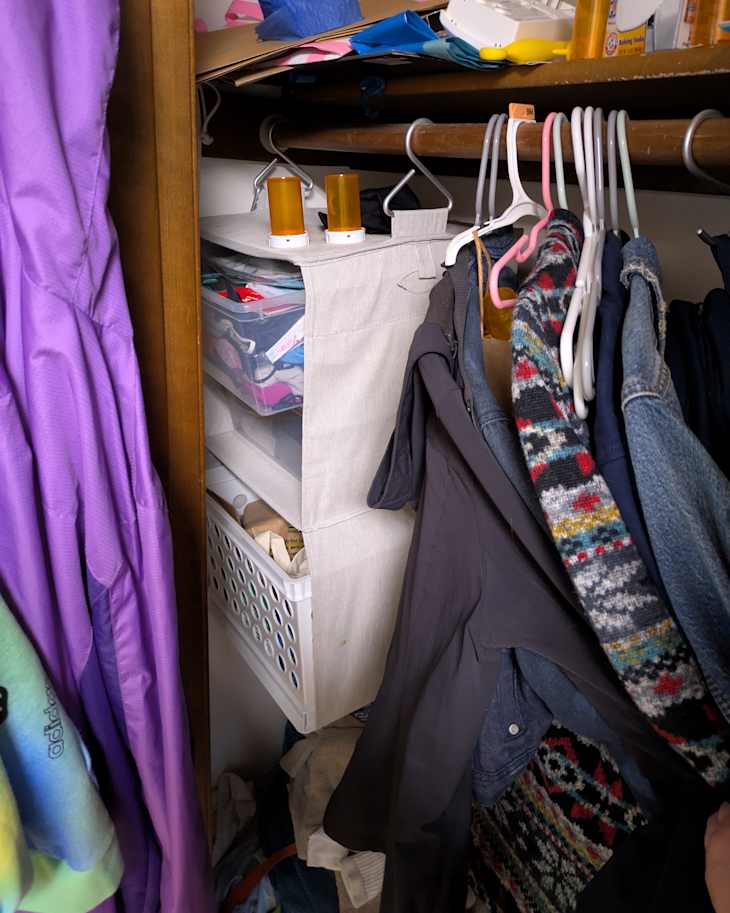
I dreaded this part, but everything had to come out. Once I removed a sweater rack that had been holding masks and shopping bags, I could see how much space I was wasting. The masks moved to a different closet since we no longer need them daily, out-of-season coats went to the front-hall closet, and I recycled old prescription bottles through Ridwell and tossed what I didn’t need. Clearing the top shelf alone made the closet feel instantly larger and easier to use.
Step 2: Plan the Space You Actually Need
Prominski and I debated adding shelving. I measured, compared options, and realized new shelves would either require a shorter trash can or moving the trash can elsewhere. Instead of buying more storage right away, I used bins I already owned to corral smaller categories — soon to be filled with winter hats, gloves, and flashlights. That helped me figure out what really had to live in this closet and what could move elsewhere.
Step 3: Shop Your Own House First
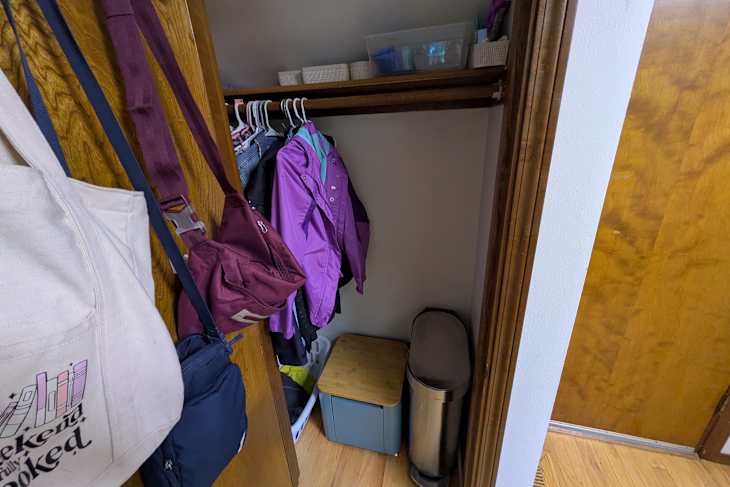
Once the essentials — coats, hamper, and trash can — were back in place, I skipped the shelves entirely and brought in a storage bench that had been languishing in the garage under my kayak. Reusable bags now go inside the bench instead of hanging on the door, the front tilt bin in the bench holds my house shoes, and I removed the old recycling bin (now I open the garage door to toss items straight into the outdoor bin).
Step 4: Create a Kid-Friendly Drop Zone
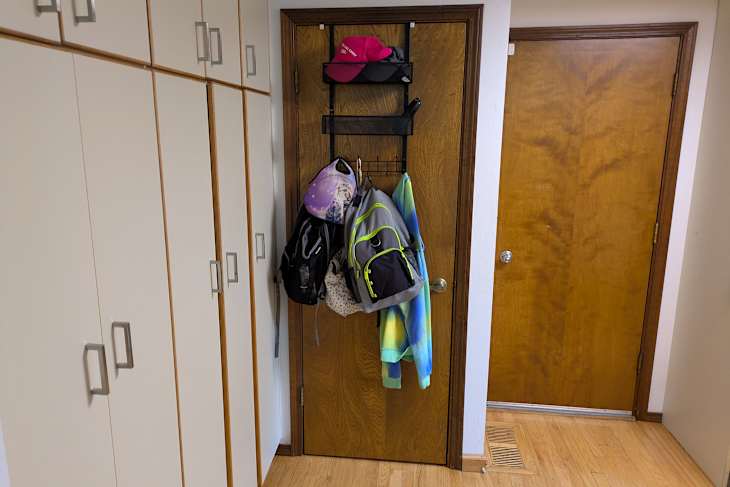
For backpacks and lunch bags, I tested a few over-the-door hook systems on the garage door, but none fit well. I ended up keeping the original coat hooks inside the closet and added an over-the-door organizer on the outside for school gear. “I have a feeling the kids are going to be more compliant with it than having to open the closet door to put them away inside,” Prominski says — and so far, she’s right. The bins on top of the organizer now hold school papers, sunglasses, hats, and other grab-and-go items.
The space isn’t perfect (yet), but it’s far more streamlined, functional, and kid-friendly than before. What started as a simple closet clean-out turned into a small-scale reflow of our entire entry zone. It’s already paying off every time we walk in the door.
This post originally appeared on Apartment Therapy. See it there: I Showed a Pro Organizer My Cramped Kitchen Closet, and Now It Feels Spacious