When it comes to grilling meat, it’s hard to beat boneless, skinless chicken thighs. The nature of the cut makes it quick-cooking, and the richness of the meat makes it less prone to the overcooking that’s common for its leaner white-meat counterpart.
That said, which approach is best for flavoring those boneless, skinless thighs? Is it ideal to marinate for hours, or does a quick dry rub do the trick in much less time? What about wet brining — and now that we’re on brining, how about dry brining? I put all of these methods (and more) to the test to find out which ones make the most impact toward juicy, flavorful meat. Read on to learn more.
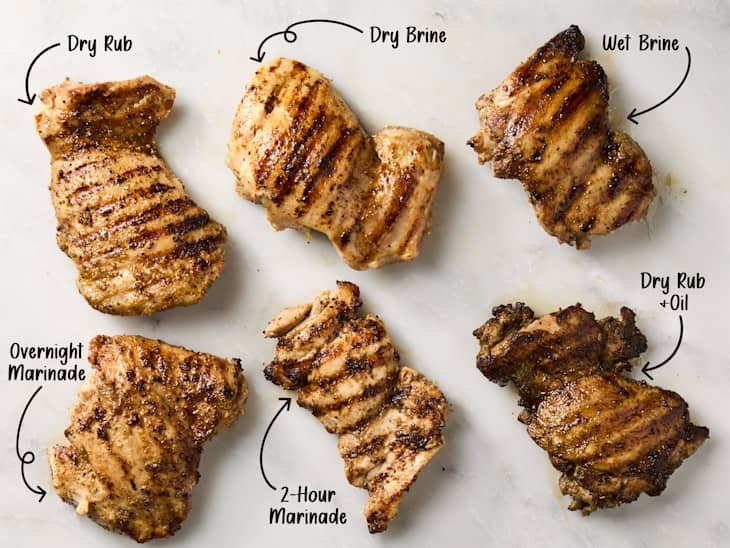
So, What’s the Best Method for Grilling Chicken Thighs?
You don’t need to plan ahead for juicy, delicious, fight-over-the-last-piece grilled chicken thighs. A simple dry rub combined with a little oil delivers stellar results.
A Few Notes on Methodology
The testing: I tested the six grilled chicken methods in two separate batches. I tested the three overnight methods in one batch; I grilled them at the same time and tasting them side-by-side. I followed up the next day with the remaining three methods. I used 1 pound of boneless, skinless chicken thighs with each method (and tried bites from each individual thigh).
The ingredients: The chicken came from Costco, and I opted for conventional (not organic) chicken. Each method I tested relies on the same base seasonings: kosher salt, black pepper, and poultry seasoning. Depending on the method, water, oil, or apple cider vinegar might be added to these seasonings. I specify the exact flavorings in the description of each method.
The grilling method: I followed the same process to cook each batch. I heated an outdoor gas grill to medium-high (450°F to 500°F). I then placed the chicken on an oiled grill rack, covered the grill, and cooked until well-marked, 4 to 5 minutes. I then flipped the chicken over, closed the lid, and grilled until well-marked and cooked to an internal temperature of at least 165°F, roughly 3 to 5 minutes more.
My ratings: I rated these methods on a scale of 1 to 10, with 10 reserved for absolute perfection. The main criteria for these ratings were flavor and texture, with minor consideration paid to ease or difficulty of the method.
Method #1: 2-Hour Marinade
- Rating: 6/10
About this method: For this test, I placed the chicken thighs in a zip-top bag with 1/4 cup olive oil, 1 tablespoon apple cider vinegar, 1 tablespoon poultry seasoning, and 1/4 teaspoon each kosher salt and black pepper. I marinated this mixture in the fridge for 2 hours. Before placing the chicken on the grill, I removed it from the marinade, allowing the excess to drip off. Then I grilled it per the method explained above in the methodology notes.
Results: The grill flared up a lot when I placed this chicken on the grill rack — no doubt because of the oil clinging to the meat. Despite the flare-ups, the chicken didn’t pick up as much robust char-grilled flavor as I would have expected or liked. The texture of the chicken was slightly wet and mushy — not appealing at all. And the flavor was rather bland. There’s barely any salt in the marinade, so I sprinkled a little on as a finish — but the flavor was still very subtle, with none of the herby goodness of the marinade having absorbed into the meat.
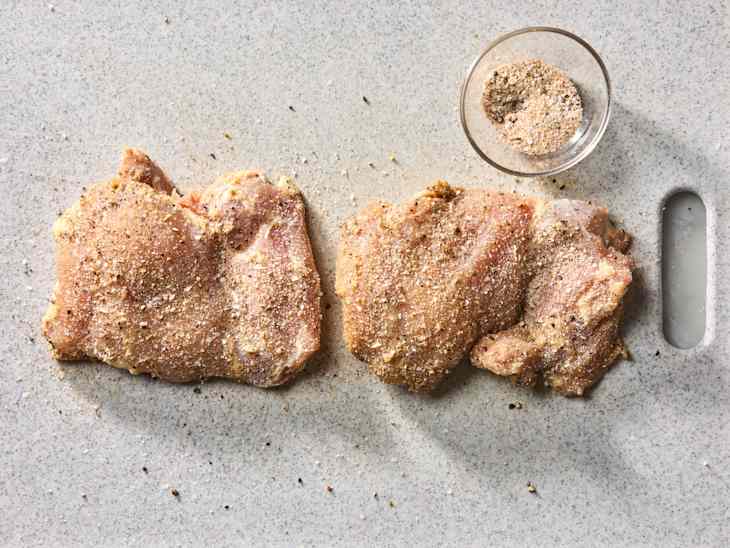
Method #2: Dry Rub
- Rating: 6.5/10
About this method: To test this method, I began by making a big batch of dry rub with 1/4 cup kosher salt, 2 tablespoons black pepper, and 2 tablespoons poultry seasoning. I then rubbed 1 tablespoon of this mixture onto the chicken, coating all sides. I did not add any oil to the chicken before grilling — I just placed the seasoned meat onto the grill rack and proceeded with the cooking method explained above.
Results: The cooked chicken had a wonderful crust (or “bark,” in barbecue parlance) on its exterior. The meat really wanted to stick to the oiled grill rack; I had to slide a thin metal fish spatula under it to release the chicken from the rack. The flavor was concentrated on the exterior, and a little salty, while the interior was unseasoned. So if you ended up with a bite that had no bark on it, that bite was very bland. The meat was a little dried-out, too.
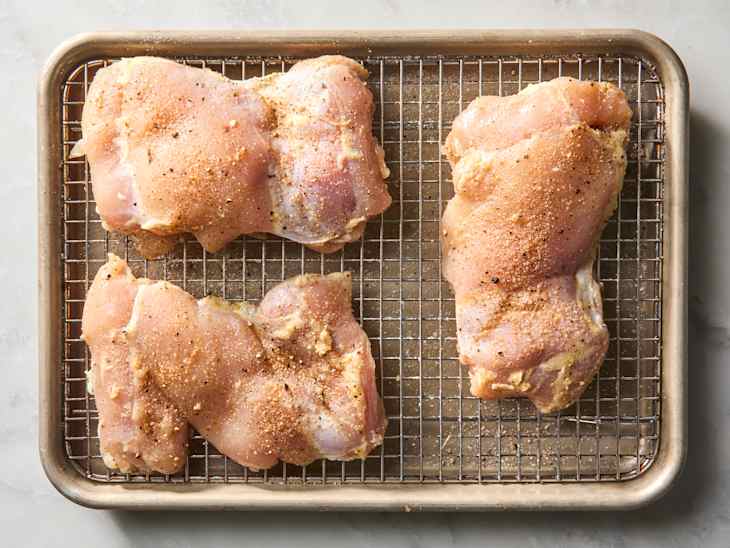
Method #3: Dry Brine
- Rating: 7/10
About this method: For this method, I seasoned the chicken on all sides with a mixture of 1 teaspoon kosher salt and 1 teaspoon poultry seasoning. I then arranged the chicken, spaced apart, on a wire rack set into a rimmed baking sheet and refrigerated, uncovered, overnight (I went 16 hours) before grilling per the instructions detailed above.
Results: I was curious about this method, which I’ve used for skin-on chicken and turkey but never skinless. When I pulled the baking sheet out of the fridge, I observed that the meat looked dry, shriveled, and slightly jerky-like. The meat stuck to the oiled grill rack, and I had to use that thin metal fish spatula again to coax it off the rack. The flavor was concentrated and salty-herby, and it penetrated throughout the meat (not just the exterior). The chicken had a great crust on its exterior, which was tasty, but the texture of the chicken seemed compressed and ham-like. It wasn’t dry, exactly — just a little chewy.
Method #4: Overnight Marinade
- Rating: 8/10
About this method: With this test, I used the same marinade described above for the 2-hour marinade method. The difference with this test is that I kept the chicken in the marinade overnight, going for 16 hours before removing from the bag and grilling.
Results: As with the 2-hour marinated chicken, I got lots of flare-ups when I placed this chicken on the grill. Unlike with the 2-hour marinated meat, though, this chicken ended up with a decent bit of robust char flavor and a nicely balanced herby-spiced essence that permeated into the meat. Surprisingly, even though this chicken looked juicy, with a wet sheen on its exterior, the meat seemed a bit dry.
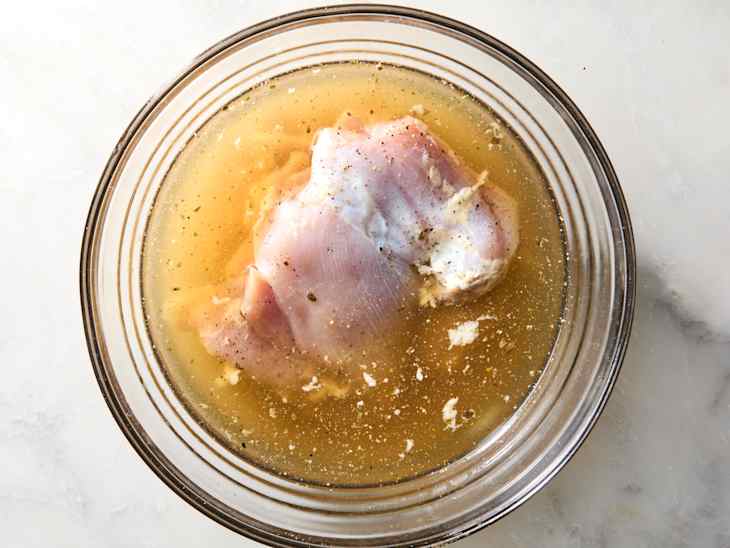
Method #5: Wet Brined
- Rating: 9/10
About this method: This test began by making a brining solution of 1/4 cup kosher salt and 2 tablespoons poultry seasoning mixed into 1 quart of water, stirring until the salt dissolved. I added the chicken to this liquid, refrigerated it overnight (I went for 16 hours), then removed it from the brine and patted it dry before grilling per the specified method.
Results: This chicken didn’t pick up grill marks that were as dark and defined as the other methods, and as a result it didn’t have as much char-grilled flavor. Despite that, it was fantastically moist and juicy — the juiciest of all the methods. The chicken was thoroughly flavored throughout, not just on the surface. The meat seemed just barely too salty, though, and I wished for a little more charred flavor. But the overall results of this method were delicious.
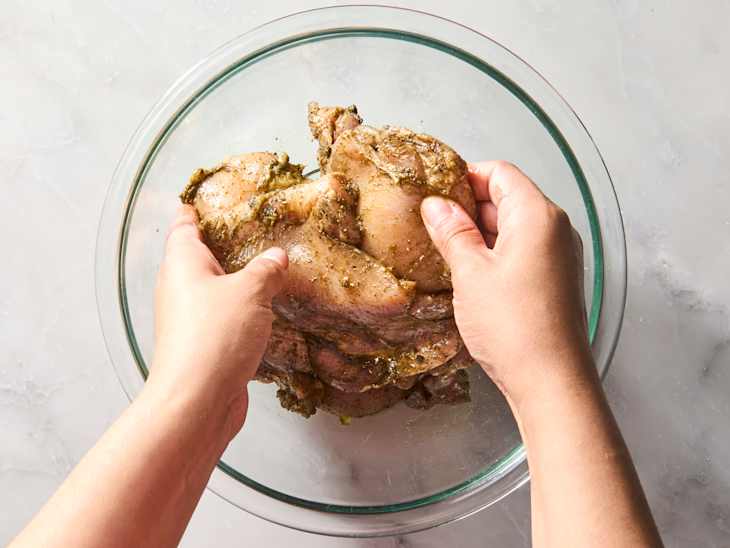
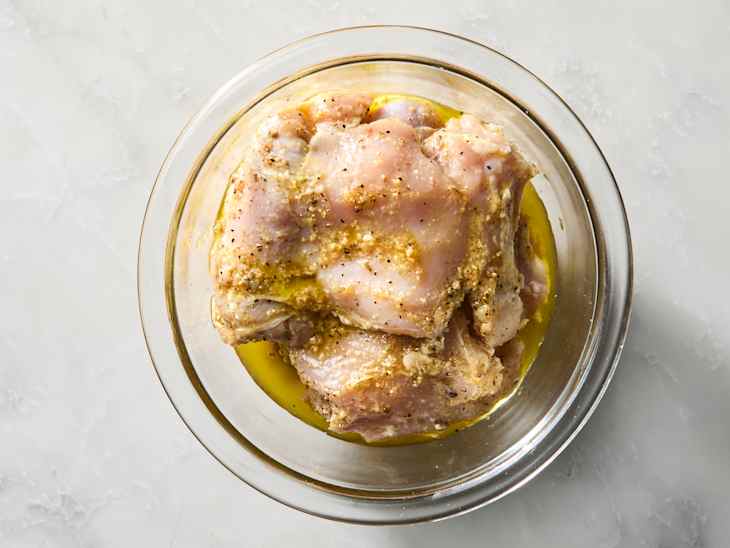
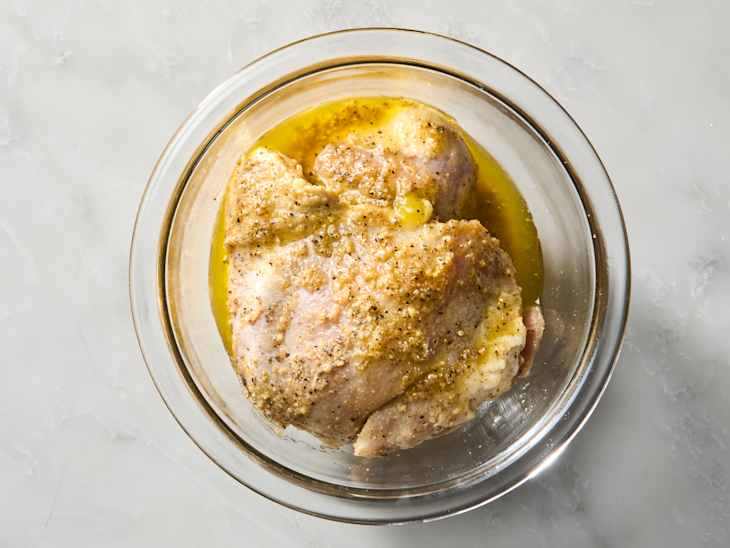
Method #6: Dry Rub + Oil
- Rating: 10/10
About this method: For this test, I placed the chicken in a bowl and tossed it with 1 1/2 tablespoons of olive oil and 1 tablespoon of the dry rub mixture explained above in the dry rub method. I then immediately placed the chicken on the grill, cooking per the method detailed in the methodology notes.
Results: This chicken had an irresistible crusty exterior bark from the dry rub and oil mixture. Unlike the dry rub and dry brined chicken methods (which used no oil), this chicken did not stick to the grill rack. It did pick up loads of robust char-grilled flavor — the most distinctive grilled flavor of all the methods. The meat was very moist and tender, and although the herby flavor didn’t penetrate all the way through the meat, the char flavor somehow did. Best of all, this method was one of the quickest of the bunch. Just toss the chicken with the oil and dry rub, and you’re rewarded with the best flavor you could ask for.
Overall Key Takeaways
Even though chicken thighs have more fat than breasts and are generally more forgiving, they can dry out over the grill’s arid, intense heat. Because of that, truly dry methods (dry rub and dry brine) don’t fare as well as others than involve some liquid. If you want to marinate, plan to do so overnight, as a shorter marinade does little to flavor the chicken. Perhaps the best takeaway? It turns out that one of the fastest methods fared the best. The dry rub with oil method yielded juicy results and the most delicious chicken.