
Now That I Make Chicken Wings Like This, Iâll Never Make Them Another Way

You’ll want to put the sauce on everything.
READ MORE…

The Pioneer Woman Launched a âVintageâ Stoneware Dining Set at Walmart

Itâs so cute!
READ MORE…

These Rule-Breaking Breakfast Potatoes Are Legendary in Maine

I said what I said.
READ MORE…


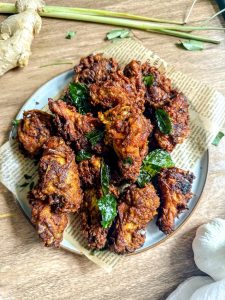
Lemongrass-Infused Chicken Recipe
### Lemongrass Chicken: A Tasty Treat
This straightforward recipe marinates chicken thighs in a homemade garlicky lemongrass mixture and grills them until they’re juicy and tender. Lemongrass chicken is a cherished dish in Southeast Asian cooking, recognized for its delicious citrusy taste that pairs beautifully with numerous fresh accompaniments.
#### What is Lemongrass Chicken?
Lemongrass chicken is defined by its citrusy, salty-sweet, and garlicky flavor combination, often accentuated by a charred, caramelized finish. This dish is not only uncomplicated for weeknight meals but also sophisticated enough to dazzle guests. It requires marinating for a minimum of one hour, but can be made up to eight hours ahead of time.
**Serving Suggestions:** Pair lemongrass chicken with rice, noodles, or lettuce wraps for a light and savory dish.
### Ingredient Tips for Lemongrass Chicken
– **Chicken:** Boneless, skinless chicken thighs work best for this recipe as they stay juicy when grilled. Chicken cutlets or breasts may also be utilized; if opting for breasts, pound them to a ½-inch thickness for even cooking.
– **Lemongrass:** This essential ingredient contributes a subtle lemon flavor. Fresh stalks are usually found in supermarkets. If they are not available, lemongrass paste or lemon zest can serve as substitutes.
– **Aromatics:** Fresh garlic and ginger are crucial for flavor; steer clear of dried options.
– **Fish Sauce:** This component imparts a rich, savory flavor. Soy sauce can substitute for a lighter version.
– **Brown Sugar:** Introduces sweetness and balances the salty-savory marinade while assisting in caramelization.
– **Variations:** Boost the marinade with red pepper flakes, black pepper, Thai basil, sriracha, Thai chili paste, or gochujang for extra heat.
To prepare lemongrass, slice the stalk into 3 to 4-inch segments and discard the tough outer layers. Finely chop the tender inner part.
### Storing Leftover Lemongrass Chicken
Keep any leftover lemongrass chicken in a covered container in the fridge for up to four days. For extended storage, freeze portions in ziplock bags for up to a month. Reheat in the microwave or air fryer, or add leftovers to stir-fries or coconut curry soups.
### Recipe for Lemongrass Chicken
**Prep Time:** 1 hour 10 minutes
**Cook Time:** 6 minutes
**Total Time:** 1 hour 16 minutes
**Servings:** 4
#### Ingredients:
– 1/4 cup brown sugar
– 1/4 cup soy sauce
– 2 tablespoons fish sauce
– 2 tablespoons lime juice
– 2 stalks lemongrass, finely chopped
– 1 tablespoon ginger, minced
– 4 cloves garlic, minced
– Red pepper flakes (optional)
– 1.5 pounds boneless, skinless chicken thighs
#### Instructions:
1. Prepare lemongrass by cutting it into 3 to 4-inch pieces and peeling away the tough outer layers. Finely chop the tender inner part.
2. In a medium bowl, mix together brown sugar, soy sauce, fish sauce, lime juice, lemongrass, ginger, garlic, and red pepper flakes if using.
3. Introduce the chicken thighs and toss thoroughly to ensure they are well-coated. Marinate for a minimum of 1 hour or up to 8 hours.
4. Preheat the grill to medium-high. Grill the chicken for 3 to 4 minutes per side or until it reaches an internal temperature of 165°F.
### Nutrition Information (per serving)
– **Calories:** 320
– **Carbohydrates:** 12g
– **Protein:** 45g
– **Fat:** 9g
– **Sodium:** 1239mg
– **Cholesterol:** 215mg
This lemongrass chicken recipe is a delightful way to savor an explosion of flavor while keeping your meal light and gratifying. Enjoy your culinary journey with this vibrant dish!
Read More
Costco Is Selling a Dubai Chocolate Bar, and Shoppers Are Already Buying 2 Bags at a Time

Theyâre bite-size!
READ MORE…
Read More
The Award-Winning Beer That Tastes Like “Pure Sunshine” in a Can

Plus, two more cans worth cracking open.
READ MORE…

Focaccia Bread Garnished with Zucchini and Potatoes
### Focaccia with Zucchini and Potatoes: A Culinary Adventure
Focaccia, a type of Italian flatbread, has become incredibly popular due to its adaptability and wonderful texture. In recent months, I dedicated time to refining my focaccia recipe, motivated by the goal of crafting a version that would endure. Throughout this culinary journey, I uncovered five essential lessons that reshaped my method for making focaccia.
#### 1. The Right Pan is Crucial
To achieve a beautifully golden and crunchy top, using a shallow pan is vital. Deeper pans may provide decent results, but they lack the same crispness. A rimmed baking sheet is perfect for this task, permitting the focaccia to form an ideal crust.
#### 2. Overbaking is Difficult to Achieve
Contrary to widespread baking recommendations, focaccia can endure extended baking durations without becoming overcooked. After 20 minutes, the bread is technically done, but to attain that sought-after crunchy top and firm edges, I found that baking for at least 30 minutes—up to 37 minutes—creates a flawless texture: crispy on the outside and chewy on the inside.
#### 3. Embrace the No-Knead Technique
Numerous focaccia recipes stress kneading or employing methods like “turns” to enhance dough strength. However, in my comparisons, I observed that the no-knead method yielded equally delightful outcomes. This approach reduces complexity and enhances flavor, making it a favored technique for many home bakers.
#### 4. Resist the Temptation to Over-Handle
While it may be tempting to punch down the dough and excessively dimple it, these actions can detract from the light texture we seek in focaccia. I learned to keep my dimpling to just a few impressions, allowing the dough to maintain its lightness and rise beautifully.
#### 5. Be Generous with Toppings
Focaccia can be enjoyed plain or lightly seasoned with salt and herbs, but for a bolder flavor, ample toppings are crucial. I often incorporate zucchini and potatoes, and occasionally include salami. It’s essential to remember that toppings will shrink while baking, so don’t hold back—more truly is better in this instance.
### Recipe: Focaccia with Zucchini and Potatoes
#### Ingredients
– 4 cups (540 grams) all-purpose flour
– 3 teaspoons (8 grams) kosher salt
– 2 1/4 teaspoons or 1 packet (7 grams) instant yeast
– 2 cups (475ml) lukewarm water (100-115°F)
– 6 tablespoons (90ml) olive oil, divided
– 8 ounces zucchini, very thinly sliced
– 8 ounces Yukon gold potatoes, very thinly sliced
– 2 ounces salami, cut into thin strips (optional)
– Fresh rosemary, to finish
– Flaky sea salt, to finish
#### Directions
**Prepare the Dough:**
1. In a large bowl, combine flour, salt, and yeast with a whisk. Add water and 1 tablespoon of olive oil. Mix until there is no dry flour remaining. Cover with plastic wrap and allow to rise until doubled, approximately 1.5 hours. If needed, refrigerate before fully doubling for later use.
**Make the Focaccia:**
2. Line a 9×13-inch rimmed baking sheet with parchment paper and drizzle with 3 tablespoons olive oil. Transfer the risen dough onto the parchment, gently stretching it towards the edges. Cover with another pan or dish and let rise for another 1.5 hours.
**Prepare the Toppings:**
3. Toss the zucchini and potatoes separately with kosher salt and allow them to sit aside to soften.
**Assemble Focaccia:**
4. Preheat the oven to 450°F. Drain and pat dry the zucchini and potatoes. Remove the cover from the dough and layer the vegetables (and salami, if using) on top. Sprinkle with rosemary, drizzle with the remaining olive oil, and lightly dimple the dough. Finish with flaky sea salt.
**Bake Focaccia:**
5. Bake for 30 to 38 minutes until deeply golden brown. Allow to cool slightly before slicing.
This focaccia is ideal for summer gatherings—be it at picnics, potlucks, or barbecues. Pair it with fresh burrata, grilled vegetables, or even as a base for scrambled eggs. Its delightful flavor and texture will have everyone reaching for more, solidifying this recipe as a staple in your culinary collection. Enjoy!
Read More