
Pesto Crafted with Avocado
Avocado pesto is a wonderfully creamy and enjoyable twist on traditional basil pesto. This avocado pesto recipe substitutes avocado for the olive oil, along with the typical basil, Parmesan, and pine nuts (in these images, I opted for pepitas instead, which are also delightful). A dash of fresh lemon enhances and complements the flavors while aiding in keeping the avocado vibrant green.
You can certainly use avocado pesto on pasta. It also works brilliantly as a veggie dip and sandwich spread. Additional uses and suggestions for it can be found below. The only warning is that avocados oxidize over time, so it’s best to utilize it right away or keep it in a jar until you’re ready to serve.
### Serving Ideas for Avocado Pesto
#### Pasta
This pesto is great on spaghetti or twisted shapes like fusilli. If you favor saucy pasta as I do, this recipe adequately coats 8 ounces of pasta, although it can be extended to lightly cover 12 to 16 ounces of pasta.
**Tips:** Save some of the starchy cooking water and add splashes of it along with the pesto to help loosen it. It’s best to wait until the pasta has cooled slightly before incorporating the pesto. If you plan on having leftovers, store the pesto and pasta separately for the best outcome, as the color begins to brown pretty quickly once exposed to air and heat.
#### Vegetables: Grilled, roasted, or raw
This avocado pesto will elevate simple vegetables, whether you serve it as a dip alongside, spread it underneath, or spoon it on top. It pairs particularly well with bell peppers, carrots, tomatoes, mushrooms, or artichokes.
#### Sandwiches or Toast
Spread this pesto on crusty bread and layer with sliced tomato and mozzarella for an amazing summer sandwich. I can vouch that it also tastes fantastic on toast with a fried egg on top for breakfast.
### More Unique Pesto Recipes to Explore
Please share how you enjoy your avocado pesto in the comments! I love receiving your feedback.
### Avocado Pesto
Enhance your pesto’s creaminess and richness by incorporating ripe avocado! This fresh basil and avocado pesto recipe is wonderful on pasta, sandwiches, vegetables, and beyond. The recipe yields approximately 1 ½ cups.
#### Instructions
1. Toast the pepitas or pine nuts to enhance their flavor. Place them in a small skillet and cook over medium-low heat, stirring frequently (don’t leave them unattended, or they may burn), until they become fragrant and lightly golden around the edges, about 3 to 4 minutes. Move them to a bowl to cool.
2. For the pesto, pit and halve the avocados, then scoop the flesh into the bowl of a food processor. Add the Parmesan, garlic, lemon juice, and salt. Blend until smooth, pausing to scrape down the sides as needed.
3. Integrate the toasted pepitas and basil, and pulse until they are finely chopped and the mixture is well-combined. Taste, and incorporate more salt if the flavor isn’t quite right yet.
4. This pesto is best when used right away, but it can be stored well for up to 3 days in the refrigerator (try to eliminate any air pockets in the mixture, as they will oxidize more than the rest).
#### Notes
*Recipe adapted from my Avocado Pesto Toast.*
**Make it dairy-free/vegan:** Leave out the Parmesan cheese. You may want to top your dish with vegan Parmesan.
**How to incorporate your pesto with pasta:** I prefer pasta that is well-sauced, so I suggest using this pesto on 8 ounces of pasta (it can lightly coat up to 16 ounces). Reserve some of the starchy cooking water and add splashes of it along with the pesto to help loosen it and coat the noodles (I used about ¼ cup pasta cooking water on 8 ounces). If you anticipate leftovers, keep the pesto and pasta stored separately for the best results, as the color will start to brown fairly quickly once exposed to air and heat.
#### Nutrition
*The information provided is an estimate generated by an online nutrition calculator. It should not serve as a substitute for professional nutritional advice.*
Read More
The âMiniâ Kitchen Gem I Regret Not Putting in My Bedroom Sooner

Itâs such a little luxury.
READ MORE…
The 2-Ingredient Pasta Salad Dressing I Wish Iâd Tried Sooner (No Mayo or Olive Oil!)

Itâs light and airy.
READ MORE…
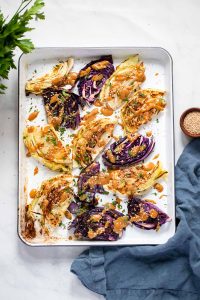
Burnt Cabbage with Salt and Vinegar Dressing
### Charred Salt and Vinegar Cabbage: A Seasonal Vegetable Treat
As winter shifts into spring, many of us discover a forgotten cabbage in the refrigerator, waiting for its moment to shine. This Charred Salt and Vinegar Cabbage recipe is an excellent way to give that cabbage a tasty transformation, turning it into a standout dish that highlights the season’s flavors.
#### The Inspiration for the Dish
The idea for this dish is inspired by the popular salt-and-vinegar potato chips. Originally, the recipe featured thick potato slices, infused with vinegar and salt. However, once cabbage was included, it became evident that cabbage was the true highlight. The outcome was a dish that not only enhanced the humble cabbage but also presented a distinctive take on a classic flavor combination.
#### Why Choose Cabbage?
Cabbage is frequently underestimated, yet it is a flexible and cost-effective vegetable found in many kitchens. This recipe reveals its potential, demonstrating how roasting can amplify its natural sweetness and yield a delightful texture. The blend of charred edges, garlic, and a zesty vinegar reduction makes this dish utterly appealing.
#### Ingredients
To make Charred Salt and Vinegar Cabbage, gather the following ingredients:
– 2 pounds (905 grams, or about 1 medium) green cabbage, halved, cored, and chopped into 1-to-2-inch pieces
– 2 tablespoons (25 grams) olive oil
– 1 teaspoon (3 grams) kosher salt
– 1/2 teaspoon freshly ground black pepper
– 2 tablespoons (30 grams) unsalted butter
– 4 garlic cloves, lightly crushed
– 1/3 cup (80 grams) vegetable broth
– 1/3 cup (80 grams) white vinegar
– Sea salt, for garnishing
#### Cooking Instructions
1. **Preheat the Oven**: Set your oven to 475°F (245°C).
2. **Prepare the Cabbage**: On a rimmed 9-by-13-inch baking sheet, combine the cabbage with olive oil, kosher salt, and black pepper, ensuring the pieces are held together. Distribute the butter on top.
3. **First Roast**: Roast the cabbage for 15 minutes until it develops some blackened spots.
4. **Add Garlic**: Use a spatula to flip the cabbage and place the smashed garlic cloves in the pan.
5. **Second Roast**: Put the pan back in the oven and roast for another 15 minutes until the cabbage looks charred.
6. **Add Broth and Vinegar**: Gently pour the vegetable broth and white vinegar into the pan, then put it back in the oven for a final 15 minutes, or until the garlic is soft and the liquids have reduced.
7. **Finish and Serve**: Before serving, sprinkle with sea salt. Enjoy the crispy bits directly from the pan if you can resist!
#### Conclusion
Charred Salt and Vinegar Cabbage is a vibrant and flavorful dish that can quickly become a favorite in your home. Its distinctive combination of textures and tastes makes it a delightful way to utilize that overlooked cabbage, providing a satisfying send-off to winter vegetables as we embrace the fresh offerings of spring. Whether enjoyed as a side or main dish, this recipe is certain to impress.
Read More
My Grandma Swears That This Portable Blender âPacks a Punchâ â and Itâs on Sale!

She adds, âIâm getting you one for Christmas.â
READ MORE…

The âAbsolutely Deliciousâ Frozen Fried Chicken I Could Eat Every Day (Plus, 4 More Dinner Shortcuts)

As much as I love cooking, some nights I really need a quick dinner that doesn’t require much effort on my part. That’s usually when I peruse my freezer. I’ll grab frozen shortcuts from the grocery store here and there, but my favorite ones come from QVC. (Yes, the QVC you watch on TV.) The retailer offers a bunch of delicious options that I, and more members of The Kitchn team, adore.
READ MORE…

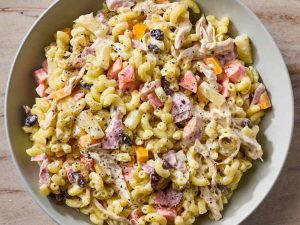
Fast and Simple Rotisserie Chicken Soup Recipe
### Hearty Rotisserie Chicken Soup: A Cozy Homemade Delight
This rotisserie chicken soup is a warming dish that unites robust pasta, tender vegetables, and succulent chicken, all cooked together to forge a cozy, welcoming meal. Ideal for brisk days or when you’re seeking a swift and fulfilling dinner, this soup is not just tasty but also simple to make.
#### Flavor Profile
The soup is abundant in taste, owing to the blend of soft veggies, savory broth, and the inclusion of whole grain pasta. Each spoonful delivers an enjoyable medley of textures and flavors, making it a beloved choice among families.
#### Skill Level
This recipe is crafted to be easy and quick, using pre-cooked rotisserie chicken. With merely one pot to clean, it’s a perfect option for hectic weeknights or when you desire a homemade dish without the hassle.
#### Budget-Friendly Tips
To maximize your ingredients, think about incorporating leftover vegetables from your refrigerator. This not only extends the soup further but also minimizes food waste, making it a cost-effective choice.
#### Versatile Swaps
One of the greatest features of this rotisserie chicken noodle soup is its adaptability. Feel free to exchange the chicken for other proteins such as beef, pork, or even meatballs for a unique variation.
### Ingredient Tips for Rotisserie Chicken Soup
– **Chicken**: Employ a store-bought rotisserie chicken or create your own. Peel off the skin before shredding for a healthier alternative.
– **Pasta**: Choose hearty pasta options like rotini, penne, or cavatappi. Alternatives such as egg noodles, white beans, or instant rice can also be effective.
– **Veggies**: Begin with a traditional mirepoix of onions, celery, and carrots. You can incorporate mixed vegetables, peas, spinach, zucchini, or any leftover veggies for added health benefits.
– **Broth**: Select your preferred store-bought broth or whip up a homemade version for a deeper flavor.
– **Variations**: For an extra crunch, consider garnishing your soup with crispy tortilla strips or homemade croutons.
### How to Make Chicken Soup with Rotisserie Chicken
1. In a sizable soup pot, melt butter over medium heat. Add diced onion, celery, and carrots; sauté until tender (about 3-4 minutes).
2. Mix in flour and seasonings, cooking for another 2 minutes. Gradually pour in broth and water, raising the heat to medium-high until it reaches a boil.
3. Once bubbling, add pasta and lower heat to a gentle boil. Cook until pasta is soft, around 7-9 minutes.
4. Mix in shredded chicken and cook for 1-2 minutes until warmed through. Season to taste prior to serving.
### Storing Soup
Leftover soup can be kept in a covered container in the refrigerator for up to 4 days. Reheat portions in the microwave or on the stovetop. For extended storage, freeze the soup in zippered bags for up to 4 months, but take out the pasta before freezing. Add fresh pasta when reheating.
### Nutritional Information (Per Serving)
– **Calories**: 291
– **Carbohydrates**: 29g
– **Protein**: 24g
– **Fat**: 9g
– **Sodium**: 993mg
– **Fiber**: 3g
### Conclusion
This rotisserie chicken soup is not just a delightful dish but also a sensible choice for busy cooks. With its nourishing ingredients and comforting tastes, it’s bound to become a fixture in your household. Enjoy the warmth and fulfillment of a homemade soup that unites the family!
Read More
Brownies Prepared with Zucchini and Chocolate, Flour-Free
**Title: Luxurious Flourless Zucchini Chocolate Brownies: An Indulgence Without Guilt**
In the realm of desserts, brownies occupy a cherished spot as a favorite treat that melds rich chocolate taste with a tender, chewy bite. For individuals in pursuit of a healthier choice that doesn’t sacrifice flavor, flourless zucchini chocolate brownies present a wonderful option. Not only are these brownies gluten-free, but they also harness the health benefits of zucchini, rendering them a guiltless delight.
**The Wonder of Zucchini in Brownies**
Zucchini may not be the initial ingredient that springs to mind when contemplating brownies, yet its addition transforms the game. This adaptable vegetable imparts moisture and a hint of sweetness to the brownies, guaranteeing they stay soft and fudgy without flour. Zucchini is also low in calories and brimming with vitamins and minerals, such as vitamin C, potassium, and antioxidants, making it a superb addition to a healthier dessert.
**Components for Flourless Zucchini Chocolate Brownies**
To whip up these scrumptious brownies, you’ll require the following components:
– 1 cup shredded zucchini (approximately 1 medium zucchini)
– 1 cup almond butter or any nut butter of preference
– 1/2 cup unsweetened cocoa powder
– 1/2 cup honey or maple syrup
– 1 large egg
– 1 teaspoon vanilla extract
– 1/2 teaspoon baking soda
– 1/4 teaspoon salt
– 1/2 cup dark chocolate chips (optional)
**Directions**
1. **Prepare the Zucchini**: Begin by shredding the zucchini using a box grater or food processor. Once shredded, place the zucchini in a clean kitchen towel and extract excess moisture. This step is vital to avoid soggy brownies.
2. **Combine the Ingredients**: In a large mixing bowl, merge the almond butter, cocoa powder, honey or maple syrup, egg, vanilla extract, baking soda, and salt. Mix until the combination is smooth and thoroughly blended.
3. **Add the Zucchini**: Gently fold the shredded zucchini into the batter, making sure it is evenly incorporated. If you like, toss in the dark chocolate chips for an added chocolatey flavor.
4. **Bake the Brownies**: Preheat your oven to 350°F (175°C). Line an 8×8-inch baking dish with parchment paper or lightly grease it. Pour the batter into the lined dish, spreading it out evenly.
5. **Bake and Cool**: Place the dish in the preheated oven and bake for 25-30 minutes, or until a toothpick inserted into the middle comes out mostly clean. Let the brownies cool in the pan for about 10 minutes before moving them to a wire rack to cool completely.
6. **Serve and Relish**: Once cooled, slice the brownies into squares and serve. These brownies make for an excellent dessert or a midday snack, delivering a deep chocolate flavor paired with a hint of natural sweetness from the zucchini.
**Advantages of Flourless Zucchini Chocolate Brownies**
1. **Gluten-Free**: By omitting flour, these brownies are ideal for those with gluten allergies or celiac disease.
2. **Nutrient-Rich**: The inclusion of zucchini enhances the nutritional value, supplying vital vitamins and minerals.
3. **Reduced Caloric Content**: Incorporating zucchini and almond butter lowers the calorie content compared to conventional brownies.
4. **Moist and Fudgy**: The inherent moisture from zucchini guarantees that these brownies remain soft and fudgy, a texture often desired in brownies.
5. **Adjustable**: You can easily modify these brownies by adding nuts, dried fruits, or a sprinkle of sea salt on top for additional flavor and texture.
In summary, flourless zucchini chocolate brownies are a delightful and healthier substitute for traditional brownies. They strike a perfect balance of intense chocolate flavor and moist texture, while also incorporating the health benefits of zucchini. Whether you’re adhering to a gluten-free regimen or simply seeking a guilt-free dessert, these brownies are bound to satisfy your cravings.
Read More
The $2 Aldi Grocery Iâve Been Buying Once a Week for Almost a Decade

Perfect for dipping.
READ MORE…

The 1 Ingredient I Add to Every Batch of Salsa I Make

Youâll never look at herbs the same way again.
READ MORE…