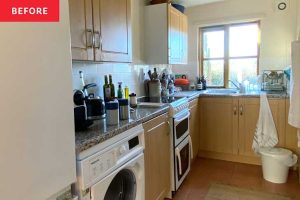
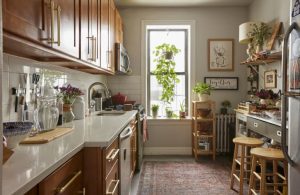
This Beige Kitchen Got the Cutest Cottage Makeover for Just $542

There are clever DIY ideas to borrow whether your kitchen is a temporary or forever place to cook.
READ MORE…
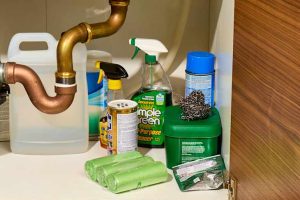
This $18 Smart Organizer Improved My Cluttered Kitchen Cabinet

It freed up more storage space, too.
READ MORE…
How to Extend the Life of Nonstick Cookware

You might be wrecking them without even realizing.
READ MORE…
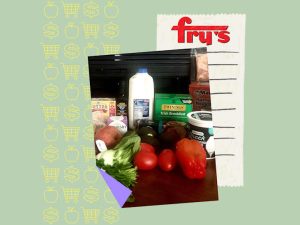
Iâm a Teacher in Arizona Living on $48,000 â Hereâs How I Budget for a Weekâs Worth of Groceries

She/They stopped at two stores.
READ MORE…

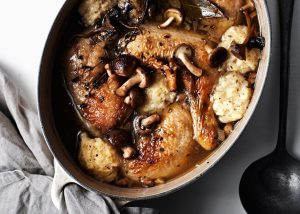
Homemade Robust Chicken and Dumplings Recipe
### Chicken and Dumplings: An Indulgent Comfort Food Favorite
Succulent chicken, airy dumplings, and a velvety broth unite in this classic homestyle dish. Packed with delightful flavors, it’s the ideal Sunday meal or a cozy comfort food option!
#### Flavor Profile
The deeply flavored and savory broth is brimming with tender chicken and fluffy dumplings, resulting in a meal that is both fulfilling and heartwarming.
#### Time-Saving Tip
To minimize preparation time while still keeping the taste intact, think about utilizing frozen vegetables and biscuit mix.
#### Recommended Tools
A pizza cutter streamlines the process of slicing dumplings into perfect strips, ensuring consistency and convenience in preparation.
#### Serving Suggestions
For a family-style dining occasion, keep the chicken and dumplings heated in a slow cooker. Serve with homemade breadsticks to absorb all that luscious broth.
### Ingredient Tips for Chicken and Dumplings
– **Chicken Base:** You can choose a mix of chicken up to 5 pounds for the broth. A whole bone-in chicken adds more richness, while leftover cooked pieces still contribute flavor without requiring a whole bird. If using frozen chicken, thaw it in the fridge overnight.
– **Vegetables:** A mirepoix (onion, carrots, celery) acts as the base for a sweet and savory balance in this recipe.
– **Dumplings:** These simple dumplings are soft and fluffy, made from pantry essentials. If you’re short on time, you can substitute with any pasta that features tubes or ridges to capture the creamy broth.
### How to Make Chicken and Dumplings
1. **Cook the Broth and Chicken:** In a large pot, combine chicken, onion, carrots, celery, salt, pepper, and bay leaf. Pour in chicken broth, bring it to a boil, then lower the heat and let it simmer covered for 45-60 minutes until the chicken is tender.
2. **Prepare the Dumplings:** While the broth simmers, make the dumplings (full recipe below) and cook until they are tender.
3. **Adjust Seasonings and Serve:** Strain the broth, shred the chicken, and return everything to the pot. Modify the seasonings as necessary and serve hot.
### Storing Leftovers
Keep leftover chicken and dumplings in an airtight container in the refrigerator for up to 4 days. Reheat portions on the stovetop or in the microwave. For extended storage, freeze chicken apart from the dumplings for up to 4 months. Dumplings can be individually frozen but are best when freshly made.
### More Cozy Chicken Recipes
Discover more comforting chicken recipes that are perfect for family gatherings or cozy evenings at home.
### Did You Enjoy This Chicken and Dumplings Recipe?
Please leave a comment and rating below to share your experience!
—
#### Recipe: Chicken and Dumplings
– **Prep Time:** 30 minutes
– **Cook Time:** 1 hour 15 minutes
– **Total Time:** 1 hour 45 minutes
– **Servings:** 8
##### Ingredients
– For the Dumplings:
– 2 cups all-purpose flour
– 1 tablespoon baking powder
– 1 teaspoon salt
– 1/4 cup shortening
– 3/4 cup milk (or more as needed)
##### Instructions
1. In a large soup pot, mix chicken, onion, carrots, celery, salt, pepper, and bay leaf. Add chicken broth and bring to a boil. Lower the heat and simmer covered for 45-60 minutes until chicken is tender.
2. Strain the broth using cheesecloth. Shred or chop the chicken, discarding skin and bones. Return the strained broth to the pot and bring to a boil again.
3. Make the dumplings by blending flour, baking powder, salt, and shortening until crumbly. Gradually add milk until a soft dough forms. Roll out and cut into strips.
4. Carefully place dumplings into the boiling broth and simmer for 15-20 minutes until tender. Stir in chicken and cook until warmed through.
##### Nutrition Information (per serving)
– Calories: 461
– Carbohydrates: 33g
– Protein: 27g
– Fat: 25g
– Fiber: 2g
This traditional chicken and dumplings recipe is a beloved comfort food that the entire family will relish.
Read More
This âInvisibleâ Trend Is the Future of Kitchen Innovation, Say Designers

It’s not a fridge!
READ MORE…


Dull, Peeling Kitchen Cabinets Got a Major Color Boost for $346

Plus, thereâs cool new texture and hardware.
READ MORE…
I Tried This Smart Fix for Dead Upper Cabinet Storage Space, and Itâs Been a Game-Changer

I only wish I’d added it sooner!
READ MORE…