
Ten Creative Eco-Friendly Cocktail Recipes
Alex & Sonja Overhiser: The Culinary Partnership Behind A Couple Cooks
Introducing Alex and Sonja Overhiser, the vibrant couple who have turned their love for cooking into a flourishing online community. As the writers of two cookbooks and the founders of the acclaimed website A Couple Cooks, Alex and Sonja have been motivating home cooks since 2010 with their straightforward, seasonal recipes and practical cooking guidance.
Their journey commenced with a mutual passion for food and a wish to discover the culinary landscape together. As busy parents, they recognize the hurdles of whipping up healthy, tasty meals amidst the whirlwind of everyday life. This insight is evident in their cooking philosophy, which prioritizes simplicity, seasonality, and the pleasure of preparing meals that unite people.
A Couple Cooks transcends a mere recipe site; it stands as proof of Alex and Sonja’s dedication to making cooking approachable and enjoyable for all. Featuring thousands of original recipes, the site serves as a rich source of culinary inspiration, ranging from quick weeknight meals to extravagant weekend gatherings. Each recipe is painstakingly developed and tested by the duo, ensuring it aligns with their high expectations for flavor and ease of preparation.
Beyond recipes, Alex and Sonja deliver essential cooking tips and meal planning suggestions, assisting their audience in maneuvering through the often daunting realm of home cooking. Their content is not only educational but also exquisitely showcased, with breathtaking photography that encapsulates the spirit of each dish.
Through their endeavors, Alex and Sonja have cultivated a community of like-minded enthusiasts who share their passion for cooking. Their website functions as a hub for food aficionados to exchange ideas, share stories, and revel in the pleasures of cooking together.
Whether you’re an experienced chef or a newcomer to the kitchen, Alex and Sonja Overhiser provide something for everyone. Their commitment to nurturing a love for cooking is clear in all they do, making A Couple Cooks a reliable resource for anyone looking to enhance their culinary abilities and relish the journey of creating delightful meals.
Read More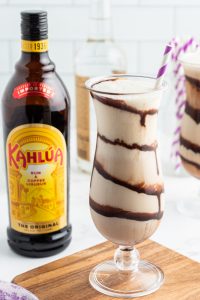
Steps to Make a Classic Mudslide Cocktail
Alex & Sonja: The Culinary Team Behind A Couple Cooks
Alex and Sonja Overhiser are the creative pair behind the well-known food blog, A Couple Cooks. As the authors of two celebrated cookbooks and busy parents, they have excelled in harmonizing family responsibilities with their love for cooking. Their adventure started in 2010 when they established their website to express their passion for uncomplicated, seasonal recipes and the happiness that cooking contributes to everyday life.
The couple’s cooking philosophy is anchored in simplicity and seasonality, aiming to craft dishes that are both tasty and easy to prepare. They maintain that the cooking process should be pleasurable rather than a burden, encouraging others to discover joy in the kitchen. Their recipes are tailored to be accessible for cooks at every level, allowing anyone to recreate their meals at home.
Throughout the years, Alex and Sonja have crafted thousands of unique recipes, each one carefully written and photographed by the duo. Their blog is a treasure trove of cooking advice and meal planning suggestions, equipping readers with the necessary resources to prepare nutritious meals for themselves and their families. The recipes undergo thorough testing, often with assistance from their children, ensuring that every dish is family-friendly and approved by kids.
Alongside their online endeavors, Alex and Sonja have penned two cookbooks, reinforcing their reputation as reliable voices in the culinary realm. Their books delve deeper into their cooking ideology, offering an organized selection of recipes that highlight their dedication to flavor, simplicity, and sustainability.
A Couple Cooks has evolved into a lively community of food lovers who share a enthusiasm for cooking and dining well. Via their blog, cookbooks, and social media platforms, Alex and Sonja continuously motivate others to embrace the pleasures of cooking, one recipe at a time. Whether you’re a seasoned gastronomy expert or just starting out in the kitchen, Alex and Sonja’s friendly approach and mouthwatering recipes make cooking a delightful and fulfilling journey.
Read More
Ten Vodka Mixed Drinks Ideal for Autumn
**Autumn Vodka Cocktails: Celebrate the Season with Apple, Pumpkin, Pear, and Cranberry Flavors**
Autumn is a charming season for cocktail lovers, presenting an array of flavors such as apple, pumpkin, pear, and cranberry. Vodka, with its clean and neutral taste, acts as an ideal foundation to showcase these warm, seasonal ingredients. Below are some exceptional autumn vodka cocktails that are simple to prepare and bound to impress.
**1. Apple Cider Martini**
This drink encapsulates the spirit of autumn with fresh apple cider, a splash of orange liqueur, and a whisper of cinnamon. It’s a tangy-sweet joy that takes under five minutes to craft.
**2. Cranberry Moscow Mule**
A festive variation on the classic, this concoction blends zesty ginger beer with sharp cranberry juice. Presented in a copper mug, its rich red hue is stunning and perfect for gatherings.
**3. Pumpkin Martini**
Crafted with genuine pumpkin puree and pumpkin pie spice, this creamy drink is elegant yet cozy. Rim the glass with crushed graham crackers for a delightful crunch.
**4. Apple Cider Mule**
A favorite among crowds that’s simple to whip up, this beverage pairs apple cider and ginger beer for a fizzy, sweet-spicy treat. Ideal for parties where attendees can help themselves.
**5. Pear Martini**
This cocktail features a subtle taste from muddled fresh pear and pear vodka, complemented by lemon and orange bitters. Opt for a ripe pear for the richest fruity flavor.
**6. Pomegranate Cosmo**
A seasonal variation on the classic Cosmopolitan, this beverage replaces cranberry with pomegranate juice, providing a sweeter, more intricate flavor. Its ruby hue is perfect for fall festivities.
**7. Vodka Sour**
Transform the traditional Vodka Sour into a fall favorite by utilizing maple syrup instead of simple syrup and garnishing with a cinnamon stick. The outcome is a beautifully balanced, sweet-tart drink.
**8. Baileys White Russian**
This creamy, coffee-infused beverage combines vodka, coffee liqueur, and Baileys for a dessert-like treat, ideal for sipping by the fire on a cool evening.
**9. Vodka Collins**
Enhance this straightforward cocktail for autumn by incorporating rosemary or ginger simple syrup. It’s a sparkling vodka lemonade that feels festive without being overly heavy.
**10. Pomegranate Martini**
Featuring rich pomegranate juice, this drink is akin to a Cosmo rather than a traditional martini. Add pomegranate arils for an enjoyable presentation and texture.
**Serving Autumn Vodka Cocktails for a Crowd**
When entertaining, vodka’s adaptability stands out as it caters to those who may not prefer whiskey-based beverages. Think about creating a self-serve bar with choices like the Apple Cider Mule, Vodka Collins, and Baileys White Russian. Prepare garnishes such as cinnamon sticks, fresh herbs, and cranberries ahead of time, and slice fruit just prior to serving.
**More Autumn Drink Ideas to Explore**
Beyond vodka, venture into other autumn drink options using bourbon, rum, tequila, and more to fully savor the season’s flavors.

Classic Stuffed Bell Peppers: A Comforting One-Dish Meal
# Stuffed Bell Peppers: A Comforting Classic
Stuffed bell peppers are a cherished dish that merges colorful vegetables with a substantial filling, producing a fulfilling meal suitable for any gathering. These bright peppers are packed with a flavorful combination of beef, sausage, rice, and marinara sauce, then baked until soft and finished with melted cheese. This traditional recipe not only excites the palate but also provides adaptability and simplicity in preparation.
## Flavor Profile
The taste of stuffed bell peppers is a delightful fusion of savory ground beef, tender veggies, and fluffy rice, all surrounded by a robust tomato sauce. The addition of cheese on top contributes a creamy, gooey finish that intensifies the overall flavor. Each bite offers a comforting medley of textures and tastes, making it a favorite among families.
## Budget-Friendly Tips
To make this dish more cost-effective, think about substituting half of the meat with black or kidney beans. This not only extends the filling but also includes a nutritious element. Furthermore, you may add extra rice or vegetables to fill additional peppers, maximizing your meal without overspending.
## Preparation Notes
When crafting stuffed bell peppers, you might have excess filling depending on your pepper sizes. This leftover filling can be innovatively utilized in other recipes, like zucchini boats or portobello mushrooms, ensuring no food is wasted.
### Make Ahead and Freezing
Stuffed bell peppers can be assembled up to two days prior. Alternatively, you can assemble and freeze them before baking. For freezing, line your baking dish with parchment paper, put together the peppers, and wrap tightly with plastic wrap. When ready to bake, thaw overnight in the fridge and increase baking time by an additional 15 minutes.
## Easy Ingredients and Add-Ins
### Bell Peppers
You can select any color of bell peppers for this dish. Green peppers provide a more earthy taste, while red, yellow, and orange peppers offer a sweeter flavor. Simply cut off the tops and dispose of the seeds.
### Meat
Ground beef and Italian sausage are the traditional selections for the filling, but you can use a mix of ground meats, including turkey, chicken, or pork, based on your preference.
### Rice
Raw long-grain rice is usually used. If using cooked rice, simmer it in the sauce for about 5 minutes to allow it to absorb the flavors.
### Sauce
Utilize a jar of your favorite pasta sauce or create your own marinara to have control over the flavor profile.
### Cheese
While cheese is optional, a sprinkle of mozzarella or an Italian blend on top introduces a delectably cheesy touch.
## How to Make Stuffed Peppers
1. Preheat the oven to 350°F and grease a 9×13-inch casserole dish.
2. Cut off the tops of the bell peppers, discarding the stems and seeds. Finely chop the tops and set aside.
3. To prepare the peppers, bring a large pot of water to a boil and cook the peppers for 5 minutes, then drain. Alternatively, air fry the peppers at 400°F for 5 minutes.
4. In a large skillet, heat over medium-high heat and brown the ground beef, Italian sausage, diced onion, and minced garlic until no pink remains. Drain the fat.
5. Add diced tomatoes with their juices, water, Worcestershire sauce, rice, chopped pepper tops, Italian seasoning, and season with salt and pepper. Bring to a boil, then reduce to a simmer and cover. Cook until the rice is tender, about 15-20 minutes.
6. Place 1½ cups of marinara sauce in the bottom of the prepared baking dish. Stuff the peppers with the meat and rice mixture and spoon the remaining marinara over the top.
7. Cover with foil and bake for 35 minutes. Remove the foil, spoon sauce over the peppers, add cheese if desired, and bake uncovered for an extra 10-12 minutes until the peppers are tender and the cheese has melted.
8. Let rest for 5 minutes before serving.
## Storing Leftovers
Leftover stuffed peppers can be kept in an airtight container in the refrigerator for up to 4 days. Reheat in the microwave, air fryer, or stovetop with a bit of water to maintain moisture. For freezing, follow the same assembly directions as before, ensuring the filling is cooled before securely covering.
## Nutritional Information
Each serving of stuffed peppers contains approximately:
– **Calories:** 397
– **Carbohydrates:** 32g
– **Protein:** 19g
– **Fat:** 22g
– **Fiber:** 6g
This dish is not only flavorful but also brimming with nutrients, making it a wholesome option for family dinners.
## Conclusion
Stuffed bell peppers are a timeless, comforting dish that can be easily tailored to match your taste and budget. With their lively colors and substantial filling, they are
Read More
Grasping the Concept of Dirty Soda: A Stylish Drink Option
# Frosty, Sparkling, and Lush: The Surge of Dirty Soda
If you hail from outside Utah, you might be curious: what precisely is “dirty soda” and why would anyone be inclined to consume it? Should you have ever visited a Swig or Sodalicious, you’re aware of the answer. Dirty soda is currently on the rise in popularity, propelled by social media outlets like TikTok and personalities such as Olivia Rodrigo.
## What is Dirty Soda?
Dirty soda is a charming blend of fountain soda combined with flavored syrups and cream, served over nugget ice. The traditional version features Diet Coke with coconut syrup, lime juice, and half-and-half, yielding a creamy and revitalizing beverag. Consider dirty soda a customizable, alcohol-free fizzy cocktail, ideal for any celebration.
## The Origin of Dirty Soda
Dirty sodas trace their roots back to Utah, a state with a notable Mormon community. Since Mormons usually refrain from alcohol and coffee, dirty sodas surfaced as an entertaining substitute for enjoying mixed beverages without any alcohol.
## What Makes It “Dirty”?
The adjective “dirty” pertains to the incorporation of cream. This distinctive mix of cream and soda produces a rich texture that sets dirty soda apart from other drinks. The swirling of cream into soda enhances both the visual appeal and the luscious mouthfeel that many people find hard to resist.
## Are Dirty Sodas Just Melted Floats?
Though dirty sodas share traits with classic ice cream floats—soda topped with ice cream—they utilize heavy cream instead of ice cream. This variation offers a different texture and taste profile, making dirty sodas a singular indulgence.
## Making Dirty Soda at Home
Preparing dirty soda at home is easy and requires only a few ingredients easily obtainable at any grocery store. You can throw a dirty soda gathering, allowing attendees to mix and match sodas and syrups to craft their own bespoke drinks. Flavored coffee creamers can also make a great alternative to standard coffee syrups.
### How to Make Dirty Soda
1. **Ice**: Begin with a sizable glass filled with ice. Nugget ice is preferred for its delightful texture, but any ice will suffice.
2. **Syrups**: Incorporate your preferred syrups. For a classic dirty soda, include 2 pumps of coconut syrup (around 1 tablespoon) and 1 tablespoon of fresh lime juice.
3. **Soda**: Finish off the mixture with Diet Coke.
4. **Cream**: Add the heavy cream, letting it swirl beautifully.
5. **Stir and Enjoy**: Blend everything together and savor your refreshing beverage!
## What is Nugget Ice?
Nugget ice, frequently found at fast-food establishments like Sonic, is celebrated for its soft, chewable nature. Many nugget ice enthusiasts value its capability to soak up flavors and keep drinks chilled without watering them down too quickly. While not everyone possesses a nugget ice maker at home, using standard ice remains a fantastic choice for dirty sodas.
## Creative Uses for Coconut Syrup
If you’re fond of coconut syrup, here are some extra ideas to utilize it:
– **Coconut Lattes**: Enhance your usual latte with coconut syrup.
– **Cold Brew**: Mix coconut syrup into cold brew coffee for a tropical flair.
– **Coconut Lemonade**: Substitute sugar in your go-to lemonade recipe with coconut syrup.
– **Coconut Banana Smoothies**: Blend a frozen banana with coconut milk and coconut syrup for a delightful smoothie.
## Dirty Soda Flavor Ideas
Here are some enjoyable combinations to experiment with:
– **DDD**: Dr. Pepper + coconut syrup
– **Malibu**: Dr. Pepper + coconut syrup + vanilla syrup
– **Naughty and Nice**: Dr. Pepper + English toffee syrup + half-and-half
– **Buttery Beer**: Root beer + butterscotch syrup + vanilla cream
– **Riptide**: Sprite + cranberry + raspberry + fresh lime
## Other Fun Drinks to Try
Delve into the realm of dirty sodas and let your creativity shine! Whether you’re relishing a classic or trying out new flavors, dirty soda is a delightful treat for any gathering.
Read More
Beloved Chicken Parmesan Recipe
# Golden, Cheesy, Indulgently Crispy Chicken Parmesan
Chicken Parmesan is a cherished Italian-American meal that merges crispy fried chicken cutlets, luscious tomato sauce, and melty cheese. This recipe enhances the traditional dish with a homemade San Marzano tomato sauce, simple fried cutlets, and an ample layer of bubbling cheese.
## Why This Recipe Shines
Drawing inspiration from the popular chicken parmesan alla vodka at Carbonara restaurant, this rendition embodies the spirit of indulgence. The striking presentation, where molten cheese and sauce cascade over crispy chicken, makes it a highlight for any dinner table. Serve it alongside garlic bread and a crisp salad for a complete dining experience that is bound to impress.
## Ingredients
### For the Crispy Chicken:
– Chicken breasts, flattened
– Salt and pepper
– Flour
– Eggs
– Panko breadcrumbs
### For the San Marzano Tomato Sauce:
– Olive oil
– Shallots
– Tomato paste
– San Marzano crushed tomatoes
– Salt
### For the Cheesy Top Layer:
– Mozzarella cheese
– Parmesan cheese
### Optional Extras:
– Fresh basil for decoration
– Red pepper flakes for extra spice
## Instructions
1. **Prepare the Chicken:** Season the chicken with salt and pepper. Arrange three bowls for dredging: one with flour, the second with beaten eggs, and the third with a blend of panko and breadcrumbs, all seasoned lightly with salt.
2. **Coat the Chicken:** Dredge each chicken breast in flour, removing excess. Dip in the egg, then press into the panko mixture for an even coating.
3. **Fry the Chicken:** Heat a shallow amount of oil in a skillet over medium heat. Fry the chicken for several minutes on each side until golden and fully cooked (internal temperature should hit 165°F).
4. **Prepare the Sauce:** In a large pot, heat olive oil over medium. Sauté shallots for 3-4 minutes, then add tomato paste and cook for an additional 3-4 minutes. Incorporate the San Marzano tomatoes and salt, simmering for 15-20 minutes.
5. **Broil the Cheese:** Preheat the broiler. Transfer some of the sauce to an oven-safe pan, top with mozzarella and a sprinkle of Parmesan. Broil for 4-5 minutes until the cheese is golden and bubbling.
6. **Serve:** Carefully tilt the pan to pour the cheese and sauce over the fried chicken. Serve hot, garnished with fresh basil and paired with garlic bread and salad.
## Tips for Success
– Make sure the cheese does not make contact with the sides of the pan while broiling to avoid sticking.
– For a lighter version, try air frying the chicken instead of deep frying.
## Conclusion
This golden, cheesy, indulgently crispy chicken parmesan presents a delightful variation of a classic dish. With its rich tastes and satisfying textures, it’s ideal for a cozy dinner or a special event. Enjoy crafting this dish and relish the scrumptious results!
Read More
Creamy Cottage Cheese Spread Recipe
This smooth cottage cheese dip presents a delightful variation of the traditional ranch dip, providing a protein-rich choice that can be made in just 5 minutes with basic pantry spices. Ideal for gatherings, snacking, or a nutritious lunch, this dip is destined to become a favorite in your home.
### Key Ingredients
For this cottage cheese dip, you’ll require only five ingredients and a food processor:
– **Cottage Cheese**: Pick your favorite variety, whether small or large curd, and experiment with different brands to discover your preferred taste.
– **Onion Powder, Garlic Powder, and Dried Dill**: These pantry essentials deliver the traditional ranch taste.
– **Kosher Salt**: Boosts the overall flavor, making it more vibrant.
### Recommended Equipment
A food processor works best for achieving a creamy, airy texture in about one minute. If you’re using a blender, you might need to frequently scrape the sides and possibly add a tablespoon of milk or water to help with blending.
### Innovative Serving Suggestions
This adaptable dip can be enjoyed in many ways:
– Pair with fresh vegetable sticks such as carrots, celery, and bell peppers.
– Serve alongside pita chips or crackers, including gluten-free varieties.
– Use as a spread on crostini or sandwiches.
– Add a spoonful to baked potatoes or sweet potatoes.
– Mix with edamame for a protein-rich treat.
### Storage Recommendations
Keep the dip in an airtight container in the fridge for up to five days. Stir before serving if you notice any liquid separation. Freezing is not advised as it could alter the texture.
### Nutritional Advantages of Cottage Cheese
Cottage cheese is a wholesome option, offering:
– Low calorie count: 163 per cup.
– High protein content: 28 grams per cup.
– Abundance of nutrients like B vitamins, calcium, and selenium.
### Dietary Information
This dip is vegetarian and gluten-free, making it appropriate for various dietary needs.
### Recipe
**Ingredients:**
– 2 cups cottage cheese
– ½ teaspoon onion powder
– 1 teaspoon garlic powder
– 2 teaspoons dried dill
– ¼ teaspoon kosher salt
– Freshly ground black pepper, optional
**Instructions:**
1. Process all ingredients in a food processor until smooth, around 1 minute, scraping down the bowl once. Taste and adjust salt if necessary.
Savor this simple, tasty, and nutritious dip that adds a fresh spin to your snacking and meal choices!
Read More
Refined Classic Chicken and Rice Soup Recipe
### About the Author: Holly Nilsson
Holly Nilsson is the inventive mind behind Spend With Pennies, a well-known site focused on simple and comforting recipes tailored for everyday cooking. With a genuine enthusiasm for nostalgic tastes and easy cooking methods, Holly motivates busy home chefs to whip up tasty meals that are both attainable and fulfilling.
Her culinary path is characterized by a dedication to making cooking fun and accessible to all. Holly’s recipes frequently take cues from traditional comfort dishes, making sure that each meal exudes warmth and familiarity. By emphasizing uncomplicated techniques, she aids her audience in maneuvering the kitchen with assurance, no matter their level of experience.
Alongside her endeavors at Spend With Pennies, Holly is the writer of “Everyday Comfort,” a cookbook that aims to inspire readers with hearty, home-cooked dishes. This compilation embodies her conviction that cooking should be a delightful journey, loaded with flavors that recall treasured memories.
For those keen on diving deeper into Holly’s culinary creations, you can discover her articles on her website: [See more posts by Holly](https://www.spendwithpennies.com/author/holly/).
### Follow Holly on Social Media
Stay in touch with Holly and uncover more of her appetizing recipes by following her on social media:
– [Pinterest](https://www.pinterest.com/spendpennies/)
– [Facebook](https://www.facebook.com/ispendwithpennies/)
– [Twitter](http://spendpennies)
– [Instagram](https://www.instagram.com/spendpennies/)
Through her captivating content and user-friendly recipes, Holly Nilsson keeps inspiring home cooks to craft meals that bring comfort and happiness to their dining experiences.
Read More
Informative Resource for Exploring Neskowin on the Oregon Coast
Tranquil Retreat in Neskowin, Oregon
An idyllic coastal retreat offering picturesque hikes, local artistry, fresh seafood, and concealed natural beauty along the rugged coastline of Oregon.
We recently had a serene stay in Neskowin, Oregon, a quaint little beach community that feels like an undiscovered treasure on the Pacific coast. We flew into Portland and then drove our rental vehicle for just over two hours to reach Neskowin. Our home base was a snug one-bedroom short-term rental, conveniently located on the ground level right on Neskowin Beach, in front of Proposal Rock. Waking up to that breathtaking view each morning was simply amazing.
Watching the sunset over the shore was just as breathtaking.
This wasn’t one of those fast-paced vacations—we intentionally maintained a relaxed itinerary, focusing on rest, delicious food, and the ocean breeze. Nonetheless, we discovered a few enjoyable activities and some fantastic local dining options during our stay in town.
Contents
Our Experience
Our condo was ideally situated—just steps from the beach and boasting a front-row view of Proposal Rock, which rises in the Pacific Ocean during high tide. Being on the ground floor made beach access incredibly easy, and we appreciated the ability to step outside and explore whenever the tide receded.
We kept our dining uncomplicated: breakfast and lunch in the condo, often with the patio door ajar to let in the sound of the waves. It was the ideal slow start to every day.
Dining and Delicacies in Town
In the evenings, we typically strolled down to Hawk Creek Café, which was conveniently positioned at the end of the condo complex. It quickly became our preferred spot for dinner. The food was delightful—fresh, satisfying, and just the kind of comfort we craved after a day spent on the beach and reading.
One evening, following dinner, we indulged in ice cream from the small stand outside the café called The Village Scoop. It’s actually served from a charming red and white van, providing a fun, nostalgic way to wrap up our night.
Scenic Train Excursion
From Garibaldi to Rockaway Beach and Back
If you’re ever wandering the northern Oregon coast and seeking a delightful, nostalgic adventure—the Oregon Coast Scenic Railroad
Read More
Low-Carb Chicken Scarpariello Dish
**Low-Carb Chicken Scarpariello Recipe: An Italian Delight Full of Flavor**
Chicken Scarpariello is a beloved Italian-American recipe celebrated for its bold flavors and substantial ingredients. Typically, it features chicken, sausage, peppers, and a zesty sauce. For those on a low-carb regimen, this meal can be effortlessly modified without losing its sumptuous taste. Here’s how to create a tasty low-carb variant of Chicken Scarpariello.
**Ingredients:**
– 4 bone-in, skin-on chicken thighs
– 2 Italian sausages (ideally low-carb), sliced
– 1 red bell pepper, sliced
– 1 yellow bell pepper, sliced
– 1 medium onion, sliced
– 4 cloves garlic, minced
– 1 cup chicken broth
– 1/4 cup white wine vinegar
– 1 tablespoon olive oil
– 1 teaspoon dried oregano
– 1 teaspoon dried thyme
– 1/2 teaspoon red pepper flakes (optional, for spice)
– Salt and pepper to taste
– Fresh parsley, chopped (for garnish)
**Instructions:**
1. **Prepare the Chicken:**
– Season the chicken thighs with salt and pepper on both faces.
– In a large skillet or Dutch oven, warm the olive oil on medium-high heat. Place the chicken thighs, skin-side down, and sear until golden brown, approximately 5 minutes per side. Take out the chicken and set aside.
2. **Cook the Sausage:**
– In the same skillet, incorporate the sliced sausage and cook until browned. Remove and set aside with the chicken.
3. **Sauté the Vegetables:**
– Add the sliced onions and bell peppers to the skillet. Sauté until they begin to soften, roughly 5 minutes. Incorporate the minced garlic and sauté for an additional minute.
4. **Deglaze and Build the Sauce:**
– Add the white wine vinegar, scraping any browned bits from the bottom of the skillet. Allow it to reduce slightly.
– Incorporate the chicken broth, oregano, thyme, and red pepper flakes. Stir to blend.
5. **Combine and Simmer:**
– Return the chicken and sausage to the skillet, placing them into the sauce and vegetables.
– Lower the heat to low, cover, and simmer for approximately 20-25 minutes, or until the chicken is fully cooked and tender.
6. **Finish and Serve:**
– Adjust seasoning with salt and pepper as required.
– Garnish with freshly chopped parsley prior to serving.
**Serving Suggestions:**
For a complete low-carb meal, accompany Chicken Scarpariello with a side of cauliflower rice or a straightforward green salad. The dish’s zesty and savory flavors complement these light sides, making it a fulfilling yet diet-friendly selection.
**Nutritional Benefits:**
This low-carb version of Chicken Scarpariello is not only tasty but also nutritious. By omitting conventional starchy sides and emphasizing protein-rich chicken and sausage, as well as fiber-rich vegetables, this meal promotes a balanced low-carb diet. It’s an ideal option for anyone wishing to savor hearty Italian flavors while adhering to their dietary objectives.
Savor this delectable and healthy rendition of a classic dish, suitable for any event!
Read More