
Revitalizing Tomato Salad Recipe: An Overview of Components and Preparation
# Fresh Tomato Salad: An Anytime Favorite
Tomato salad is a pleasing dish that embodies the spirit of summer with its lively hues and fresh tastes. This easy yet tasty recipe melds succulent ripe tomatoes, crisp red onions, and fragrant herbs, all gently dressed to form an ideal side dish for any meal. Whether savored in the height of summer or during the chillier months, this salad remains a beloved choice in numerous kitchens.
## Flavor Profile
The highlight of this dish is undoubtedly the tomatoes. Using fresh, vine-ripened tomatoes allows their natural sweetness and juiciness to truly stand out. The dressing, crafted from red wine vinegar and olive oil, introduces a light tang that pairs wonderfully with the tomatoes. The end result is a revitalizing salad that is both fulfilling and nutritious.
### Skill Level
This recipe is excellent for novice cooks. It necessitates minimal effort—just chop and combine! Even those inexperienced in the kitchen can effortlessly prepare this delightful salad in a jiffy.
### Serving Suggestions
To enhance your tomato salad, think about incorporating fresh herbs like basil or parsley. For a rich twist, bocconcini (fresh mozzarella) or feta cheese can be added. These enhancements not only boost the flavor but also provide texture and visual interest to the dish.
## Tomato Tips
Though this salad is straightforward, there are a few pointers to ensure optimal flavor and texture:
– **Choosing Tomatoes**: Select large, ripe tomatoes or heirloom varieties for superior taste. Cherry or grape tomatoes may be halved for easier consumption and improved dressing absorption.
– **Preparation**: There’s no need to drain the juices or remove the seeds, as they enhance the salad’s overall flavor.
– **Cutting**: For larger tomatoes, slice them into wedges or bite-sized pieces. Smaller tomatoes can be halved or quartered.
## Variations
One of the fantastic aspects of tomato salad is its adaptability. Here are some variations to explore:
– **Herbs**: Test with fresh oregano, dill, or mint for unique flavor profiles.
– **Cheese**: Consider incorporating burrata or different kinds of cheese to boost the creaminess.
– **Other Add-ins**: Think about stirring in minced garlic, diced avocado, or other garden vegetables like bell peppers or zucchini for extra nutrition and taste.
## Tomato Salad Dressing
The dressing for this salad is purposefully kept uncomplicated to let the tomatoes shine. A blend of red wine vinegar, olive oil, salt, and black pepper is all that’s required. If desired, you can swap balsamic vinegar for a sweeter note.
## Serving Suggestions
This tomato salad is best enjoyed at room temperature, allowing the flavors to blend beautifully. It pairs excellently with grilled meats such as chicken, pork chops, or shrimp, making it an ideal side for summer cookouts or casual meals.
If you have any leftovers, no need to worry! The salad keeps nicely in the fridge, and the flavors continue to enhance, making it a tasty option for lunch the next day.
## Nutritional Information
This fresh tomato salad is not only delicious but also beneficial to your health. Here’s a brief overview of its nutritional advantages per serving:
– **Calories**: 190
– **Carbohydrates**: 11g
– **Protein**: 5g
– **Fat**: 14g
– **Fiber**: 3g
– **Vitamin C**: 33.4mg
## Conclusion
This fresh tomato salad is a delightful and adaptable dish that can be enjoyed throughout the year. With its straightforward preparation and vibrant tastes, it’s destined to become a favorite in your home. Whether served as a side or a light meal, this salad is a celebration of fresh ingredients and simple cooking.
Did you enjoy this fresh Tomato Salad? Share your rating and thoughts in the comments below!
Read More
Homemade Blueberry Scones Recipe
🍋 The Definitive Guide to Crafting Flawless Blueberry Scones
If you seek a wholesome, delicious, and straightforward treat, this blueberry scone recipe is your answer. These soft, golden-brown scones feature a slight crispness outside, overflowing with juicy blueberries within, and are subtly enhanced with lemon zest and creamy Greek yogurt. Whether you’re preparing for a special event like an Easter brunch or simply yearning for a warm afternoon snack, these scones are bound to impress.
Reasons to Fall in Love with These Blueberry Scones
– Lightly sweetened with merely ¼ cup of sugar
– Crafted with whole wheat flour for extra texture and nutrition
– Egg-free, making them suitable for those with egg allergies
– Can be prepared in standard or miniature sizes
– Freezer-friendly, making them ideal for make-ahead breakfasts
These scones perfectly blend indulgence with nutrition. The inclusion of Greek yogurt not only provides a tangy taste but also increases the protein content, making them a more fulfilling indulgence.
Ingredients Overview
– Flour: Opt for white whole wheat flour for a wholesome yet airy texture. All-purpose flour is also acceptable.
– Baking Powder: The only leavening agent, so ensure it’s fresh.
– Sugar: Just the right amount to sweeten without being overwhelming.
– Lemon Zest: Adds brightness and complements blueberries wonderfully.
– Butter: Should be cold and cut into small chunks or grated for easier mixing.
– Greek Yogurt: Contributes moisture and protein.
– Milk: Assists in binding the dough together.
– Blueberries: Fresh or frozen—both options work well.
– Raw Sugar: Sprinkled on top for a delightful crunch.
Step-by-Step Directions
1. Preheat your oven to 375°F and line a baking sheet with parchment paper.
2. In a large bowl, combine flour, baking powder, and salt by whisking.
3. In a separate small bowl, rub lemon zest into the sugar to release its oils, then mix with the dry ingredients.
4. Cut in the butter using a pastry cutter or cheese grater until the mixture resembles coarse crumbs.
5. Carefully fold in the blueberries.
6. Add milk and Greek yogurt, mixing until just combined. The dough will appear crumbly—this is normal.
7. Transfer the dough onto a clean surface and gently knead it together.
8. Shape into a round disk (or two for mini scones), approximately 1 inch thick. Cut into wedges.
9. Arrange on the baking sheet and sprinkle with raw sugar.
10. Bake for 21–24 minutes (18–20 for mini scones), until lightly golden.
Tips for Perfect Scones
– Properly Measure Flour: Utilize the spoon-and-level method or a kitchen scale to avoid dense scones.
– Avoid Overmixing: Overworking the dough can result in tough scones.
– Use Cold Butter: This ensures a wonderfully flaky texture.
– Fresh or Frozen Berries: Both options are suitable, but toss frozen ones in a touch of flour to prevent bleeding.
– Personalize: Substitute lemon zest with orange, or try raspberries or strawberries in place of blueberries.
Serving Ideas
These scones are delightful when fresh from the oven, but they also taste wonderful at room temperature. Serve with a bit of butter, a drizzle of honey, or a spoonful of clotted cream. Pair with coffee or tea for a lovely breakfast or afternoon delight.
Storage and Freezing
– Room Temperature: Store in an airtight container for up to 3 days.
– Freezer: Freeze for up to 6 months. Reheat in the oven or microwave prior to serving.
Nutrition Note
These scones are a healthier alternative to standard bakery options, thanks to reduced sugar and the incorporation of whole wheat flour and Greek yogurt. While still a treat, they offer superior nutritional value compared to most pastries.
Final Remarks
Whether you’re an experienced baker or just starting, this blueberry scone recipe is accessible, gratifying, and endlessly customizable. With a few simple ingredients and useful tips, you’ll produce bakery-quality scones in roughly 35 minutes.
Give them a try and share your experience—we believe they could become your new favorite scone recipe too! 🫐
📌 For a printable version of the recipe, visit: Blueberry Scones Recipe on Cookie and Kate.
Read More
Sweet Potato Stuffed with Coleslaw and Add-Ons
Introducing Alex & Sonja Overhiser: The Visionaries Behind A Couple Cooks
Alex and Sonja Overhiser are the inspiring pair behind the well-known food blog A Couple Cooks, a reliable source for home chefs in search of healthy, flavorful, and accessible recipes. As the creators of two well-regarded cookbooks—A Couple Cooks: Pretty Simple Cooking and Pretty Simple Cooking—Alex and Sonja have cultivated a lively online community focused on the joy of cooking together and the benefits of wholesome, seasonal ingredients.
A Journey from Passion to Culinary Expertise
The Overhisers started A Couple Cooks in 2010 as a creative space to chronicle their explorations in home cooking. What began as a modest blog has transformed into a vast culinary platform, offering over 3,000 carefully tested recipes. Their goal is to make home cooking enjoyable and approachable for everyone, regardless of experience.
As a real couple who have experienced the delight of cooking alongside each other in their own kitchen, Alex and Sonja infuse a personal and relatable aspect into their content. Their recipes are celebrated for being both nourishing and delicious, emphasizing whole foods and sustainable ingredients.
Cookbooks That Motivate
In 2018, the couple published their inaugural cookbook, Pretty Simple Cooking, which received accolades as one of the finest vegetarian cookbooks from Epicurious and Mind Body Green. The book consists of 100 vegetarian recipes structured around 10 life lessons that foster a healthy relationship with food and cooking. Their subsequent book, A Couple Cooks, continues this vision with even more recipes and advice for joyful, everyday cooking.
Variety and Inclusion in Recipes
Alex and Sonja’s recipe compilation covers a wide spectrum of dietary preferences and lifestyles. Whether you are adhering to a Mediterranean diet, are vegan, vegetarian, pescatarian, or simply searching for simple smoothie recipes or craft cocktails, A Couple Cooks offers something for everyone. Their dishes are crafted to be both fulfilling and straightforward to prepare, making them ideal for hectic weeknights or leisurely weekend meals.
More Than Recipes Alone
Besides their culinary pursuits, Alex and Sonja are devoted to fostering community and encouraging others to connect through food. They often share personal anecdotes, cooking advice, and behind-the-scenes insights into their lives as a couple and culinary partners. Their friendly demeanor and authentic passion have garnered them a dedicated following of home cooks from across the globe.
Become Part of the A Couple Cooks Community
Whether you’re an experienced chef or embarking on your cooking adventure, Alex and Sonja welcome you to discover their website, experiment with new recipes, and reignite the joy of cooking at home. With their support, you’ll realize that crafting healthy, delicious meals can be both effortless and immensely fulfilling.
Visit A Couple Cooks to browse their entire recipe collection, learn more about their cookbooks, and join a community that celebrates wonderful food and delightful company.
Read More
Herb-Enhanced Creamy Garden Veggie Dip
**Herb-Infused Creamy Garden Vegetable Dip: A Refreshing and Flavorful Treat**
When it comes to hosting gatherings or simply indulging in a nutritious snack, there are few choices as fulfilling and adaptable as a creamy vegetable dip. Among its many variations, the herb-infused creamy garden vegetable dip shines for its lively flavor, health benefits, and simple preparation. This article delves into the ingredients, preparation techniques, health perks, and serving ideas for this tasty and wholesome dip.
—
### What Is an Herb-Infused Creamy Garden Vegetable Dip?
An herb-infused creamy garden vegetable dip is a luscious, flavor-packed blend created from a creamy foundation—such as Greek yogurt, sour cream, or cream cheese—combined with fresh herbs and finely diced garden vegetables. The outcome is a dip that is both zesty and rich, serving as an ideal pairing for fresh vegetables, crackers, or even as a spread for sandwiches and wraps.
—
### Key Ingredients
The charm of this dip lies in its adaptability and the incorporation of fresh, seasonal ingredients. Here are the standard components:
#### 1. **Creamy Base**
– **Greek Yogurt**: Packed with protein and probiotics, it gives a tangy taste and velvety texture.
– **Sour Cream**: Contributes richness and a classic dip consistency.
– **Cream Cheese**: Creates a thicker, more indulgent variation.
– **Mayonnaise**: Often blended in for extra creaminess.
#### 2. **Fresh Herbs**
Herbs take center stage in this dip, saturating it with aromatic and earthy tastes.
– **Dill**: Provides a bright, slightly tangy essence.
– **Parsley**: Introduces freshness and color.
– **Chives**: Adds a gentle onion-like flavor.
– **Basil or Tarragon**: Optional additions for a distinct twist.
#### 3. **Garden Vegetables**
Finely chopped veggies infuse texture, color, and nutritional value.
– **Carrots**: Sweet and crunchy.
– **Celery**: Contributes a crisp texture.
– **Bell Peppers**: Deliver sweetness and vibrant hues.
– **Cucumbers**: Refreshing and hydrating.
– **Green Onions**: Add a subtle, savory note.
#### 4. **Seasonings**
– **Garlic (fresh or powdered)**: Amplifies the flavor depth.
– **Salt and Pepper**: To taste.
– **Lemon Juice or Vinegar**: Introduces acidity to balance the creaminess.
—
### How to Make It
**Step-by-Step Preparation:**
1. **Prepare the Base**: In a mixing bowl, blend 1 cup of Greek yogurt with ½ cup of sour cream or cream cheese. Mix until smooth.
2. **Add the Herbs**: Finely chop 1 tablespoon each of dill, parsley, and chives. Fold into the creamy base.
3. **Incorporate Vegetables**: Finely dice ½ cup of assorted vegetables like carrots, bell peppers, and cucumbers. Mix into the blend.
4. **Season**: Incorporate 1 minced garlic clove (or ½ teaspoon garlic powder), 1 tablespoon lemon juice, and salt and pepper to taste.
5. **Chill**: Cover and refrigerate for at least 30 minutes to let the flavors combine.
6. **Serve**: Garnish with a sprinkle of fresh herbs and offer with sliced vegetables, pita chips, or crackers.
—
### Health Benefits
This dip is not only delicious but also loaded with nutrients:
– **High in Fiber**: Thanks to the fresh vegetables.
– **Rich in Protein**: Particularly when utilizing Greek yogurt.
– **Low in Calories**: A healthier choice compared to store-bought, preservative-heavy dips.
– **Probiotic-Rich**: When made with yogurt, it enhances gut health.
– **Customizable for Dietary Needs**: Easily can be made vegetarian, gluten-free, or low-fat.
—
### Serving Suggestions
– **As a Snack**: Enjoy with sliced cucumbers, cherry tomatoes, and baby carrots.
– **Party Platter**: Serve as a component of a crudité board with an assortment of dippers.
– **Spread**: Utilize as a flavorful spread on sandwiches or wraps.
– **Topping**: Spoon over baked potatoes or grilled chicken for extra flavor.
—
### Tips for the Best Dip
– **Use Fresh Herbs**: While dried herbs are fine in a pinch, fresh herbs provide unmatched flavor and texture.
– **Let It Rest**: Chilling the dip enhances the flavor profile.
– **Adjust Consistency**: Add a splash of milk or lemon juice if the dip is too thick.
– **Make Ahead**: This dip can be prepared up to 2 days in advance and stored in the refrigerator.
—
### Conclusion
An herb-infused creamy garden vegetable dip is a delightful combination of freshness, flavor
Read More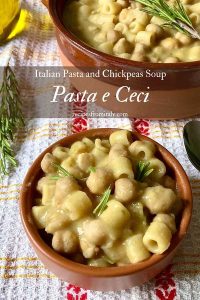
Chickpea Pasta (Pasta e Ceci) – A Classic Italian Comfort Meal
Pasta e Ceci (Chickpea Pasta): A Timeless Italian Comfort Meal
Pasta e Ceci, also referred to as chickpea pasta, is a classic Italian recipe that seamlessly combines simplicity, health, and taste. With origins in traditional Italian cuisine, this robust soup-like dish is a common favorite in numerous homes, particularly in Southern Italy. Prepared using pantry essentials such as chickpeas, pasta, and broth, it’s a swift and fulfilling option, perfect for hectic weeknights or leisurely weekends.
Quick and Convenient Comfort Food
This rendition of Pasta e Ceci aims for efficiency and ease, needing only 5 minutes for prep and 15 minutes of cooking, resulting in a total of 20 minutes to completion. It serves four people and is perfect for anyone in search of a comforting, wholesome meal that doesn’t require hours in the kitchen.
Ingredients That Stand Out
- Olive Oil: A fundamental component of Italian cooking, providing a rich foundation for sautéing aromatic ingredients.
- Onion and Garlic: These essential flavor enhancers lay down a savory base for the soup.
- Red Pepper Flakes (optional): Introduce a little heat for those who prefer a bit of spice.
- Tomato Paste: Contributes richness and umami to the broth.
- Broth: Opt for chicken, beef, ham, or vegetable broth to accommodate your dietary needs.
- Chickpeas: The highlight of the dish, chickpeas are protein-packed and impart a creamy consistency when cooked.
- Ditalini Pasta: A petite tubular pasta that’s ideal for soups. Gluten-free alternatives work equally well.
- Rosemary: Adds a fragrant, earthy aroma that pairs perfectly with the chickpeas and tomato base.
- Pecorino Romano or Parmesan Cheese: Melts into the broth, lending a salty, umami-rich finish.
- Salt and Pepper: Crucial for enhancing flavor to your liking.
Step-by-Step Instructions
- Heat olive oil in a large pot over medium heat. Add chopped onion and sauté until softened, around 5–7 minutes.
- Stir in minced garlic, red pepper flakes, and tomato paste. Cook for approximately a minute until fragrant.
- Pour in the broth, then incorporate chickpeas, pasta, and rosemary. Bring to a boil, then lower the heat and simmer for 10 minutes or until the pasta is cooked through.
- Turn off the heat and mix in the grated cheese until fully melted.
- Season with salt and pepper according to your taste. Serve hot and relish!
Customizable Variations
One of the highlights of Pasta e Ceci is its adaptability. Here are some optional additions and substitutes to personalize the dish to your preferences:
- Add vegetables: Incorporating carrots, celery, spinach, or kale can boost nutrition and flavor.
- Make it creamy: Blend one can of chickpeas with a cup of broth prior to adding it to the pot.
- Alter the tomato base: Replace tomato paste with crushed plum tomatoes for a chunkier consistency.
- Add acidity: A squeeze of lemon juice or a dash of white wine vinegar can elevate the flavors.
- Herbs and spices: A sprinkle of oregano or thyme can enhance the complexity.
Nutritional Advantages
This dish is not just tasty but also rich in essential nutrients. Each serving contains roughly:
- Calories: 272
- Fat: 14g (2g saturated)
- Cholesterol: 6mg
- Sodium: 990mg
- Carbohydrates: 95g (21g fiber, 16g sugar)
- Protein: 29g
Thanks to the chickpeas, this dish is
Read More
Wholesome Strawberry Oatmeal Muffins Recipe
# Oatmeal Strawberry Muffins: A Delightful and Nutritious Snack
With the arrival of spring, showcasing the lively hues of blossoming flowers and the sun’s warmth, there’s no finer moment to relish a charming snack that captures the essence of the season. Introducing the **Oatmeal Strawberry Muffins**—a wonderful fusion of health and sweetness, ideal for those lengthy hikes or relaxing picnics.
## The Ultimate Spring Snack
These muffins are not simple baked goods; they are a filling, health-conscious option enriched with protein-packed rolled oats and delectable, ripe strawberries. The mix of flavors and textures turns them into a delightful addition for any spring gathering. Whether you’re soaking up the sun at the park or gearing up for an adventurous trek, these muffins are sure to hit the spot.
## Why Opt for Oatmeal Strawberry Muffins?
Muffins are popular for their convenience and adaptability. They provide a handy snack that keeps you satisfied without any remorse. This specific recipe puts a twist on the traditional blueberry muffin, swapping strawberries for a fresh, fruity taste that beautifully embodies springtime. The inclusion of rolled oats not only improves the texture but also adds a wholesome touch, making these muffins a nutritious option.
## How to Prepare Oatmeal Strawberry Muffins
Making these scrumptious muffins is straightforward and involves just a few steps:
1. **Soak the Oats**: Start by soaking the rolled oats in milk to soften them, providing a fluffier consistency in the finished product.
2. **Cream the Butter and Sugar**: In a mixing bowl, beat together the butter and sugar until light and airy. Then, add in an egg, vanilla extract, and the soaked oat-milk mixture.
3. **Combine Dry Ingredients**: Mix flour, baking powder, and salt into the creamed mixture, stirring until just combined.
4. **Incorporate Strawberries**: Carefully fold in the diced strawberries and portion the batter into a muffin tin. For an added crunch, top it off with a few extra rolled oats.
5. **Bake and Savor**: Bake until golden brown, let cool, and relish your tasty muffins!
## Ingredients for Oatmeal Strawberry Muffins
These muffins feature standard baking ingredients, enhanced with rolled oats for added nutrition:
– 1/2 cup milk (of your choice)
– 1/2 cup rolled oats (plus some extra for the topping)
– 1 cup strawberries (finely chopped or sliced)
– 1/4 cup butter (softened)
– 10 tablespoons sugar (equivalent to 1/2 cup + 2 tablespoons)
– 1 large egg
– 1/2 teaspoon vanilla extract
– 3/4 cup all-purpose flour
– 1 teaspoon baking powder
– 1/4 teaspoon kosher salt
– 1 teaspoon coarse sanding sugar (for garnishing)
## Variations to Explore
One of the greatest features of muffins is their versatility. Feel free to adapt these oatmeal muffins with your favorite fruits! You might try raspberries, blueberries, blackberries, or even some grated carrots or zucchini. For a indulgent twist, mix in some chocolate chips or chopped chocolate alongside the fruit.
## Nutritional Overview
These oatmeal strawberry muffins are not only tasty but also boast a respectable nutritional profile. Each muffin approximately contains:
– **Calories**: 257
– **Fat**: 9.6g
– **Cholesterol**: 53mg
– **Sodium**: 174mg
– **Carbohydrates**: 39.9g
– **Protein**: 4.5g
With a balanced mix of carbohydrates, protein, and healthy fats, these muffins make for a fulfilling snack or breakfast choice.
## Final Thoughts
As you celebrate the delights of spring, these Oatmeal Strawberry Muffins provide a lovely way to enjoy the season. Simple to prepare, adaptable, and bursting with flavor, they are the perfect partner for your outdoor excursions. So gather your ingredients, preheat your oven, and prepare to indulge in a sweet snack that is as nutritious as it is delightful!
Read More
How to Create Genuine Stromboli: A Comprehensive Recipe Tutorial
# Simple Stromboli Recipe: A Pizza Roll Wonder
Stromboli is a fantastic Italian-American creation that looks like a rolled-up pizza, making it ideal for dipping and enjoying. This straightforward Stromboli recipe is not only easy to make but also allows for personalization, so you can include your preferred toppings. Whether you’re organizing a game night or seeking a fast weeknight meal, this dish is guaranteed to satisfy everyone gathered around the table.
## Reasons to Adore This Recipe
– **Taste**: Flavorful, cheesy, and slightly crunchy, this Stromboli is filled with an appealing combination of Italian spices.
– **Personalization**: Set up a make-your-own topping station where guests can choose their favorite additions, turning the meal into a fun and engaging experience.
– **Time-Saving Tip**: Opt for store-bought pizza dough and pre-grated cheese to streamline the cooking process.
– **Serving Ideas**: Pair it with warm marinara sauce for dipping and a crisp side salad for a well-rounded meal.
– **Freezing**: Prepare the Stromboli, wrap it securely, and freeze it unbaked for a convenient meal option in the future.
## Stromboli Compared to Calzone
Though both Stromboli and calzones share similar ingredients, they differ in shape and method of preparation. Strombolis are rolled up, while calzones are folded into half-moon shapes. Furthermore, calzones usually contain ricotta cheese, while Strombolis commonly feature a mix of cheeses and meats.
## Ingredient Suggestions for Stromboli
– **Dough**: You can either purchase pre-made dough or whip up your own homemade pizza dough.
– **Sauce**: Choose marinara sauce or homemade pizza sauce, tweaking the quantity of Italian herbs to fit your taste. For a zing, toss in red pepper flakes.
– **Toppings**: Virtually anything you’d put on a pizza can find its place in a Stromboli. Popular options include pepperoni, ham, olives, onions, diced bell peppers, and mushrooms.
## Useful Tips
1. **Cheese**: Use plenty of gooey cheese to secure the filling.
2. **Sealing**: An egg wash helps close the ends of the Stromboli, stopping the filling from oozing out.
3. **Steam Release**: Make small slashes across the top of the Stromboli to let steam escape while baking, which helps keep the crust crispy.
4. **Egg Wash**: This not only seals the Stromboli but also gives it a lovely golden finish. You can mix in melted butter or garlic butter for extra flavor.
5. **Resting**: Let the cooked Stromboli stand for a few minutes before slicing to ensure it retains its shape.
## Storing Stromboli
– If adding vegetables, cook and cool them beforehand to avoid sogginess.
– Prepare in advance and keep wrapped in plastic in the refrigerator for up to two days before baking.
– Keep leftover Stromboli in a covered container in the fridge for up to four days. Enjoy slices cold or warm them in the air fryer or microwave.
– Wrap individual portions in plastic and freeze in a zippered bag for up to a month. They’ll be ready to eat or reheat by lunchtime.
## Additional Pizza-Inspired Recipes
If you liked this Stromboli recipe, you may also enjoy other pizza-themed dishes such as:
– **Homemade Pizza**: Create your own pizza from scratch with your favorite toppings.
– **Calzones**: Experiment with calzones stuffed with ricotta cheese and various meats and veggies.
– **Pizza Rolls**: Ideal for snacking, these bite-sized pizza rolls are simple to prepare and enjoyable to eat.
## Final Thoughts
This simple Stromboli recipe is an excellent way to savor the flavors of pizza in a fun, transportable form. With its tasty filling and crunchy crust, it’s perfect for any gathering. Be sure to leave a rating and a comment below if you give it a try!
### Recipe Overview
– **Prep Time**: 15 minutes
– **Cook Time**: 25 minutes
– **Total Time**: 45 minutes
– **Servings**: 12 slices
### Directions
1. Preheat the oven to 350°F and line a baking sheet with parchment paper.
2. Roll the pizza dough into a rectangle (about 12×16 inches) on a lightly floured surface.
3. Spread marinara sauce over the dough, leaving a 1-inch border around the edges and a 3-inch border at the far end.
4. Sprinkle 1 cup of mozzarella over the sauce, followed by layers of ham, salami, and pepperoni. Add the remaining cheese on top.
5. Tightly roll the dough, stopping just before the end.
6. Whisk together egg, water, Italian seasoning, and garlic powder. Brush the mixture