
Challah Bread French Toast Recipe
### Traditional Skillet Challah French Toast with Berry Sauce and Whipped Cottage Cheese
Everyone requires a traditional, reliable recipe for skillet French toast, particularly one that makes use of leftover challah. This recipe is not only easy but also enhances the dish with delightful toppings that make it worthy of brunch without needing to head to a restaurant.
#### The Essence of Challah French Toast
Challah bread, celebrated for its light and rich texture, produces a French toast that is crispy on the outside and soft on the inside. This recipe is crafted to be uncomplicated, demanding no overnight soaking or excessive butter, rendering it ideal for a swift morning indulgence.
#### Ingredients
**Berry Sauce:**
– 2 cups (10 ounces) assorted frozen berries
– 2 tablespoons (25 grams) granulated sugar
– Pinch of salt
– 3 tablespoons + 2 teaspoons water, separated
– 1 1/2 teaspoons cornstarch
– 1 to 2 tablespoons fresh lemon juice
**Whipped Cottage Cheese:**
– 2 cups (16 ounces or 455 grams) cottage cheese, whole or low-fat
– 1 tablespoon (15 grams) granulated sugar
– 1 teaspoon vanilla bean paste or vanilla extract
**French Toast:**
– 3 large eggs
– 2 teaspoons vanilla bean paste or vanilla extract
– 1 1/2 cups (340 grams) milk, any kind
– 1 large (1-lb) loaf of challah bread, sliced into 1 to 1.5-inch thick pieces
– Butter for the skillet, salted or unsalted
– Powdered sugar, for dusting
#### Instructions
**1. Prepare the Berry Sauce:**
– In a small saucepan, mix the berries, sugar, salt, and 3 tablespoons of water. Bring to a boil, then lower the heat to a simmer. Cook for around 8 to 10 minutes until the berries are saucy.
– Combine cornstarch with the remaining 2 teaspoons of water and add to the berry mixture. Simmer for an additional minute until thickened. Off heat, squeeze in lemon juice to taste. Set aside.
**2. Prepare the Whipped Cottage Cheese:**
– In a food processor or high-speed blender, blend together cottage cheese, sugar, and vanilla. Process until smooth and fluffy. Adjust sweetness to your liking and set aside.
**3. Prepare the French Toast:**
– In a large bowl, whisk the eggs and vanilla together. Gradually incorporate the milk while whisking.
– Heat a large skillet over medium-low heat for approximately two minutes. Add a tablespoon of butter.
– Dip pieces of challah in the egg-milk mixture, soaking briefly, then place in the skillet. Cook until browned, about 2 to 3 minutes, then flip to brown the other side. Repeat with the remaining slices, adding more butter as necessary.
**4. To Serve:**
– Dust the French toast with powdered sugar. Serve two slices on a plate, adorned with whipped cottage cheese and berry sauce. Enjoy right away.
#### Storage and Tips
– The berry sauce and whipped cottage cheese can be stored in the refrigerator for 3 to 4 days.
– French toast can be kept warm in a 200°F oven until ready to serve. Leftovers may be refrigerated for up to 3 days.
– For variations, brioche can be substituted for challah, and the sweetness of the egg-milk mixture can be modified to suit personal taste.
This traditional skillet challah French toast recipe is more than just a morning meal; it’s a charming way to kickstart your day, blending ease with gourmet style.
Read More
5 Cheap Grilling Gifts Dad Will Love This Fatherâs Day (Theyâre All $30 or Less)

Plus, four more last-minute Fatherâs Day gift ideas.
READ MORE…

Clásico Platillo Mexicano para el Desayuno: Huevos Rancheros
# Huevos Rancheros Could Be the Best Breakfast Available
Fried eggs, warm crunchy tortillas, refried beans, and salsa blend in a delightful mix of flavors and textures. Utterly satisfying and truly the finest way to begin the day.
Similar to many cherished breakfasts, there are numerous ways to prepare huevos rancheros, and each family has its unique method. However, all huevos rancheros plates feature sunny side up eggs, salsa, and tortillas. This version is our ultimate huevos rancheros, and it’s definitely one of my all-time favorite breakfasts. Crafting huevos rancheros from scratch is among the most gratifying breakfasts you can whip up, and it’s incredibly easy, whether you opt for freshly made or store-bought salsa.
## What Are Huevos Rancheros?
Huevos rancheros is a traditional Mexican breakfast that includes lightly fried tortillas, refried beans, sunny side up eggs, and salsa. It can range from spicy to mild and can be enhanced with cheese, avocados, cilantro, and various other toppings. The term huevos rancheros translates to “ranch style eggs,” and fundamentally, it’s a wonderfully hearty breakfast that ranch or farm workers consumed to sustain their energy throughout the day.
## How to Prepare Huevos Rancheros
Most excellent breakfast dishes, such as French toast or chilaquiles, cleverly utilize leftovers in a fresh way, and huevos rancheros fits this description perfectly. It excels in two aspects. First, you’re making use of ingredients already present in your refrigerator. Secondly, since many of the elements are pre-prepared, it allows for a quicker breakfast preparation. Naturally, you can also take the more intricate approach and make everything entirely from scratch. I’ll outline both methods so you can pick your own huevos rancheros journey.
1. **Prepare the salsa.** In a saucepan, lightly sauté diced onions and incorporate fire-roasted tomatoes, minced chiles, broth, cumin, and oregano. Allow to simmer until slightly thickened and aromatic.
2. **Crisp the tortillas.** Lightly fry the tortillas in hot oil until golden and crunchy at the edges.
3. **Cook the eggs.** Fry the eggs sunny side up, ensuring firm whites and creamy yolks.
4. **Assemble.** Arrange the crispy tortillas and ladle some warm salsa over them.
5. **Place a fried egg** on top and add even more salsa.
6. **Top with a sprinkle of queso fresco** and cilantro and serve with a side of refried beans.
7. **Dig in.** Make sure to savor a bit of everything: crispy tortilla, savory salsa, and creamy egg!
## Ingredients for Huevos Rancheros
### Salsa
Salsa translates to sauce in Spanish, and for huevos rancheros, you can use your preferred sauce, whether store-bought or homemade. A simple homemade ranchero salsa can be created using canned fire-roasted tomatoes, onion, and roasted green chile simmered in chicken broth, but store-bought salsa is also acceptable. The salsa can be roja (red), verde (green), or a combination of both (divorciados/Christmas).
### Beans
Refried beans are optional but frequently included on the plate, either atop the tortillas or served on the side. If you wish to indulge, you can make your own refried beans, utilize leftover beans from your fridge, or simply use store-bought.
### Tortillas
Huevos rancheros is typically served with small corn tortillas lightly fried into tostadas, but if you only have flour tortillas, those will work as well. Frying your own corn tortillas at home elevates this dish and gives you control over their crispiness and softness.
### Eggs
Huevos would not exist without eggs! Sunny side up is classic.
### Toppings and Sides
– Avocados (sliced or as guacamole)
– Cheese (Queso Fresco is ideal)
– Mexican rice
– Pico de gallo
– Sliced jalapeños
– Cilantro
– Carnitas
– Barbacoa
– Birria
You can keep it simple or make it as elaborate as desired!
## Huevos Rancheros Recipe
### Ingredients
– 2 tbsp neutral oil
– 8 small corn tortillas
– 1/4 medium onion, chopped
– 14.5 oz fire-roasted tomatoes (1 can)
– 1/4 cup roasted green chile or 1 jalapeno, chopped
– 1/2 cup chicken broth or vegetable broth, no sodium preferred
– 1 tsp oregano (Mexican preferred)
– 1/2 tsp ground cumin
– 2 cups refried beans (optional)
– 8 eggs
– 2 tbsp fresh cilantro, chopped
– 2 tbsp queso fresco, crumbled
### Instructions
1. Add approximately 1

Sautéed Chicken with Asparagus
Stir-fried Chicken and Asparagus
Preparation Time: 10 minutes Cooking Time: 10 minutes Total Duration: 20 minutes Yield: 4
An effortless and fast chicken stir-fry featuring asparagus and cashews!
Ingredients
- 1 tablespoon oil
- 1 pound boneless, skinless chicken breasts or thighs, sliced thin
- 1 pound asparagus, trimmed and cut into thin slices
- 1 tablespoon garlic, minced
- 1 tablespoon ginger, minced
- 1/3 cup chicken broth
- 1 tablespoon oyster sauce
- 1 teaspoon soy sauce
- 1 teaspoon sugar
- 1 tablespoon rice wine vinegar
- 1 tablespoon cornstarch
- 1/3 cup cashews
- 2 green onions, sliced thin
- 1/2 teaspoon toasted sesame oil
Instructions
- In a wok or large skillet, heat the oil over medium-high heat, add the chicken, and stir-fry until fully cooked, about 3-5 minutes, and then set aside.
- Introduce the asparagus and stir-fry until it starts to take on a dark green hue, roughly 2 minutes.
- Incorporate garlic and ginger, cooking until aromatic, around 30 seconds.
- Return the chicken to the skillet, adding the combined mixture of broth, oyster sauce, soy sauce, sugar, vinegar, and cornstarch; stir and cook until the sauce thickens, about 2 minutes.
- Toss in the cashews and green onions, mix well, and cook for an additional minute.
- Finally, stir in the sesame oil and savor!
Note: If necessary, add more oil.
Optional: Tenderize the chicken by marinating it in a blend of 1 egg white, 1/2 teaspoon baking soda, 1 tablespoon Shaoxing wine (if using), and 1 tablespoon cornstarch for 1-2 hours, covered in the refrigerator. This will result in exceptionally tender chicken that practically melts in your mouth.

We Attended QVCâs Sold-Out Foodie Fest â Here Are the 3 Best Things That We Ate

Yes, QVC sells food (and itâs really good).
READ MORE…
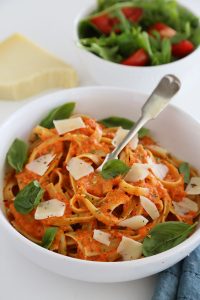
Pasta with Charred Red Pepper Sauce
### Restaurant-Quality Pasta: Caramelized Shallots in Luxurious Red Pepper Sauce
Pasta is a cherished meal that bridges various cultures and cuisines, often regarded as comfort food by many. Among countless pasta dishes, one shines for its simplicity and rich flavor: pasta featuring caramelized shallots blended into a luxurious red pepper sauce. This recipe is not only straightforward enough for a weeknight dinner but also sophisticated enough to dazzle your guests, making it a genuine restaurant-quality entrée that you can whip up in your own kitchen.
#### The Heart of the Dish
The foundation of this pasta recipe lies in the fusion of caramelized shallots and roasted red pepper sauce. Shallots, known for their subtle and sweet taste, create a fantastic base when cooked until golden. This caramelization process amplifies their inherent sweetness and enriches the sauce’s depth.
The red pepper sauce comes together by blending roasted red peppers with a touch of broth and cream, yielding a luxurious texture that beautifully envelops the pasta. This sauce is not only creamy but also imbued with the smoky sweetness of roasted red peppers, creating a delightful pairing with the noodles.
#### Ingredients
To make this dish, you will require:
– **Pasta**: While any kind works well, fun shapes like pennoni or rigatoni hold the sauce wonderfully.
– **Shallots**: Essential for achieving the caramelized flavor.
– **Roasted Red Peppers**: Can be either homemade or store-bought.
– **Cream**: For a sumptuous and creamy sauce.
– **Broth**: Chicken or vegetable broth elevates the flavor.
– **Parmesan Cheese**: For serving, contributing a salty, nutty finish.
#### Cooking Instructions
1. **Make the Red Pepper Puree**: Blend roasted red peppers with water and broth until smooth.
2. **Sauté the Shallots**: In a skillet, melt butter and sauté the shallots until they achieve caramelization.
3. **Cook the Pasta**: Boil the pasta according to the package directions until al dente.
4. **Combine the Sauce**: Pour the red pepper puree into the skillet with shallots, then mix in the cream and let it simmer until thickened.
5. **Mix with Pasta**: Stir the cooked pasta into the sauce, adding reserved pasta water if needed to reach the desired consistency.
6. **Serve**: Plate the pasta and sprinkle with freshly grated Parmesan, fresh basil, or red pepper flakes for added zest.
#### Pairing Suggestions
This dish pairs beautifully with shrimp, which can be sautéed quickly and incorporated into the pasta for an added protein boost. A simple green salad or air-fried broccoli serves as an excellent side, balancing the pasta’s richness. For a complete dining experience, serve with garlic bread to soak up any remaining sauce.
#### Conclusion
This restaurant-quality pasta creation, featuring caramelized shallots and a creamy red pepper sauce, proves that excellent cooking doesn’t need to be complicated. With just a handful of ingredients and steps, you can whip up a dish that feels special and indulgent. Whether you’re aiming to elevate your mood after a long day or impress dinner guests, this pasta is certain to deliver blissful results. Enjoy!
Read More
6 Not-to-Be-Missed Trader Joeâs Groceries That Just Hit Stores (Plus 1 to Skip), According to a Former Employee

French. Butter. Cookies.
READ MORE…
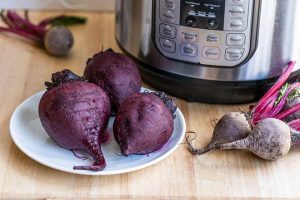
How to Prepare Beet Greens Efficiently
### Sautéed Beet Greens and Stems: A Flavorful and Nutritious Accompaniment
Sautéed beet greens and stems are a tasty and nutritious enhancement to any dish. Cooked in oil, garlic, and a mix of spices, this recipe is brightened with a dash of lemon juice, delivering a refreshing and zesty taste. This straightforward yet sophisticated side can enrich various main dishes while being loaded with vitamins and minerals.
#### Taste Profile
The blend of garlic butter and lemon juice amplifies the subtle, sweet, and earthy notes of the beet stems. This dish is as delightful as it is an excellent method to add more greens to your meals.
#### Difficulty Level
This recipe is suitable for beginners, needing only basic ingredients and a short cooking duration. It can be made in just 15 minutes using a single skillet, making it perfect for busy weeknight meals.
#### Ingredient Alternatives
If beet greens aren’t available, you might opt for radish or mustard greens instead. Mixing different greens can also lead to a more complex flavor experience.
#### Serving Ideas
Sautéed beet greens present a refined side dish that pairs wonderfully with chicken piccata, pork tenderloin, or a straightforward veggie stir-fry. Their vibrant hue and fresh flavor can elevate any dish.
### Basic Ingredients
– **Beet Greens**: Use a bunch of beet greens that contains the stems and leaves from around 4-5 beets. Be sure to discard any wilted or damaged leaves prior to cooking.
– **Seasonings**: This recipe simply calls for a bit of oil, minced garlic, and a dash of lemon juice to enhance the flavors.
### Cooking Beet Greens
1. **Prep the Greens**: Thoroughly rinse the beet greens and separate the stems from the leaves. Chop the stems into smaller pieces than the leaves since they require more cooking time.
2. **Simmer**: In a pot, cook the chopped stems in water until tender, then drain.
3. **Sauté**: In a skillet, combine the beet greens, garlic, olive oil, salt, and pepper, squeezing lemon juice over the mixture. Sauté until the greens wilt.
4. **Finish**: Take off the heat, mix in butter, and season as desired. Top with lemon zest if preferred.
### Cooking Tips
– Always wash beet greens carefully to eliminate any concealed dirt.
– Cook just until wilted to keep the greens’ color and texture intact.
### Storing Leftovers
Leftover sautéed beet greens can be kept in an airtight container in the refrigerator for up to 4 days. For extended storage, freeze them in zip-top bags for up to a month. Thaw in the refrigerator before use or add directly to soups or stews.
### Nutritional Facts
Sautéed beet greens are not only flavorful but also packed with nutrients. They are low in calories, rich in vitamins A and C, and offer important minerals.
### Final Thoughts
Sautéed beet greens and stems prepared with garlic and lemon juice create a quick, nutritious, and tasteful side dish. Their adaptability allows them to pair with many main courses, making them a recommended choice for anyone aiming to enrich their meals with healthy greens.
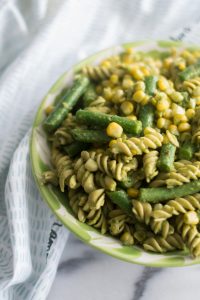
Pesto Pasta Salad Recipe: An Easy Dish Perfect for Potlucks
### Pesto Pasta Salad with Tomatoes, Kalamata Olives, and Mozzarella
A mix of tomatoes, kalamata olives, and mozzarella balls blended with pasta in a creamy pesto dressing results in a charming dish that’s ideal for picnics or potlucks. This colorful salad is not only attractive but also rich in flavor, making it a top choice for many.
#### Flavor Profile
This pesto pasta salad is herby, garlicky, and zesty, enhanced by creamy morsels of mozzarella and ripe tomatoes. The blend of components delivers a refreshing flavor perfect for warm-weather events.
#### Skill Level
This recipe is accessible for beginners, featuring a straightforward 3-ingredient dressing along with a few other items. It’s a fantastic option for anyone new to cooking or in need of a quick and simple dish.
#### Budget Tips
To maximize the recipe, think about using leftover vegetable scraps or adding more pasta. This approach creates a more cost-effective meal while reducing food waste.
#### Serving Suggestions
Elevate this salad to a main course by incorporating leftover chicken, shrimp, salmon, or tofu. This adaptability makes it fitting for a variety of dietary choices and events.
### Ingredient Tips for Pesto Pasta Salad
– **Pasta:** Choose pasta shapes that have grooves, tubes, or twists, such as penne, rotini, cavatappi, or bow-tie, to ensure the pesto dressing adheres well.
– **Dressing:** You can opt for pre-made pesto or create your own basil pesto. For a lighter alternative, swap mayonnaise for plain Greek yogurt.
– **Veggies:** Add sun-dried tomatoes for a chewy texture, or use grape or cherry tomatoes for extra sweetness. Other suggestions include chopped spinach, diced cucumbers, corn kernels, peas, or chopped bell peppers.
– **Cheese:** Utilize bite-sized bocconcini balls or chop larger mozzarella into smaller cubes. Alternatively, feta, gorgonzola, or blue cheese crumbles can provide a different flavor experience.
### Storing Pesto Pasta Salad
Prepare the pesto pasta salad at least 2 hours before serving, or up to two days in advance. Mix the components, cover, and refrigerate until you’re ready to serve. Leftovers can be kept in a covered container in the fridge for up to 3 days, but freezing is not advisable.
### Recipe Overview
#### Pesto Pasta Salad
– **Prep Time:** 20 minutes
– **Chill Time:** 2 hours
– **Total Time:** 2 hours 20 minutes
– **Servings:** 6
#### Instructions
1. In a large pot of salted water, cook pasta until al dente, then drain and rinse under cold water to halt cooking.
2. In a small bowl, blend together pesto, mayonnaise, and red wine vinegar.
3. In a large bowl, mix the drained pasta, grape tomatoes, sun-dried tomatoes, mozzarella, and olives. Pour the dressing over and toss thoroughly to blend. Add extra salt and pepper if needed.
4. Chill for at least 2 hours before serving.
5. Chop fresh basil and sprinkle over just before serving.
#### Notes
– Rinse the pasta with cold water to keep its texture.
– The salad will absorb the dressing over time, so be generous with it.
– Optional extras include parmesan cheese, fresh spinach, capers, or a splash of lemon juice.
### Nutritional Information (per serving)
– **Calories:** 338
– **Carbohydrates:** 34g
– **Protein:** 9g
– **Fat:** 19g
– **Saturated Fat:** 3g
– **Cholesterol:** 9mg
– **Sodium:** 443mg
– **Potassium:** 311mg
– **Fiber:** 3g
– **Sugar:** 4g
This pesto pasta salad is a charming creation that merges fresh ingredients and robust flavors, making it an excellent choice for any occasion. Savor the lively taste and the simplicity of preparation!
Read More
Miso-Glazed Salmon Skewers on the Grill with Zucchini and Scallions
**Salmon Skewers with Miso Glaze, Zucchini, and Scallions: A Tasty Treat**
Salmon Skewers with Miso Glaze, Zucchini, and Scallions provide a wonderful blend of flavors and textures, ideal for a summer cookout or a snug indoor grilling experience. This recipe marries the deep umami flavor of miso with the fresh essence of salmon, complemented by the gentle sweetness of zucchini and the mild zest of scallions.
**Ingredients:**
– 1 pound of skinless, fresh salmon fillets
– 2 medium zucchinis
– 1 bunch of scallions
– Wooden or metal skewers
**For the Miso Glaze:**
– 1/4 cup white miso paste
– 2 tablespoons soy sauce
– 2 tablespoons mirin (sweet rice wine)
– 1 tablespoon rice vinegar
– 1 tablespoon honey or maple syrup
– 1 teaspoon sesame oil
– 1 clove garlic, minced
– 1 teaspoon grated fresh ginger
**Preparation:**
1. **Prepare the Skewers:**
– If utilizing wooden skewers, soak them in water for at least 30 minutes to avoid burning.
– Cut the salmon into 1-inch cubes.
– Slice the zucchinis into 1/2-inch thick rounds.
– Trim the scallions, cutting into 2-inch lengths.
2. **Create the Miso Glaze:**
– In a bowl, combine the miso paste, soy sauce, mirin, rice vinegar, honey, sesame oil, garlic, and ginger, whisking until well blended.
3. **Assemble the Skewers:**
– Alternate threading the salmon, zucchini, and scallions onto the skewers.
– Generously brush the skewers with the miso glaze, setting aside some for basting while grilling.
4. **Grill the Skewers:**
– Preheat the grill to medium-high heat.
– Arrange the skewers on the grill and cook for approximately 8-10 minutes, turning periodically and basting with any remaining glaze, until the salmon is thoroughly cooked and the vegetables are tender.
5. **Serve:**
– Move the skewers to a serving plate.
– Top with sesame seeds or freshly chopped herbs such as cilantro or parsley for an extra burst of freshness.
**Tips for Success:**
– **Choosing Salmon:** Opt for fresh, high-quality salmon for optimal flavor. Wild-caught options are generally favored for their richer taste.
– **Miso Options:** White miso is chosen for its gentle flavor, but feel free to try red or mixed miso for a bolder taste.
– **Grilling Method:** Ensure the grill is well-oiled to prevent sticking. A grill pan can serve as an alternative to outdoor grilling.
**Nutritional Benefits:**
This dish is not only tasty but also nourishing. Salmon serves as an excellent source of omega-3 fatty acids, promoting heart health. Zucchini contributes fiber and vital vitamins, while scallions offer antioxidants and a subtle onion taste without overwhelming the dish.
**Conclusion:**
Salmon Skewers with Miso Glaze, Zucchini, and Scallions exemplify the balance of flavors that can be achieved with simple, fresh ingredients. This dish is certain to delight guests and become a favorite in your grilling collection. Whether served as a main dish or as part of a broader meal, these skewers celebrate flavor and health.
Read More