
Foil-Baked Shrimp Piccata Dish
**Foil-Baked Shrimp Piccata Recipe: A Tasty and Simple Seafood Treat**
Shrimp Piccata is an exquisite dish that merges the briny sweetness of shrimp with the zesty, buttery notes of piccata sauce. When enveloped in foil, this meal transforms into a hassle-free, tidy option that retains all the scrumptious flavors. Here’s how you can whip up this simple and delicious dish at home.
**Ingredients:**
– 1 pound large shrimp, cleaned and deveined
– 2 tablespoons olive oil
– 3 cloves garlic, minced
– 1/4 cup fresh lemon juice
– 1/4 cup dry white wine (if desired)
– 1/4 cup capers, drained
– 1/4 cup fresh parsley, chopped
– 1/2 teaspoon salt
– 1/4 teaspoon black pepper
– 4 tablespoons unsalted butter, diced
– Lemon slices, for decoration
– Aluminum foil
**Instructions:**
1. **Preheat the Oven:**
Set your oven to 400°F (200°C).
2. **Prepare the Foil Packets:**
Cut four large sheets of aluminum foil, each approximately 12 inches long. Lay them out on a flat surface.
3. **Combine the Ingredients:**
In a medium bowl, mix the shrimp, olive oil, garlic, lemon juice, white wine (if included), capers, parsley, salt, and pepper. Toss the mixture until the shrimp are thoroughly coated.
4. **Form the Foil Packets:**
Evenly distribute the shrimp mix among the four foil sheets. Place a few butter pieces on each shrimp portion. Fold the foil over the shrimp, crimping the edges to ensure the packets are sealed tightly.
5. **Bake the Packets:**
Arrange the foil packets on a baking sheet and bake in the preheated oven for 12-15 minutes, or until the shrimp turn pink and are fully cooked.
6. **Serve:**
Gently open the foil packets, taking care of the hot steam. Place the shrimp and sauce onto serving plates. Garnish with lemon slices and extra parsley if desired.
**Tips for Success:**
– **Shrimp Size:** Opt for large shrimp for optimal texture and taste. Smaller shrimp may cook too fast and become rubbery.
– **Wine Alternative:** If you choose to skip the wine, chicken broth can be used instead, or simply eliminate it.
– **Serving Suggestions:** Serve the shrimp piccata over pasta, rice, or with crusty bread to enjoy the delightful sauce.
**Nutritional Information:**
This dish is not only quick and easy but also healthy. Shrimp are a low-calorie, high-protein seafood option packed with nutrients like selenium and vitamin B12. The inclusion of fresh components like lemon and parsley adds vitamins and antioxidants, making this dish a wholesome choice for seafood enthusiasts.
**Conclusion:**
Foil-baked shrimp piccata is a fantastic option for a weeknight meal or a special gathering. The foil packets guarantee minimal cleanup and maximum flavor, creating a convenient and flavorful dish. Savor the delightful fusion of tangy, buttery, and savory tastes with each bite.
Read More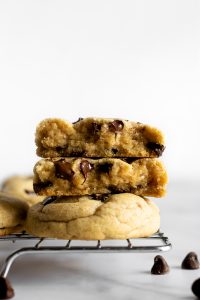
Ultimate Handbook for Crafting Brown Butter Chocolate Chip Cookies
# I Am Completely Enchanted by Chocolate Chip Cookies
Chocolate chip cookie day is observed on August 4th, an ideal opportunity to treat yourself to one of the most adored confections. The chocolate chip cookie is recognized as a classic cookie, often inciting discussions about its dominance over other types. In a whimsical matchup of MFK (marry, f***, kill) featuring chocolate chip cookies, peanut butter cookies, and oatmeal raisin cookies, most would likely pick to marry chocolate chip cookies, have a fling with oatmeal raisin, and say goodbye to peanut butter.
## I Truly, Deeply Adore Chocolate Chip Cookies
With more than 10 chocolate chip cookie recipes showcased on [I am a Food Blog](https://iamafoodblog.com/?s=chocolate+chip+cookies), it’s fair to say that I’ve experimented with, created, and enjoyed countless chocolate chip cookies over the years. My search for the finest store-bought chocolate chip cookie continues, and whenever I think I’ve discovered “the one,” I ponder if something even better exists. Maybe I have cookie relationship issues, but I feel I’ve finally stumbled upon my top cookie: the brown butter chocolate chip cookie.

## Why These Are the Ultimate Chocolate Chip Cookies
The enchantment of these cookies arises from the caramelized sugars, the nuttiness of browned butter, and the ample pools of melted chocolate. They have slightly crisp buttery edges with a touch of toffee and a soft, dense, chewy center, scarcely held together by the chocolate. The tops are rugged with Instagram-ready swirls, striking an ideal balance of sweet and salty. This cookie truly makes my heart race.
The recipe is a compilation of all the cookies I’ve cherished in the past, and in tribute to those cookies, I present my finest salted brown butter chocolate chip cookie recipe.
## For the Finest Chocolate Chip Cookies, Opt for Brown Butter
Browned butter is a transformative element in chocolate chip cookies, introducing a pleasant hint of hazelnut flavor. The browning process negates the necessity to allow it to reach room temperature. However, it’s important to keep a close eye on the butter to prevent burning. I prefer to brown it just until it shows small brown flecks. Since browning butter diminishes moisture, I make up for it by incorporating an extra pat or two of butter post-browning, which also aids in cooling it down.
### What is Brown Butter?
Brown butter, or beurre noisette in French, is a delectable creation that began in savory French cuisine but has now graced numerous desserts. It features a deep golden hue, marked with brown bits, and offers a nutty, aromatic taste. Adding brown butter improves baked goods, providing a nutty caramel richness that elevates chocolate chip cookies to exceptional levels.
### How to Brown Butter
1. **Warm:** Cut the butter into small chunks and melt it over low heat in a cold pan for even melting.
2. **Sputter:** As the butter melts, it will bubble and froth as the water evaporates. Stir gently and lower the heat if it splatters.
3. **Foamy:** The foam will shift from light to yellow as the milk solids settle at the bottom.
4. **Brown:** The butter will transform into a deep yellow and golden brown, releasing a nutty fragrance.
5. **Remove:** When it’s browned to your preference, pour it into a liquid measuring cup to halt the cooking process.
6. **Bonus Step:** Add room-temperature butter to replace any moisture lost, ensuring you have 1/2 cup of liquid brown butter.
### How to Create Brown Butter Chocolate Chip Cookies
1. **Whisk together** the dry ingredients in a mixing bowl.
2. **Brown the butter** and incorporate additional butter to compensate for any moisture loss.
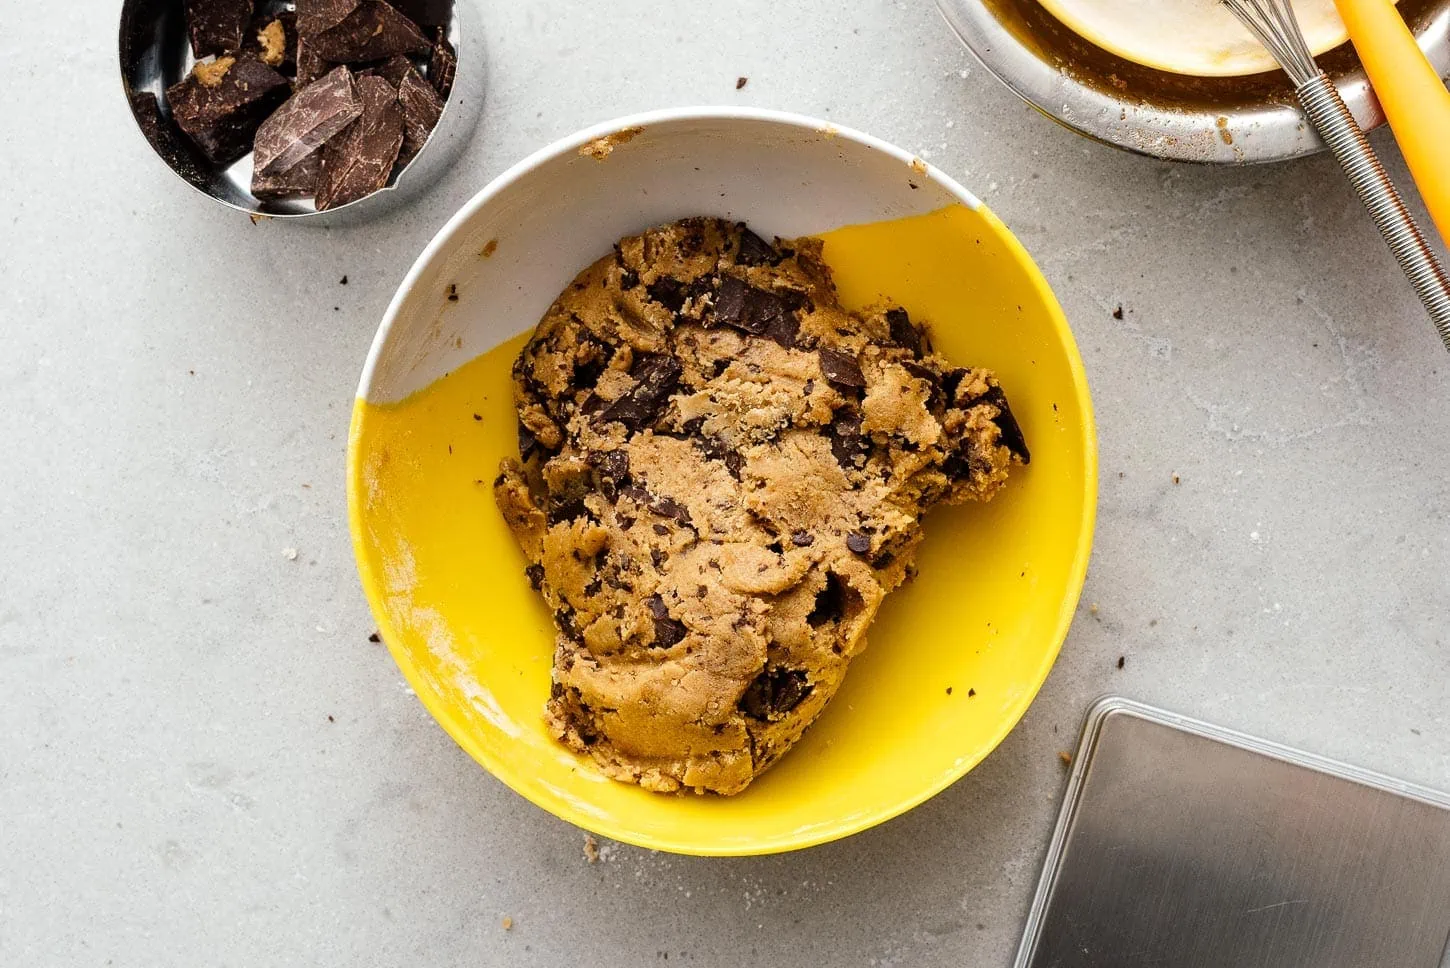
3. **Whisk the browned butter** with the sugars until smooth, then whisk in the egg. Stir in vanilla and fold in the flour and chocolate.
4. **Shape the cookies** using 3 tablespoons of dough, layering one ball atop another. Chill while preheating the oven.
5. **Bake the cookies** until golden and firm around the edges, giving the pan a solid tap on the countertop when removing from the oven.
6. **Savor ALL the cookies!**
## Why These Chocolate Chip Cookies Are Effective
The proportion of flour, brown sugar, and white sugar is essential. With three times the amount of brown sugar compared to white, these cookies achieve a thick and moist consistency. Cookies containing more brown sugar tend to
Read More
Simple Slow Cooker Sloppy Joe Recipe for Effortless Meal Prep
# Slow Cooker Sloppy Joes: An Effortlessly Tasty Recipe
Ground beef slow-cooked in a tangy, brown sugar chili sauce combined with onions, peppers, and celery, then generously piled onto rolls, creates a delectable meal that is both fulfilling and simple to make. This iconic dish, commonly known as Sloppy Joes, is ideal for family dinners, get-togethers, or game day festivities. With its delightful blend of sweet, spicy, and tangy notes, it’s a favorite that unites everyone.
## Taste Profile
Homemade Sloppy Joes boast a rich and intricate flavor profile. The mix of ground beef, fragrant vegetables, and a spirited sauce yields a pleasing combination of sweetness and heat. The inclusion of brown sugar offsets the acidity of the tomatoes, while chili powder provides a spicy kick. This meal is not only packed with flavor but also offers a satisfying texture thanks to the meat and vegetable medley.
## Difficulty Level
This recipe is exceptionally straightforward, making it ideal for cooks of any experience level. Simply brown the ground beef with onions, blend it with the remaining ingredients in a slow cooker, cover, and allow it to stew. The slow cooking method lets the flavors combine harmoniously, resulting in a delicious dish ready when you need it.
## Essential Tools
A slow cooker is an indispensable appliance for this recipe, promoting hands-off cooking that suits busy families perfectly. It’s also fantastic for larger gatherings, making it easy to serve a substantial meal to many with minimal effort.
## Cost-Saving Tips
To make the recipe more economical and expand its servings, think about incorporating cooked rice or beans into the mixture. This not only boosts the dish’s volume but also enhances its nutritional benefits.
## Serving Ideas
Slow Cooker Sloppy Joes are ideally paired with robust rolls or slider buns. Serve alongside sides such as homemade potato salad or coleslaw for a full meal. Consider even placing the Sloppy Joe mixture atop the sides for an interesting twist!
## Ingredient Suggestions for Sloppy Joes
– **Ground Beef**: While ground beef is the classic choice, you can swap it for ground turkey, chicken, or even introduce chorizo for a spicier take.
– **Sauce**: Although store-bought options like Manwich work fine, creating your own sauce with pantry essentials such as ketchup, brown sugar, and chili sauce enhances the dish. Modify the sweetness and spice levels according to your preference.
– **Vegetables**: Onions, peppers, and celery contribute both texture and flavor. If pressed for time, using frozen mixed vegetables can help cut down on prep.
– **Buns**: Select sturdy buns that can contain the juicy filling. Choices include burger buns, hoagie rolls, or even garlic cheese toast.
## Mix It Up!
Feel free to personalize your Sloppy Joes by adding additional ingredients such as sliced mushrooms, black olives, or jalapenos. For a fun variation, create “Tidy Josephs” by stuffing dinner rolls with the mixture. Toasting the inside of the buns with garlic can also infuse a delightful flavor.
## Leftover Love!
Keep any leftover Sloppy Joes in a sealed container in the refrigerator for up to four days. Reheat servings on the stove or in the microwave. You may also freeze the mixture in zip-lock bags and defrost overnight in the fridge. Leftover sauce makes a fantastic topping for baked potatoes or nachos.
## Final Thoughts
Slow Cooker Sloppy Joes are a tasty and effortless meal that everyone will adore. With their sweet and tangy flavors and hearty consistency, they are fitting for any occasion. Whether you are serving a crowd or just your family, this recipe is bound to be a success. Relish the sloppy goodness and don’t forget the napkins!
Read More
Flavorful Everything Bagel Inspired Dip
This scrumptious Everything Bagel dip crafted with Greek yogurt is ideal for gatherings and entertaining or just casual snacking! Everyone adores this simple appetizer recipe and it takes merely 5 minutes to prepare.
I’ve always been an enormous admirer of Everything Bagel seasoning – I mean, who isn’t? Just the other day, I was pondering inventive uses for the seasoning and thought, why not transform it into a quick and simple dip?
I’m fond of our Greek yogurt-based ranch dip, so I created a variation using Greek yogurt instead. The Greek yogurt provides an incredible creamy foundation with a slight tang that truly enhances the savory everything bagel notes. The blend of Greek yogurt and a hint of mayonnaise gives you all the creaminess you desire without the heaviness. Additionally, you’re getting a substantial dose of protein – something most dips definitely can’t boast!
Pro tips for Everything Bagel dip
A few months back, I brought this everything bagel dip as a last-minute snack for my book club and everyone thrilled about it! My friend even asked me to text her the recipe before she left my place. What makes this dip special is that it’s lighter than your usual cream cheese or sour cream-based dips. I utilize Greek yogurt as the foundation, which provides that same creamy, tangy richness with more protein and fewer calories. Here are a few tips:
– Seasoning blend: The essence of this dip truly lies in the seasoning blend. Sometimes I whip up my own homemade everything bagel seasoning, but store-bought works just as well. The magic occurs when you mix it with onion powder and garlic powder for added depth.
– Chill time: While I generally consume this dip immediately, I’ve discovered that allowing it to sit for at least 30 minutes before serving does make a difference. This gives all those dried spices time to meld together, resulting in a much more harmonious flavor.
– Garnish: Always reserve a bit of extra everything bagel seasoning to sprinkle on top right before serving. It adds a lovely visual touch and gives you bursts of sesame and poppy seeds with every bite.
Pairings and serving ideas
This dip is remarkably versatile, which is a big part of why I cherish it so much. For dipping, I enjoy serving it with:
– Fresh cut vegetables like bell peppers, carrots, and cucumber slices
– Toasted baguette slices or homemade crostini
– Crackers (I fancy these homemade crackers if I have the time)
– Pretzel chips for extra crunch
It would also be wonderful as:
For entertaining, I relish serving this alongside other effortless appetizers like my classic hummus recipe or Greek yogurt veggie dip. It creates a delightful variety without demanding extensive preparation.
Storage and make ahead tips
This everything bagel dip stays fresh in the refrigerator for up to 1 week in an airtight container. I actually believe it tastes even better after a day or two since the flavors keep developing.
You can prepare this dip up to 2 days in advance, which makes it perfect for gatherings. Just give it a quick stir before serving and add that final sprinkle of everything bagel seasoning on top for the freshest appearance.
If you’re presenting this at a party, consider placing it in a shallow bowl instead of a deep one. It simplifies the dipping process for guests without causing a mess, and you can create a nicer presentation with that final garnish of everything bagel seasoning.
Dietary notes
This everything bagel dip is vegetarian and gluten-free. For a vegan option, swap in vegan coconut yogurt and vegan mayonnaise.
Everything Bagel Dip
This scrumptious Everything Bagel dip crafted with Greek yogurt is ideal for gatherings and entertaining or just casual snacking! Everyone adores this simple appetizer recipe and it takes merely 5 minutes to prepare.
Author: Sonja Overhiser
Prep Time: 5 minutes
Cook Time: 0 minutes
Total Time: 5 minutes
Yield: 2 cups 1x
Category: Snack
Method: No Cook
Cuisine: American
Diet: Vegetarian
Ingredients:
– 1 ½ cups (18 ounces) full fat Greek yogurt (or sour cream)
– ½ cup mayonnaise
– 1 ½ tablespoons everything bagel seasoning, plus more to garnish
– 1 teaspoon onion powder
– 1 teaspoon garlic powder
– ¾ teaspoon kosher salt
– Fresh ground black pepper
Instructions:
1. Mix all ingredients in a bowl. Enjoy immediately or refrigerate for 30 minutes before serving to let flavors meld. Store up to 1 week in the fridge.
More easy dips
If you enjoy this 5 minute dip, here are a few more dips that are perfect for snacking or entertaining:
Read More
These âDeliciousâ Biscuits Are So Good, Iâll Always Have 2 Boxes on Hand for Guests

You wonât catch me without them.
READ MORE…
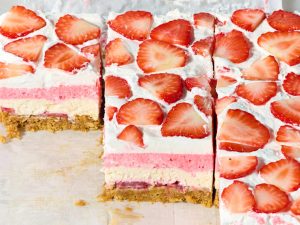
40 Unbelievably Easy Fruit Desserts for Every Season

Start with the no-bake strawberry delight!
READ MORE…

The $7 Costco French Fries Iâm Telling Everyone (and Their Mothers) About

Plus, six other great frozen finds.
READ MORE…

Zesty Honey Buffalo Chicken Recipe
Buffalo Chicken with Hot Honey
Preparation Time: 5 minutes Cooking Time: 10 minutes Total Duration: 15 minutes Servings: 8
Chicken coated in a sweet, zesty, and spicy hot honey glaze!
ingredients
- 2 pounds skinless chicken tenders or small thighs
- 1 tablespoon (smoked) paprika
- 2 teaspoons onion powder
- 2 teaspoons garlic powder
- salt and pepper to taste
- 2 tablespoons melted butter
- 1/4 cup hot sauce (like Frank Red Hot)
- 1/4 cup honey
- 1 teaspoon red pepper flakes
- 2 tablespoons oil
directions
- Coat the chicken with the blend of paprika, onion powder, garlic powder, salt, and pepper.
- In a small saucepan, melt the butter, mix in the hot sauce, honey, and red pepper flakes, then bring to a simmer, turn off the heat and allow to cool.
- In a large skillet, heat the oil over medium-high heat, add the chicken and cook until fully done (165F), around 3-7 minutes per side.
- Savor the chicken drizzled with the hot honey sauce.
Alternative: Grill or bake the chicken!

I Asked Designers the Most Regretted Kitchen Trend & They Said This

A beautiful kitchen shouldnât be a pain.
READ MORE…